www.gisma-connectors.de14Cabling Instructions series 10+22 Revision F - 11/2018
CABLING INSTRUCTIONS - SERIES 10 + 22
Den O-Ring des Steckergehäuses mit GISMA-Fett EK2
benetzen. Zusätzlich sollte der Anlagerezess der
Überwurfmutter (Reibfläche zwischen Steckergehäuse und
Überwurfmutter) mit GISMA-Fett LP430 benetzt werden.
Verkabelungsblinddose senkrecht in einen Schraubstock
einspannen (Größenangaben für die Verkabelungs-
blinddosen sind in der Tabelle auf Seite 5 aufgeführt).
PREPARATION FOR THE CABLING PROCESS
Smear the O-ring of the plug shell with grease GISMA-Fett
EK2. The friction surface between plug shell and locking
sleeve should also be smeared with grease GISMA-Fett
LP430.
Screw the locking sleeve onto the plug shell and cable dummy
receptacle.
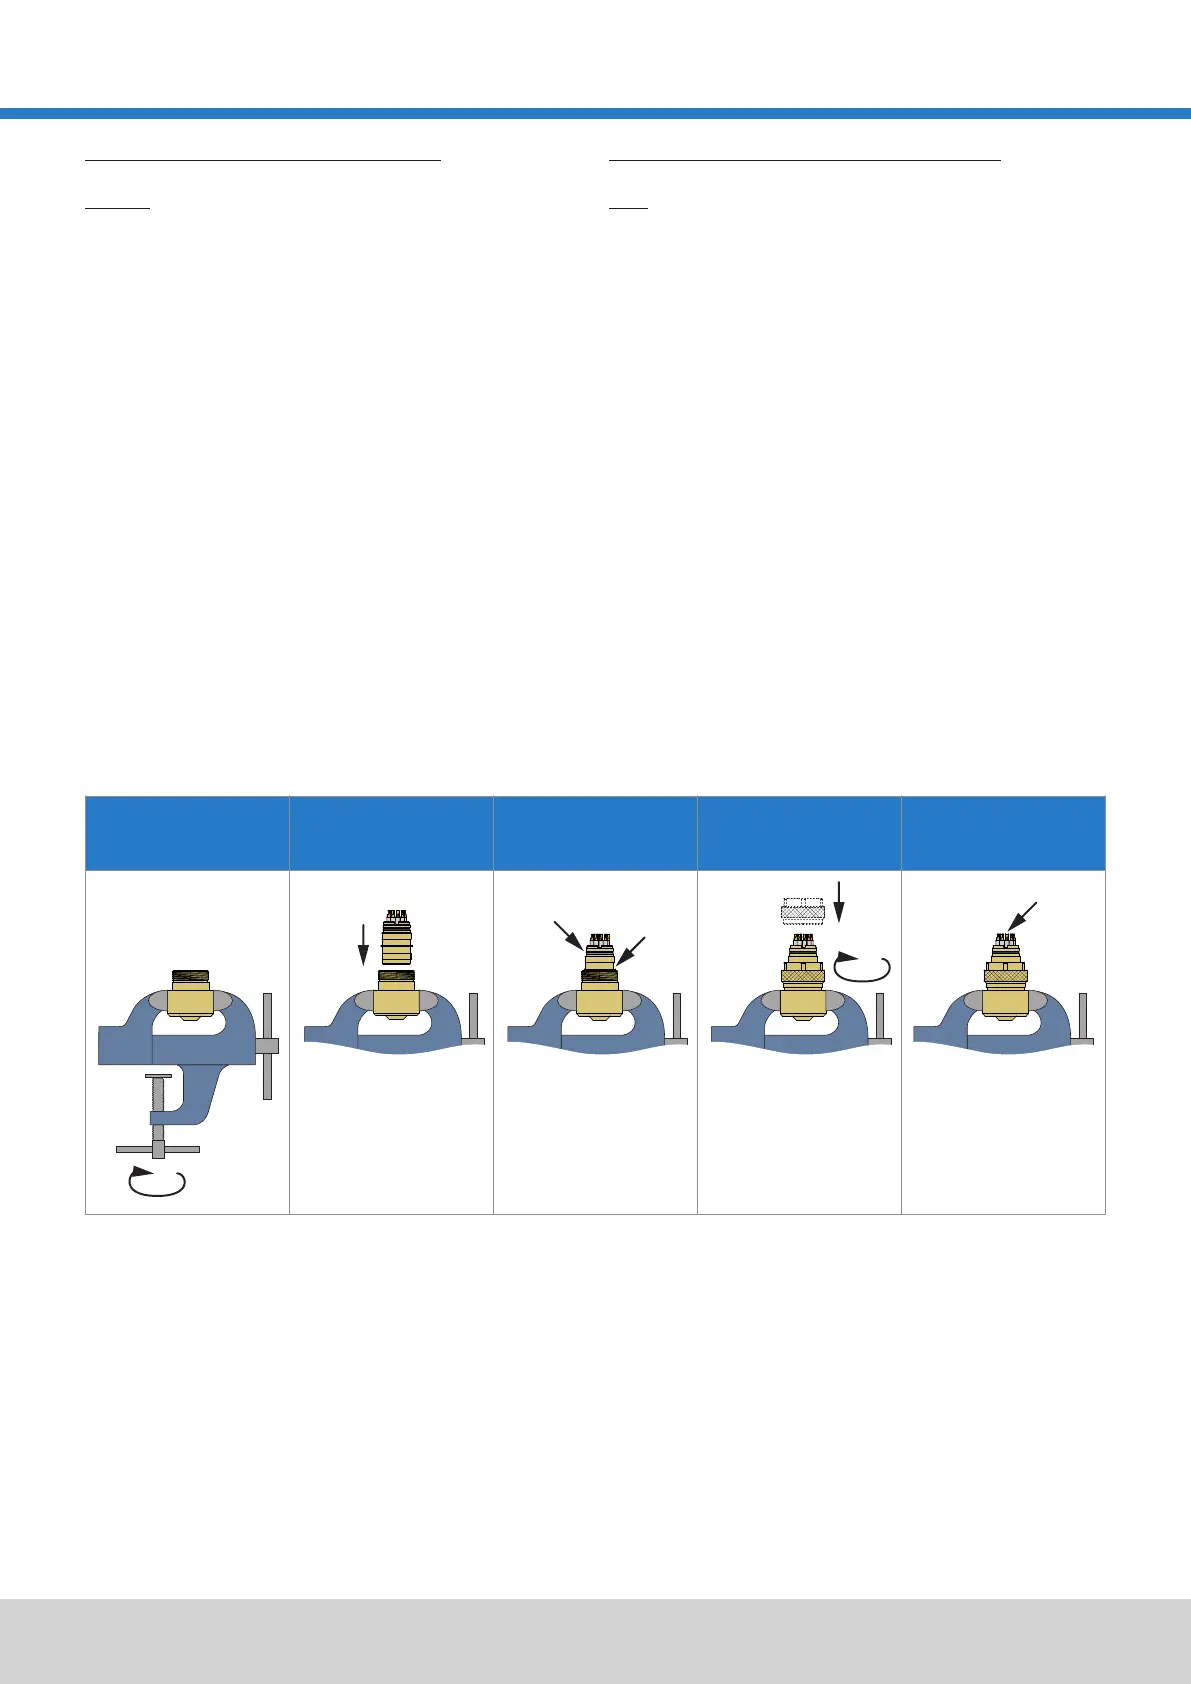
Clamp the cable dummy receptacle vertically in a vice (sizes
of the cable dummy receptacles are specified in the table on
page 5).
Stecker
Schritt 4:
Step 1:
Steckergehäuse in die Verkabelungsblinddose stecken.
Plug
Lötkontakte des Steckers verzinnen.
Step 2:
Schritt 5:
Schritt 3:
Insert the plug shell into the cable dummy receptacle.
Schritt 1:
Schritt 2:
Steckergehäuse und Verkabelungsblinddose mit der
Überwurfmutter verschrauben.
Step 4:
VORBEREITUNGEN ZUR VERKABELUNG
Step 3:
Coat the soldering contacts with tin.
Step 5:
 Loading...