www.gisma-connectors.de15Cabling Instructions series 10+22 Revision F - 11/2018
CABLING INSTRUCTIONS - SERIES 10 + 22
Push the heat shrink tubes over the wiring points and the
neoprene-leakage extension and then shrink on.
Hierzu bitte die Angaben in der GISMA Crimping
Instruction beachten!
VERKABELUNG DES STECKERS
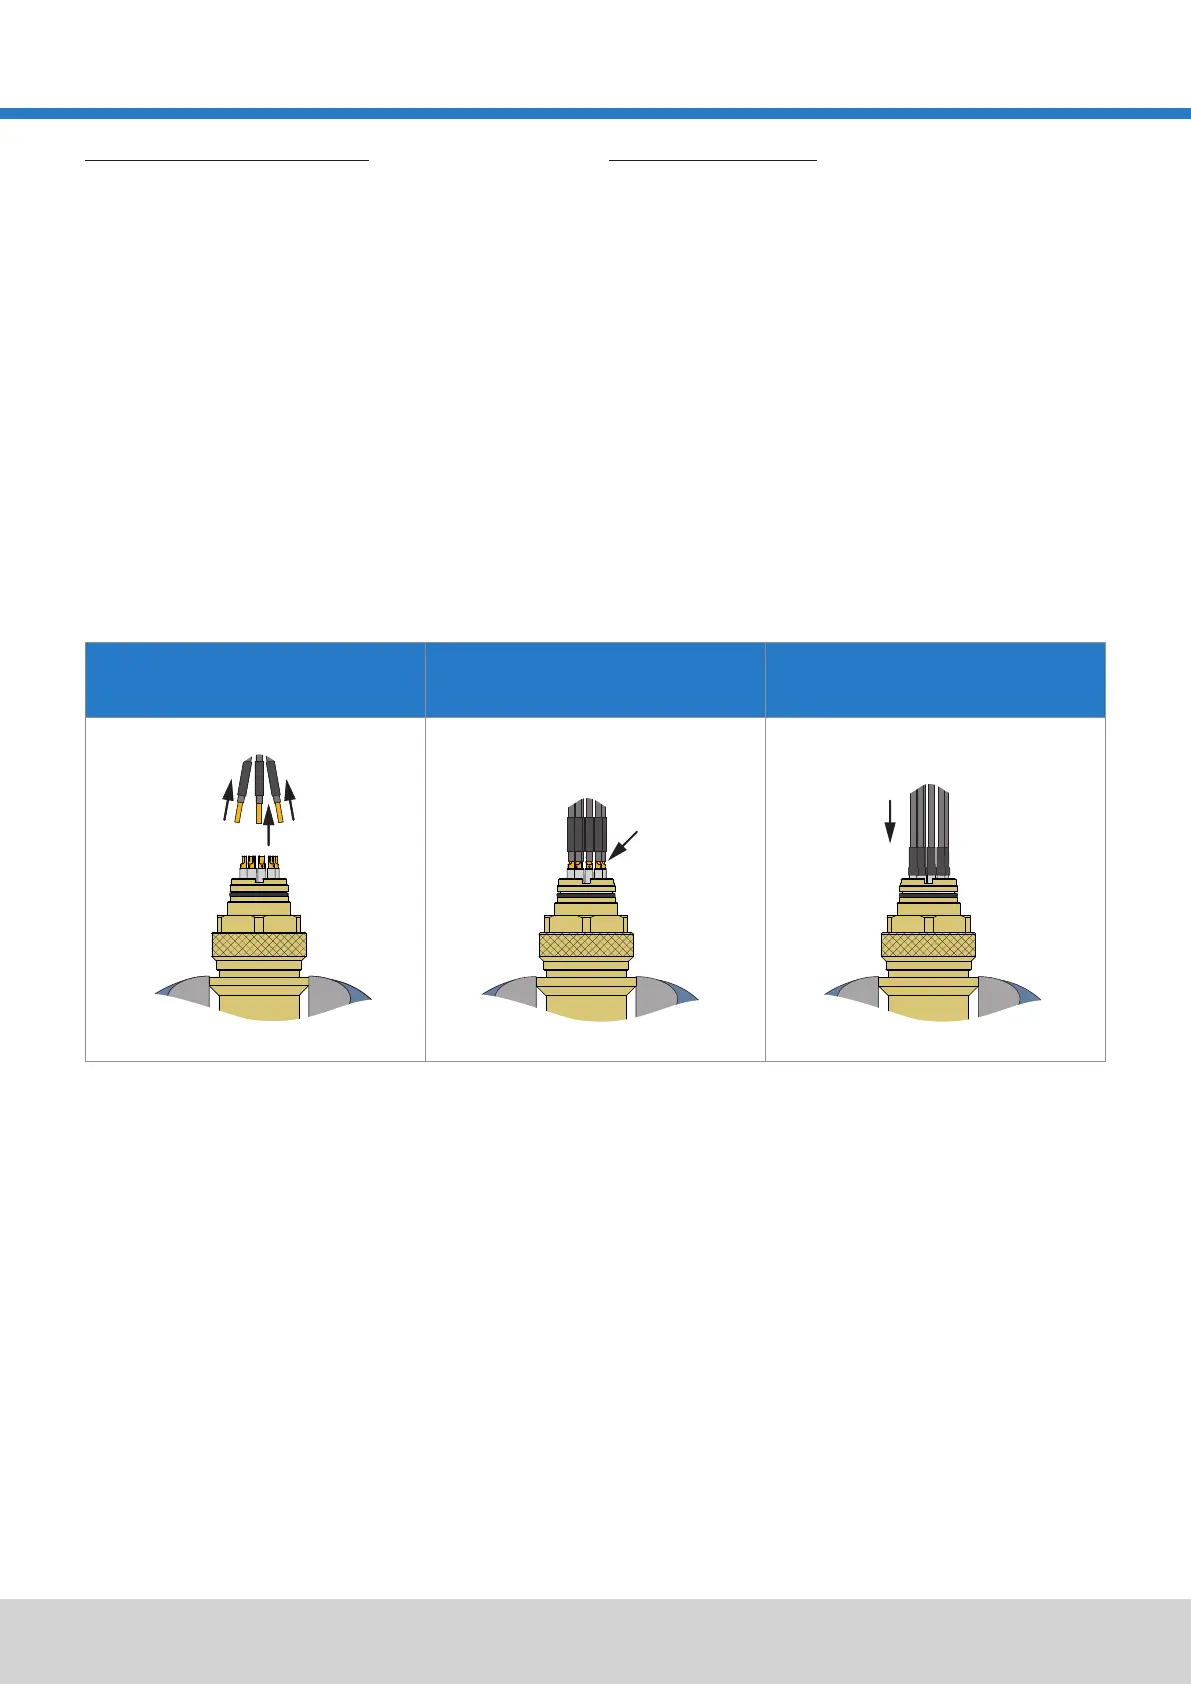
Schritt 1:
Kabeladern an die Kontakte löten (dabei entweder von innen
nach aussen oder horizontal in einer Linie vorgehen).
Schritt 3:
Step 1:
Push the heat shrink tubes over the single cores.
Die Schrumpfschläuche über die Anschlussstelle und die
Neopren-Kriechstrecken schieben und aufschrumpfen.
Step 2:Schritt 2:
Schrumpfschläuche über die Einzeladern schieben.
Bei großen Einzeladerquerschnitten werden die Krimp-
kabelschuhe unter Berücksichtigung der Steckerausrichtung
aufgekrimpt. Anschliessend wird der Krimpkabelschuh an den
Kontakt geschraubt.
CABLING OF THE PLUG
Solder the cable cores onto the contacts (either starting from
the inside towards the outside or horizontally in one line).
In case of large cable cross sections, crimp the crimp
terminals taking the connector‘s keyway orientation into
consideration. Finally screw the crimp terminal onto the
contact.
Please pay attention to the GISMA Crimping Instruction
for further information.
Step 3:
 Loading...