www.gisma-connectors.de22Cabling Instructions series 10+22 Revision F - 11/2018
CABLING INSTRUCTIONS - SERIES 10 + 22
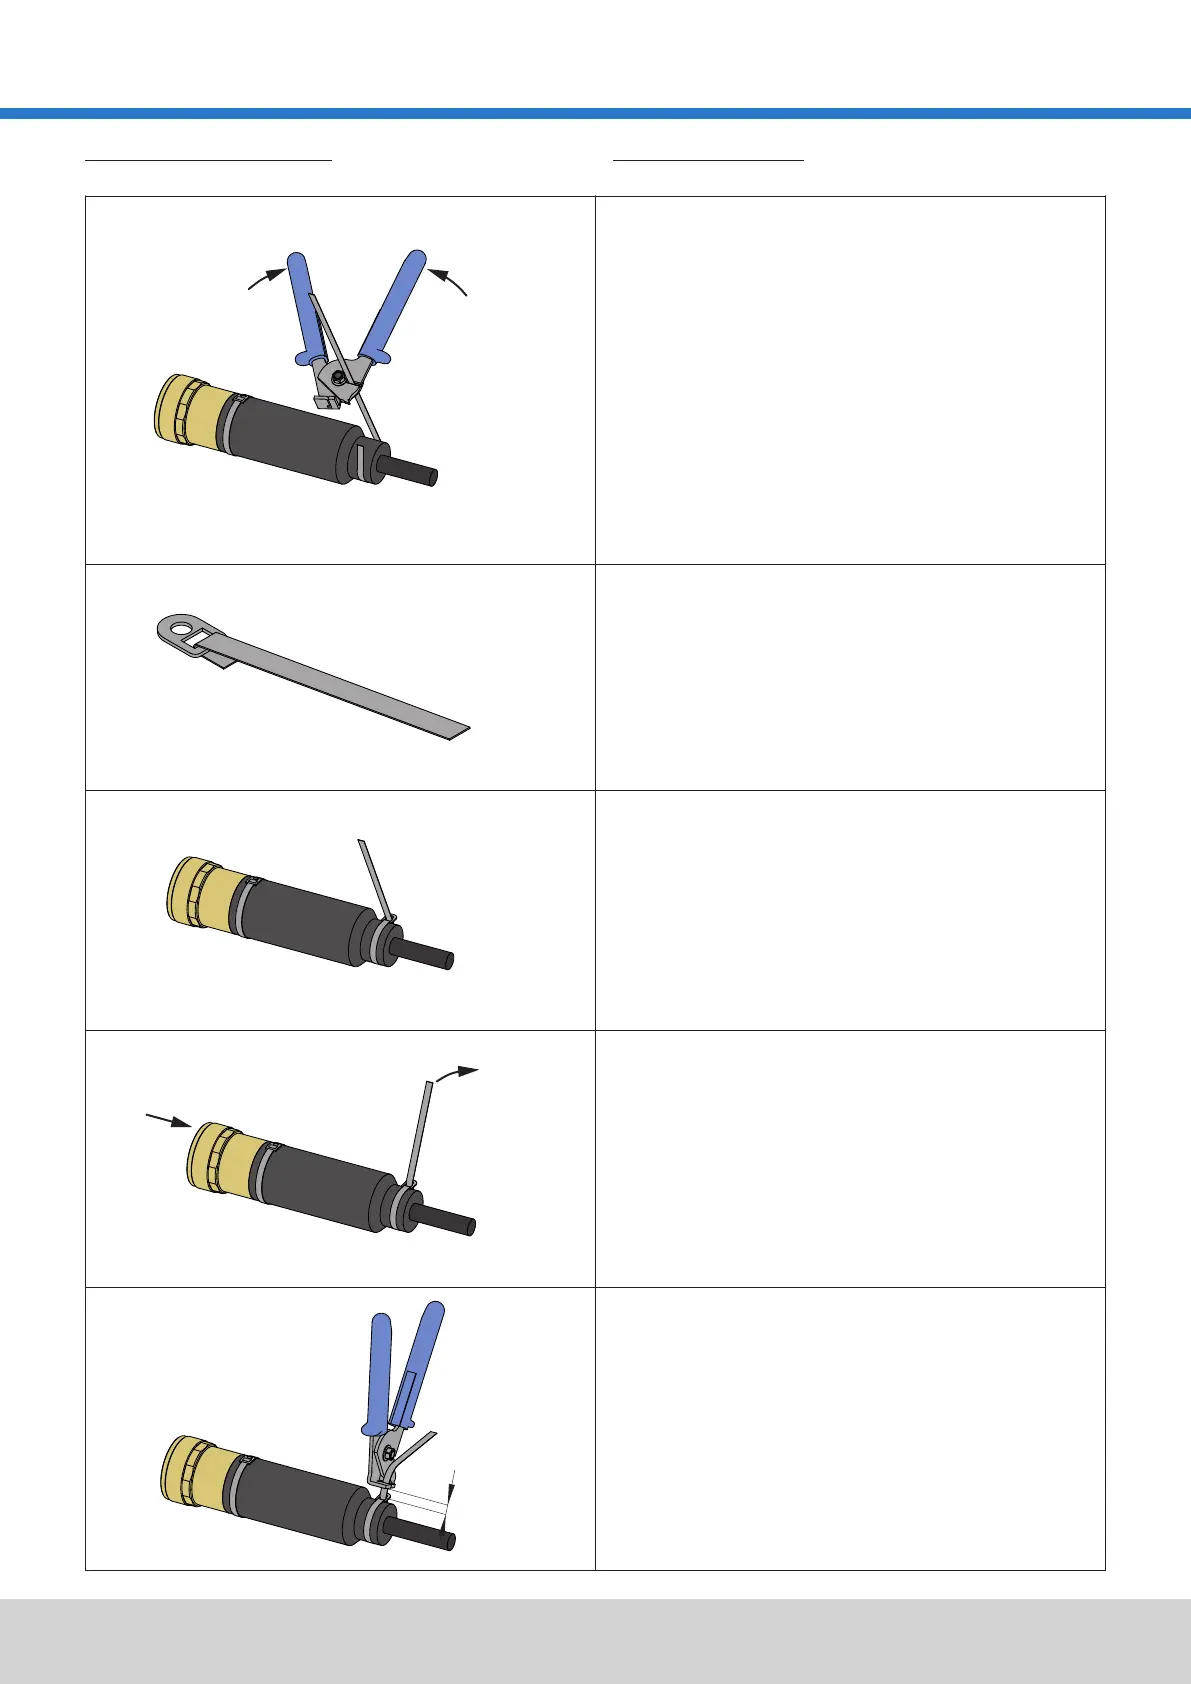
1.
Abmessung Schellenbandlänge:
Measuring the length of the clamps:
Generally the enclosed clamps have already been cut to
the required length. In this case, please skip directly to
step 3!
The length must be approx. 8 cm longer than double the
circumference of the part on which it is to be fastened.
Die Schellenbänder sind standardmäßig in bereits
abgemessener Länge beigelegt. In diesem Fall bitte
direkt zu Schritt 3 übergehen!
Die Länge muss ca. 8 cm länger als der doppelte Umfang
des abzubindenden Teils sein.
2.
Befestigung des Schellenschlosses an der Schelle:
Das Schellenband wird ca. 2 cm durch das Schloss gesteckt
und umgebogen.
Fastening the clasp onto the clamp:
The clamp is inserted approx. 2 cm through the clasp and
turned down.
Das Schellenband wird 2 Mal um das Formteil gelegt und 2
Mal durch das Schloss gezogen.
3.
Umlegen der Schelle:
Fixing the clamp:
The clamp is put around the rubber boot twice and pulled
through the clasp twice.
Das Schellenschloss zum Keyway ausrichten.
Um ein Zurückspringen der Schelle zu vermeiden, muss das
Ende des Schellenbandes leicht zurückgebogen werden.
To prevent the clamp from snapping back the end of the
clamp must be bent backwards. The pliers have to be placed
in the same position as the keyway.
4.
Aufsetzen der Schellenzange:
Die Zange wird ca. 6 - 10 mm hinter dem Schellenschloss
auf das Ende des Schellenbandes aufgesetzt.
5.
The pliers are placed approx. 6 - 10 mm behind the clasp at
the end of the band.
Attachment of the clamping pliers:
MONTAGE DER SCHELLEN FIXING THE CLAMPS
6-10 mm
Keyway
 Loading...