Section 4 Operating Instructions
4-7
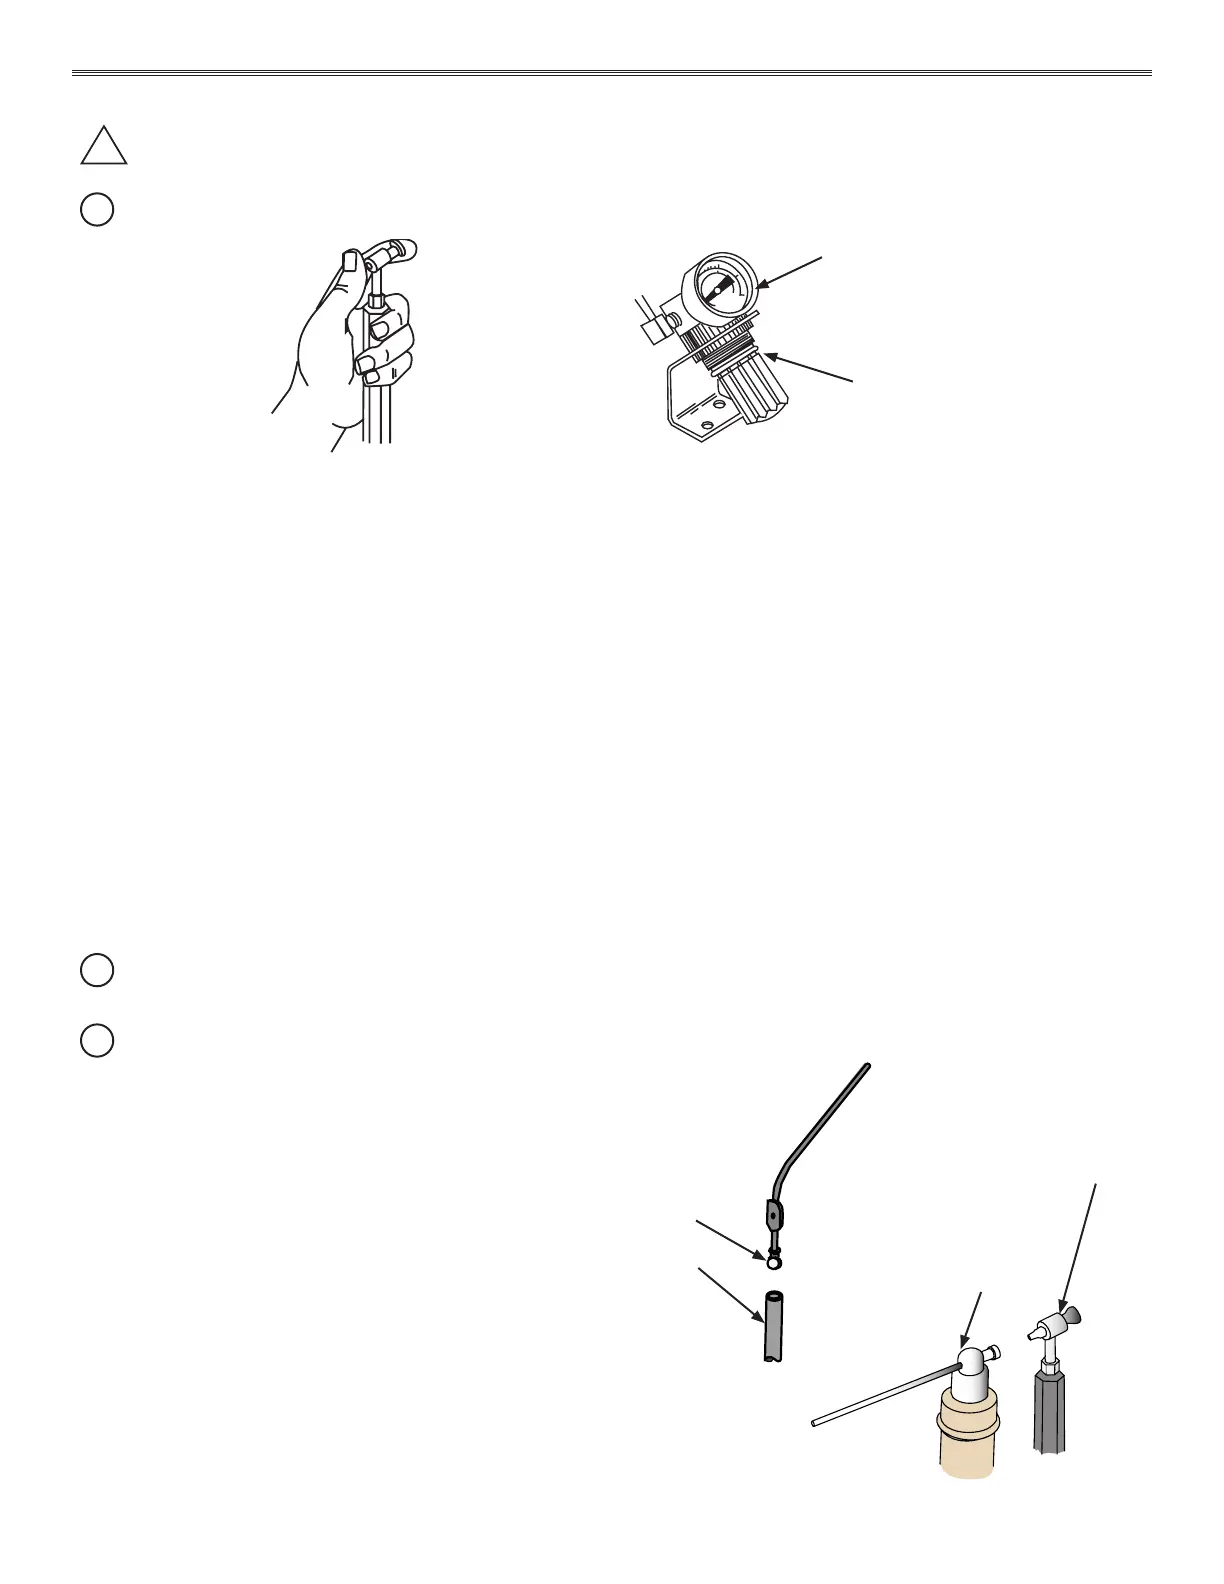
4.9.3. Pressure Adjustment
The air pressure is set at 20 psi when shipped from the factory. The air pressure system must be set to the
pressure which suits the owner’s application. This pressure is usually about 10 psi (0.7 bar). Once set, the
pressure regulator should require no further attention. To adjust the pressure, proceed as follows:
See Figure 4-10.
1. Select ”PRESSURE” on the control panel and unlock and open the bottom door of the cabinet.
2. Squeeze the open air cut-o tip between the thumb and forenger to restrict the air ow.
See Figure 4-10. Detail A.
3. Pull out and turn the pressure-control knob clockwise to increase pressure or counter-clockwise to
decrease pressure.
4. Release the pressure exerted by your ngers, allow a moment for the pressure to stabilize. Note the air
pressure on the pressure gauge. The pressure will be approximately 0 to 5 psi.
5. When the pressure has been adjusted to the desired level, push the pressure-control knob inward and turn
o the pump.
4.10. Attaching Glassware or Suction Instruments
4.10.1. Atomizer Instruments
Insert the instrument’s connector over the open air
cut-o and twist slightly while pushing to secure the
connection. See Figure 4-11. Detail A
4.10.2. Suction Instruments
Suction Instruments are simply connected by pushing
the end of the vacuum hose over the nipple of the instrument.
See Figure 4-11. Detail B
Figure 4-10. Pressure Adjustment
Detail A
Pressure
Gauge
Pressure
Control Knob
WARNING
!
PRESSURE THAT IS TOO HIGH COULD RESULT IN HAZARDOUS OUTPUT FOR
DISPENSING MEDICATIONS.
NOTE
!
The pressure can only be set with the air restricted at the open-air cuto tip.
NOTE
!
Consult manufacturer’s glassware instructions for cleaning, sterilizing, and use of
glassware.
NOTE
!
It is the Customer’s responsibility to label medication inside the glassware.
Instrument
Connector
Open Air
Cut-O Tip
Nipple
Vacuum
Hose
Suction
Instrument
Detail A
Detail B
Figure 4-11. Instrument Attachment
 Loading...