19
INSTALLATION & COMMISSIONING MANUAL - REVISION 1.0 - 19.FEB.2007
INSTALLATION
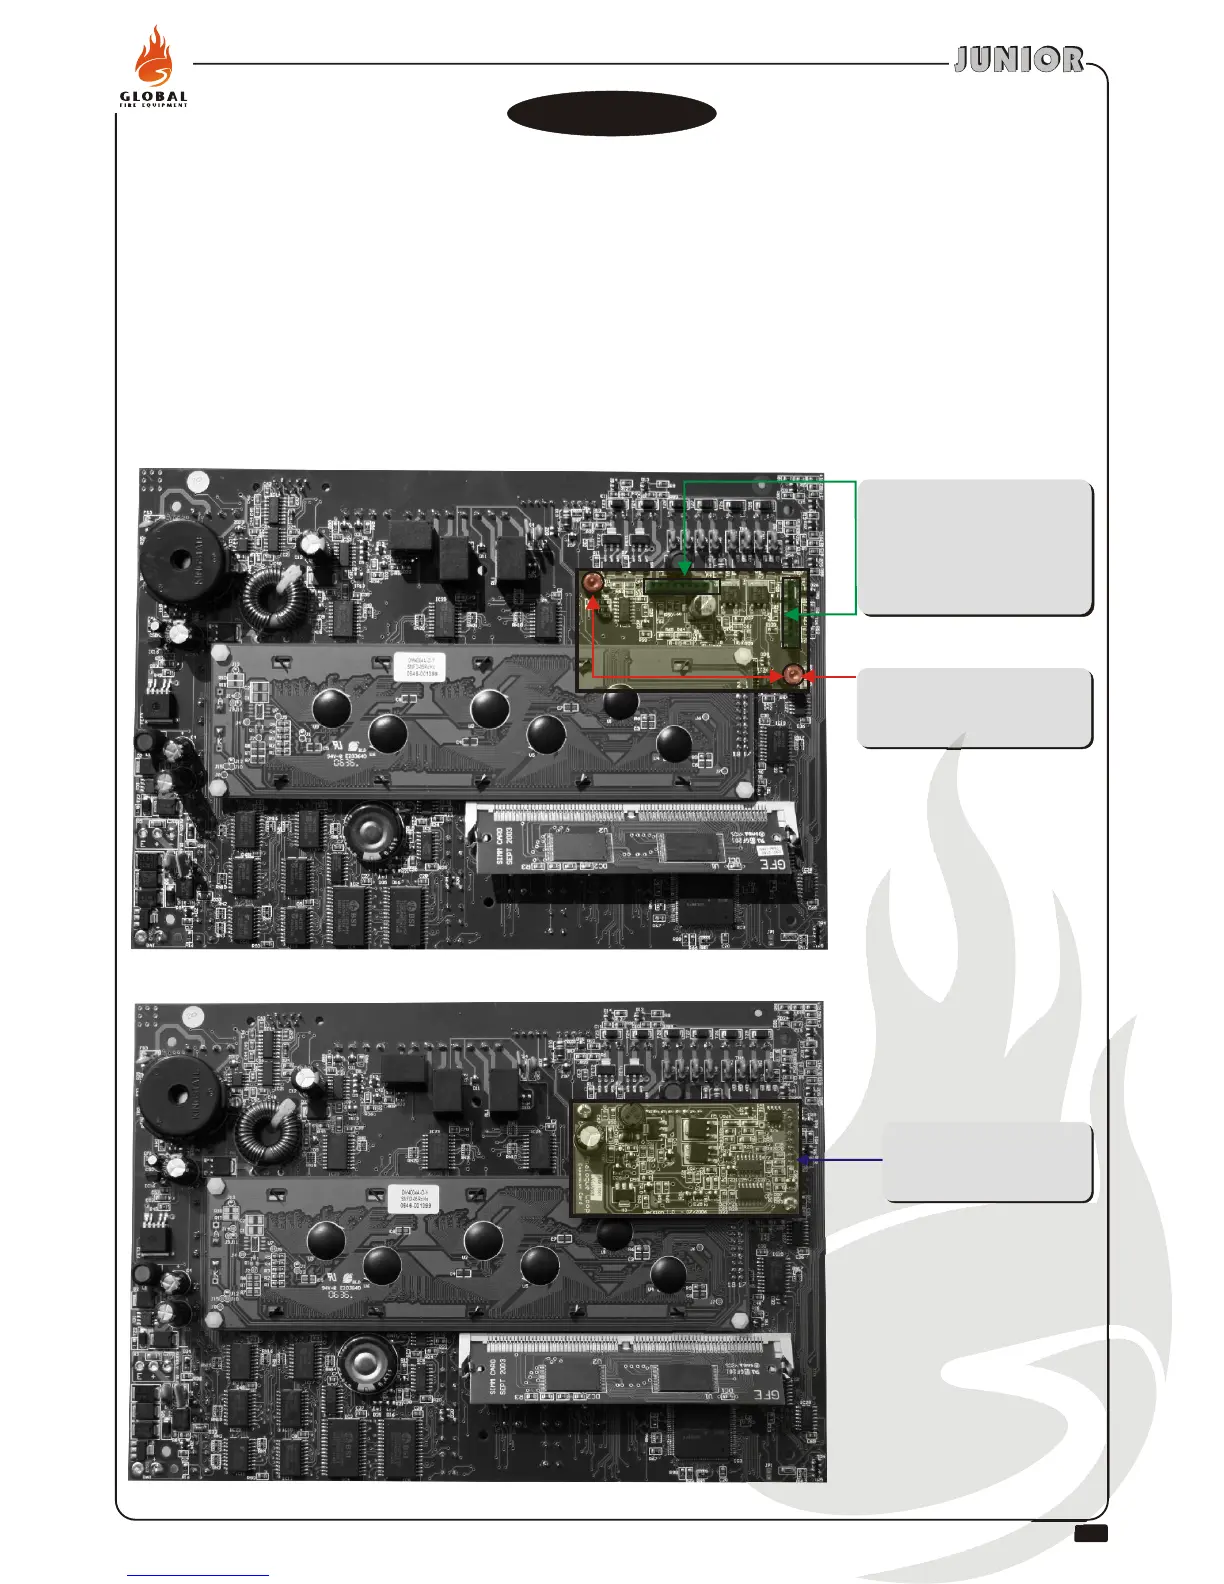
Use 2 units of M3x5 mm
screws provided to fix Junior
Expansion Loop. .
Fitting Junior Expansion Loop Card
2 Male 8-way headers on
expansion board should fit
into the corresponding
female headers situated at
the back of the panel’s main
board. .
Junior Expansion
Loop Card
After fitting is completed
This operation should only be performed by qualified personnel.
Power to the panel should be completely removed, both primary and secondary (batteries)
supplies, before the installation process of the card is initiated.
After process is completed re-apply power to the panel.
Panel should be in installation mode. Green (Status) LED should be flashing.See function 8.4.1
Confirm using function 7.1 that devices attached to the 2nd loop are being detected by the panel.
No programming is required in order to enable the expansion loop card. The 2nd loop is
automatically detected by the panel.
.
.
.
.
1.-
2.-
3.-
4.-
5.-
6.-
Junior Expansion
Loop Card
sits HERE
Junior Expansion
Loop Card
sits HERE