3-2
OPERATING PROCEDUREUSER HANDBOOK
Each time you use the instrument, carry out the following procedure:
3.1 SWITCH THE INSTRUMENT ON
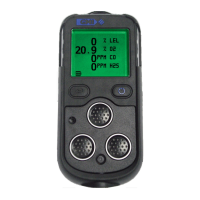
To switch the instrument ON in fresh air:
• Press and hold the RH button , for one second.
Fig. 3.1 Switch ON
The instrument begins its warm-up routine, which lasts approximately
30 seconds. During the warm-up cycle, a countdown timer appears
in the top right hand corner of the display.
The Power ON LED illuminates when the instrument is switched
ON and also during operation. The display backlight illuminates and
remains ON during warm-up. When the warm-up cycle is complete,
the screen light automatically switches OFF.
The Fault LED illuminates briey, for approximately ve (5) seconds,
during the warm-up cycle.
3.2 INSTRUMENT IDENTIFICATION
During the warm-up cycle, the
instrument display identies the
model, serial number, software
version and battery status
information as shown in Fig. 3.2:
Fig. 3.2 Instrument I/d

 Loading...