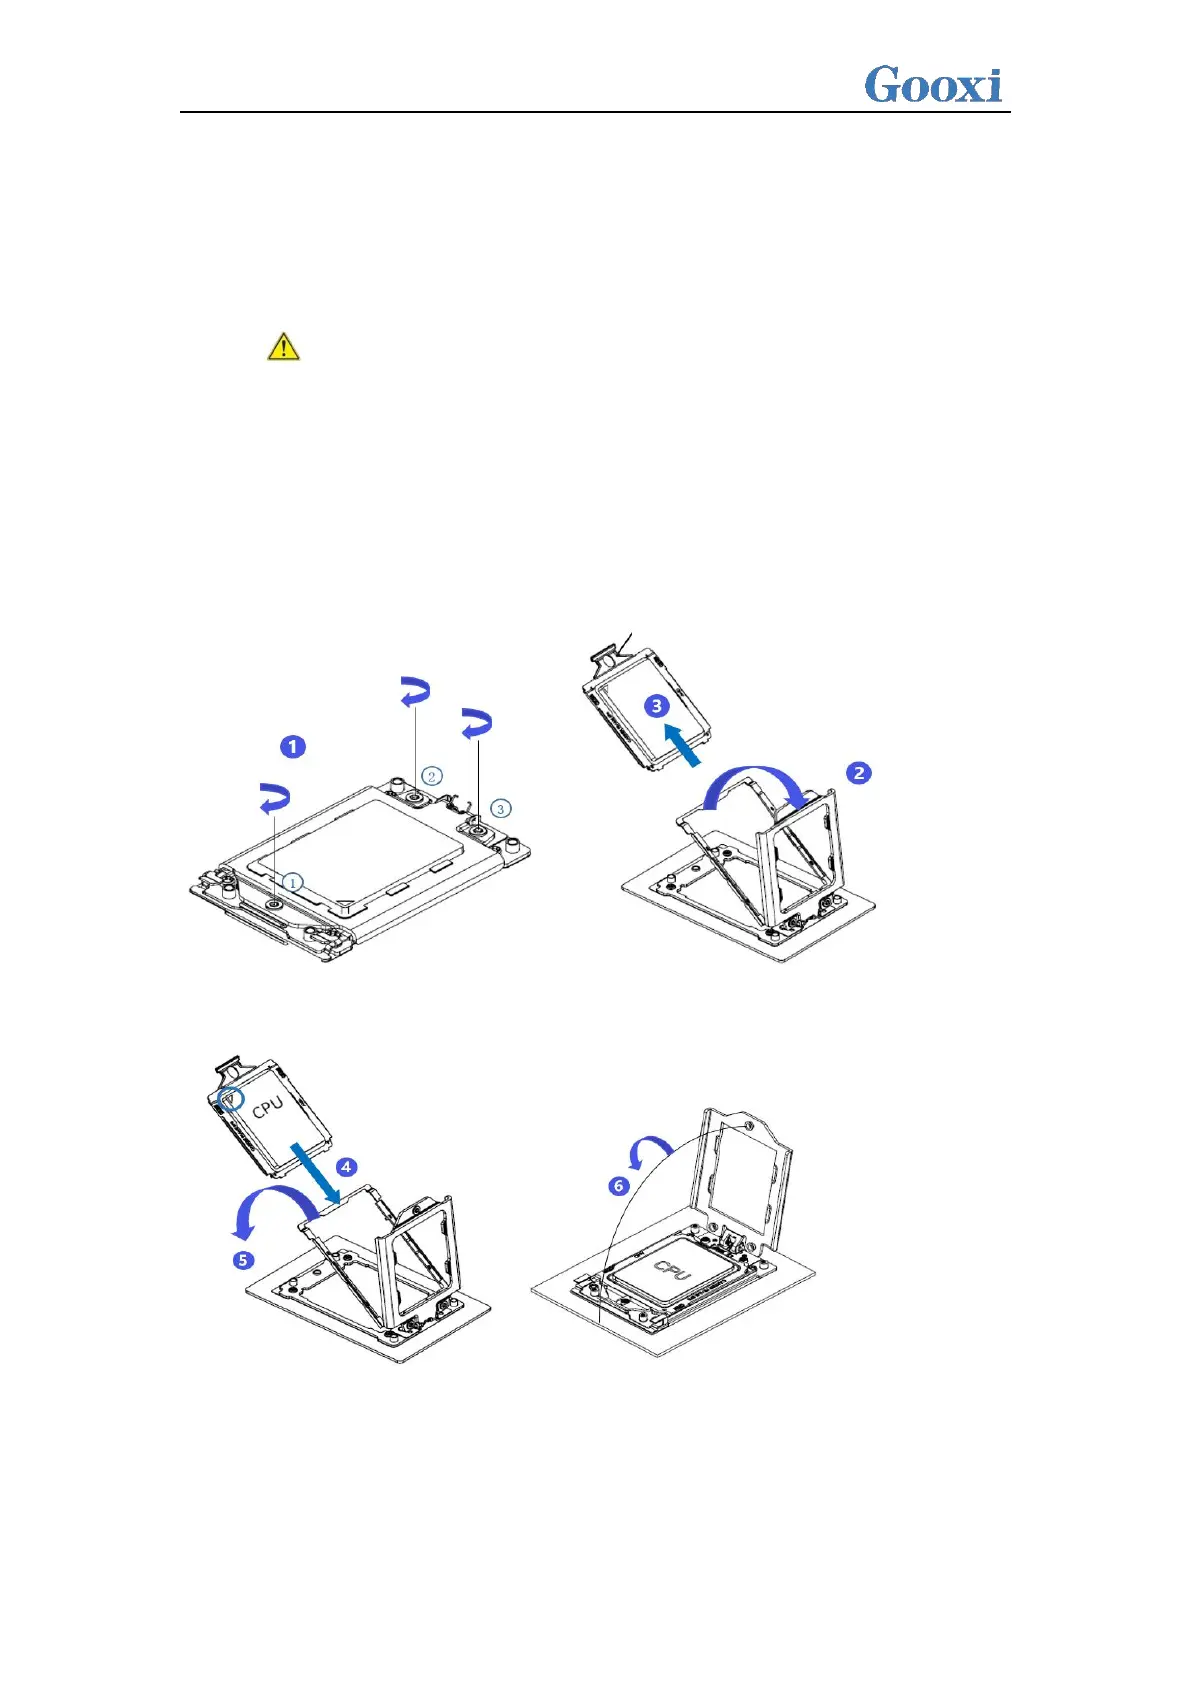
Follow the instructions below to install the CPU:
1. In sequence (3 → 2 → 1), loosen the 3 fixing screws that secure the CPU cover.
2. Flip open the CPU cover.
3. Use the handle on the CPU tray to remove the CPU tray from the CPU rack.
4. Using the handle on the CPU tray, insert the new CPU tray with the CPU installed
into the CPU rack.
Note: Make sure the CPU is installed in the correct orientation in the CPU tray, with
the triangle on the CPU aligned with the upper left corner of the CPU carrier.
5. Flip the CPU rack with the CPU installed into the proper position in the CPU socket.
6. Flip the CPU cover into place over the CPU socket.
7. Tighten the CPU cover screws in sequence (1 → 2 → 3) to secure the CPU cover in
place. Torque: 16.1 kgf-cm (14.0 lbf-in)
8. Repeat steps 1-7 for the second CPU.
9. To remove the CPU, perform steps 1-7 in reverse order.
Figure (3-2)
Figure (3-3)
 Loading...