STALL
PRESSURE
CALIBRATION
6.
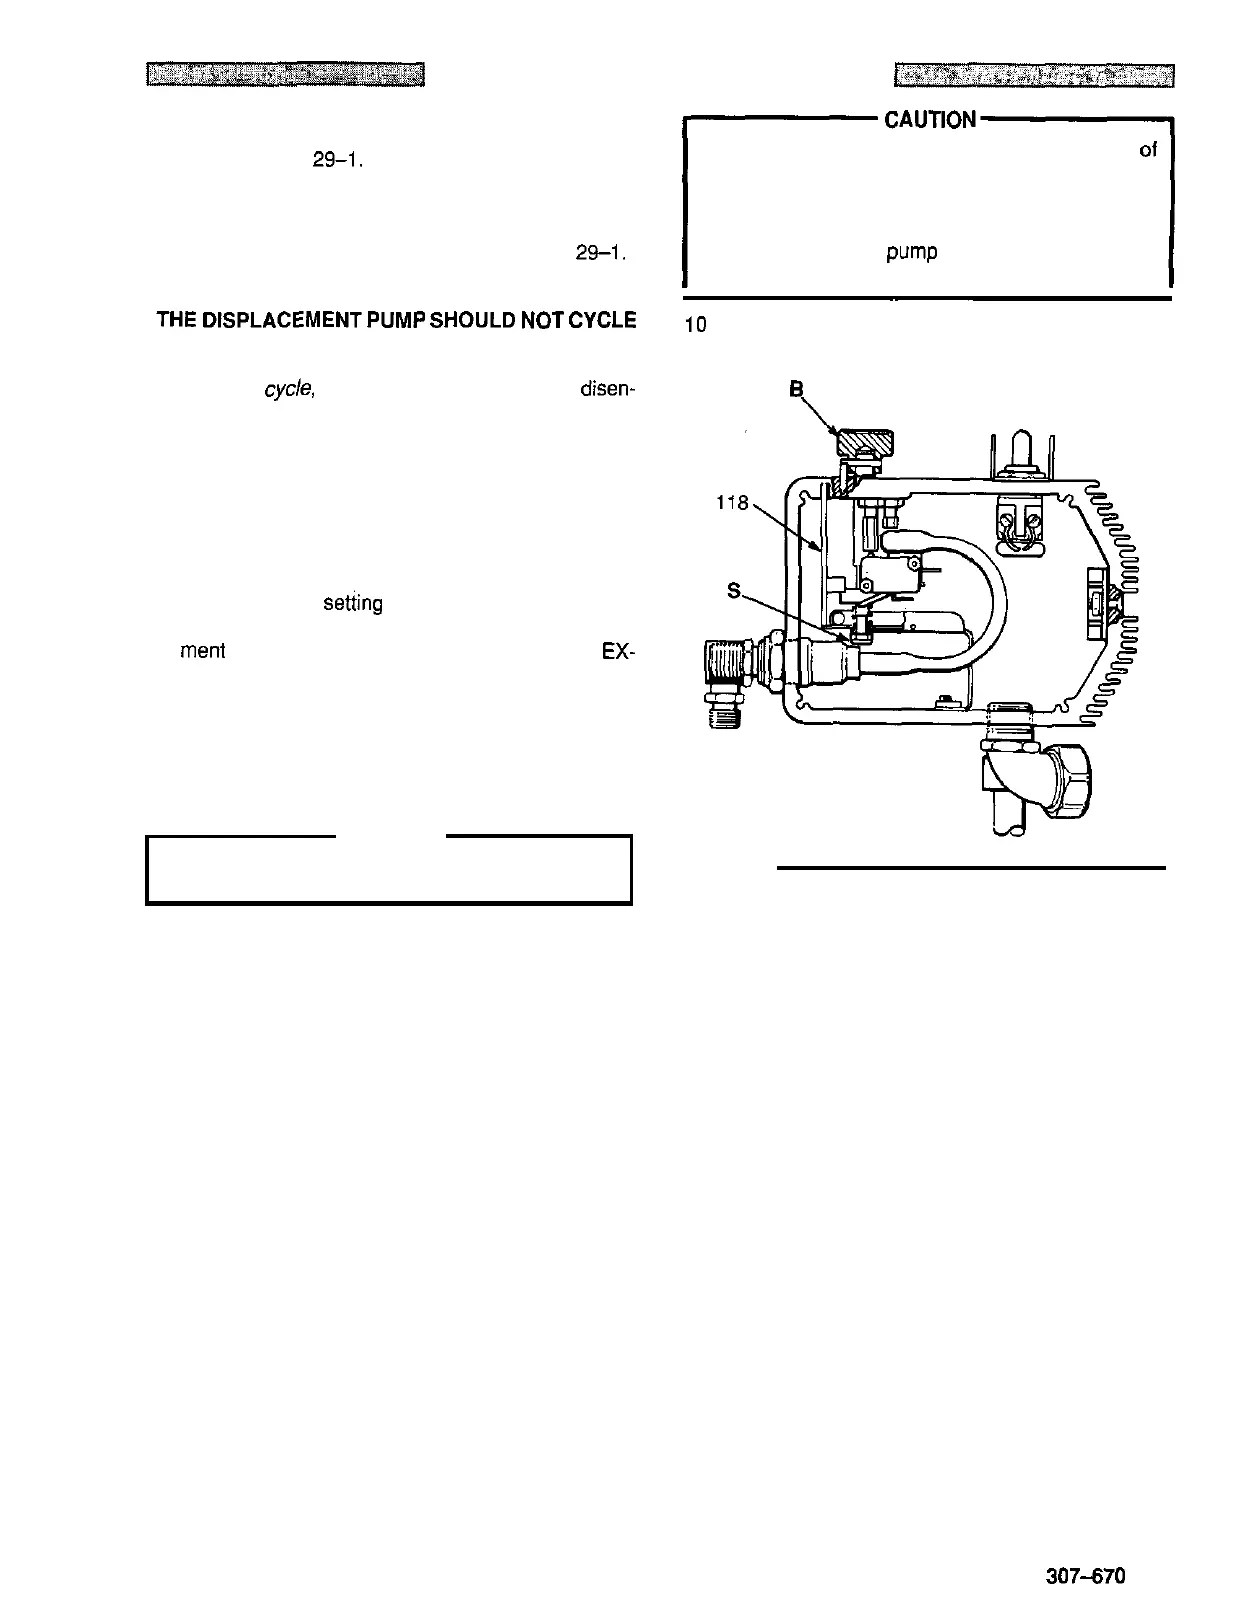
Use a 9 rnm ignition wrench
to
turn the pressure ad
-
justment nut
(S)
counterclockwise about
two
full
turns. See Fig 29-1.
To
prevent
pump
corrosion, flush the water out
of
the pump, hose and gun with mineral spirits.
Be
sure
to close the drain valve, first. ,Use the lowest
7.
With the pressure control knob
(B)
at the minimum
pressure necessary to flush. Follow the
Pressure
setting, turn the sprayer switch
ON.
See Fig 29-1. mineral spirits in the pump
to
protect it until you are
Relief Procedure Warning
on page
21.
Leave the
ready to spray again.
THE DISPLACEMENT PUMP SHOULD
NOT
CYCLE
10
Remove the test gauge assembly and reinstall the
~~
-
plug. Flush out water with mineral spirits.
If
it does cyde, shut the sprayer switch OFF, disen-
gage the gun satety latch, trigger the gun into a
grounded waste container until pressure is relieved,
and engage the latch again. Turn the nut
(S)
a little
further clockwise. Turn the sprayer on again to be
sure
THE
PUMP
DOES
NOT
CYCLE.
8.
Slowly
turn the pressure control knob
(B)
clockwise
to the maximum
setting and hold it there. Use a9 rnm
ment nut
(S)
clockwise until the test gauge reads
EX-
ignition wrench to slowly turn the pressure adjust
-
ACTLY
207 bar.
9. The calibration procedure is now completed.
WARNING
Follow the
Pressure Relief Procedure Warning
on
page
21.
Fig
29
-
1
307470
29