30868536
Displacement Pump Repair
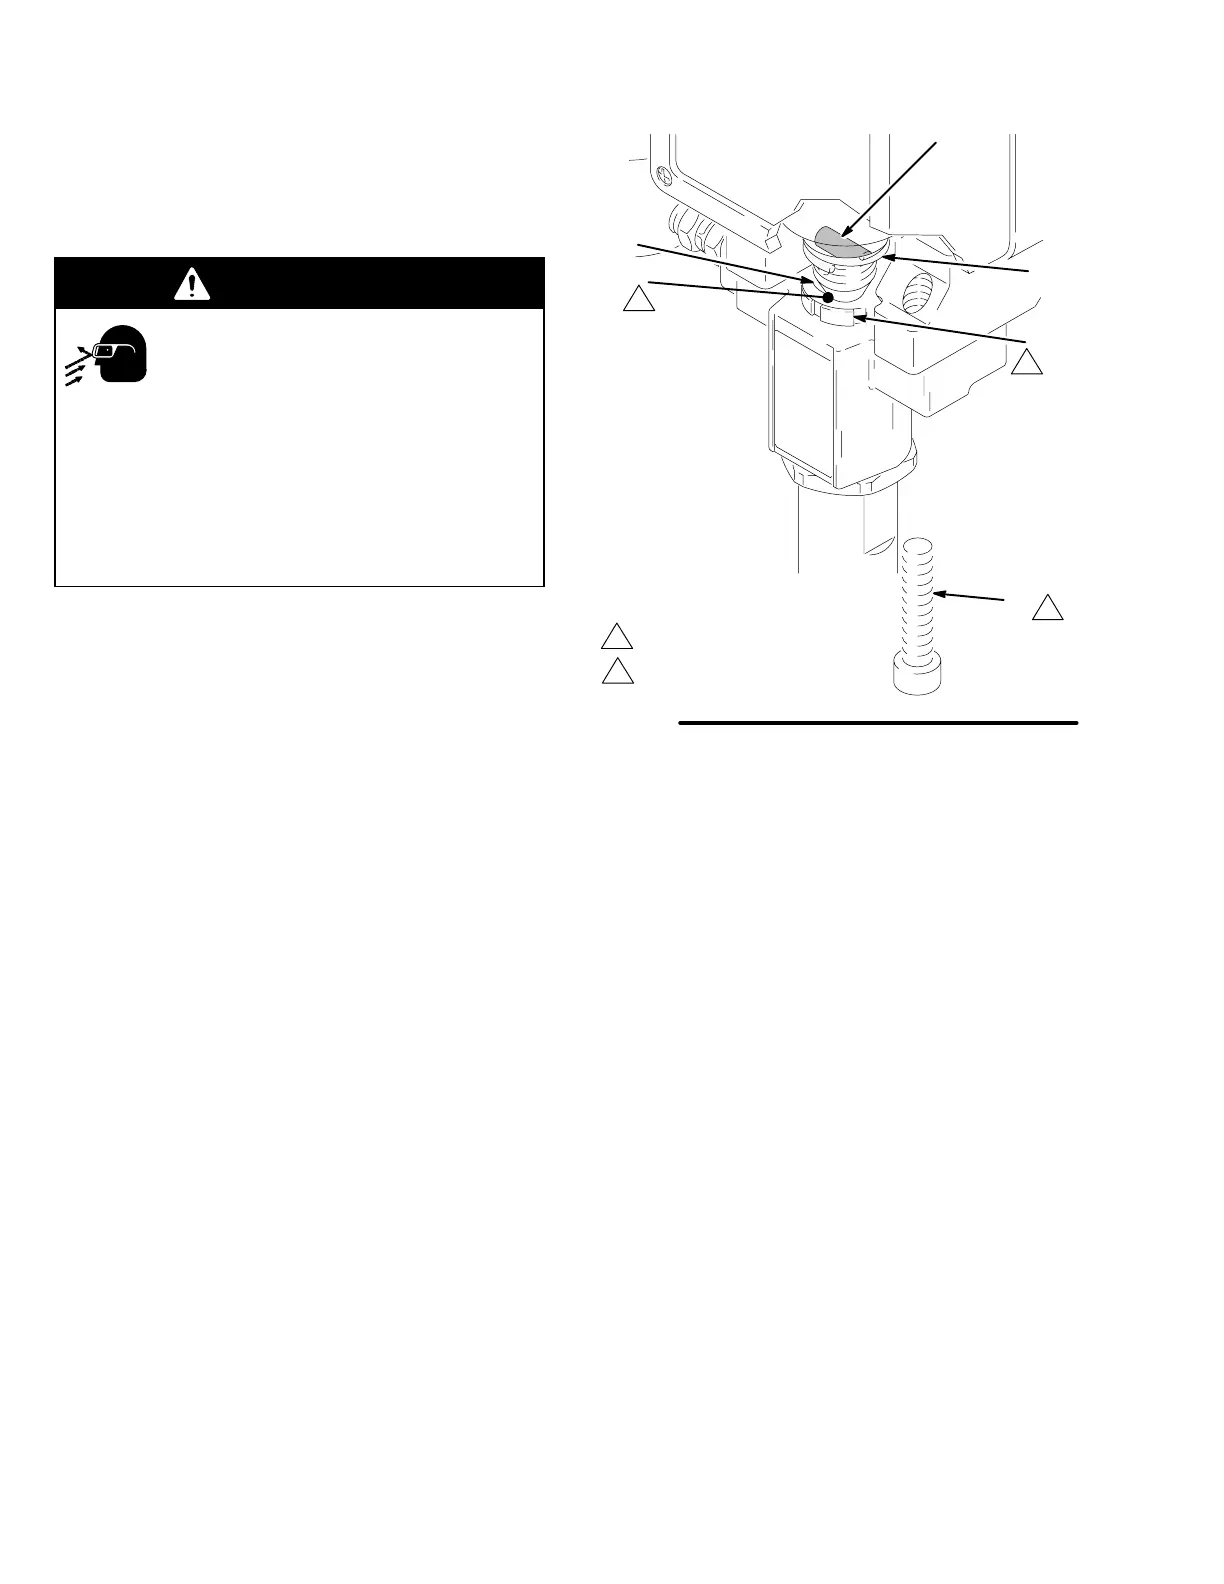
Installing the pump (See Fig. 26 and 27.)
5. Mount the pump on the drive housing. Tap it into
the alignment pins with a soft hammer. Tighten the
screws (17) to 50 ft-lb (68 N.m).
WARNING
MOVING PARTS HAZARD
Be sure the retaining spring (12) is firmly
in the groove all the way around, to
prevent the pin (11) from working loose
due to vibration. See Fig. 27.
If the pin works loose, it or other parts could break
off due to the force of the pump action. These parts
could be projected into the air and result in serious
injury or property damage, including the pump
connecting rod or drive housing.
6. Align the hole in the rod (107) with the connecting
rod assembly (10). Use a screwdriver to push the
retaining spring (12) up and push in the pin (11).
Push the retaining spring (12) into place around
the connecting rod.
7. Reconnect the suction and drain hoses. Install the
front cover (9).
8. Tighten the packing nut (102) just enough to stop
leakage, but no tighter. Fill the packing nut/wet-cup
1/3 full with Graco TSL. Push the plug (123) into
the wet-cup.
Fig. 27
11
12
123
10
102
1
Torque to
50 ft–lb (68 N.m)
1
17
Pump part number
2
2
2