12 308717
Spray Techniques
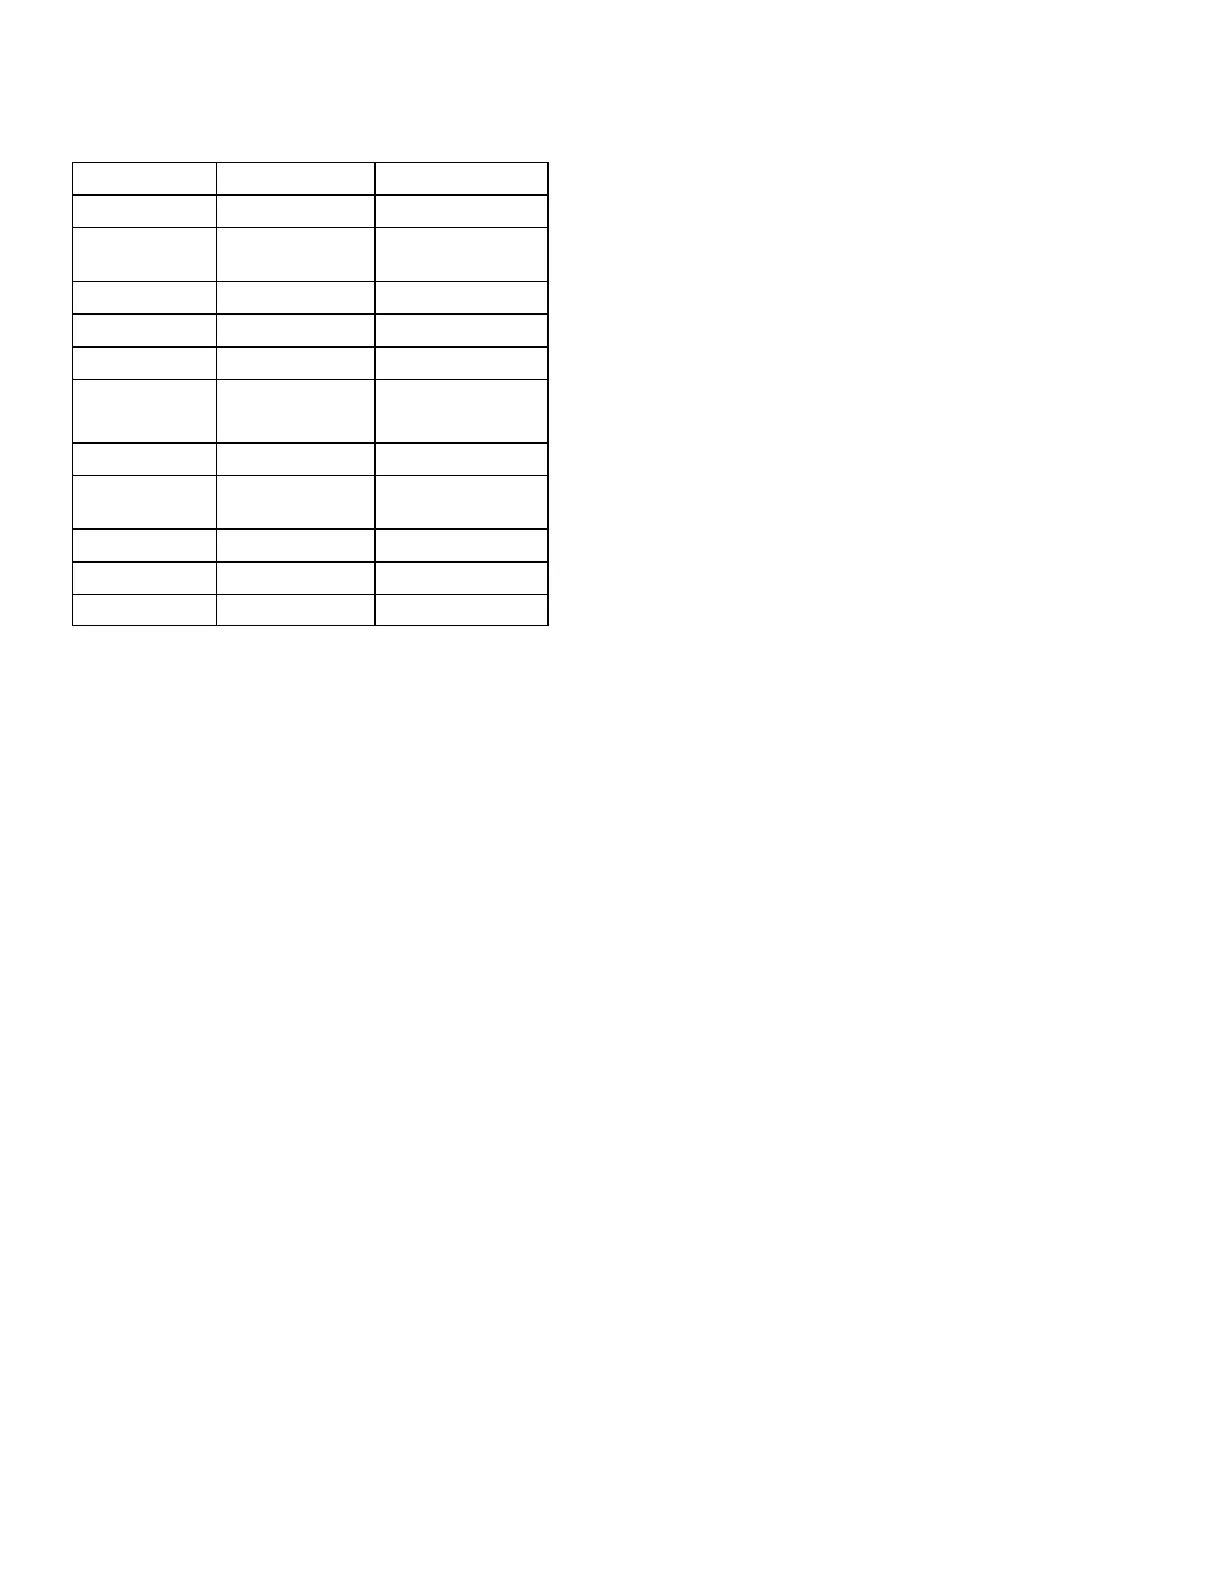
Nozzle Selection
Application Nozzle
2
Air Volume
1
Fog 3 – 4 mm high
Simulated
acoustic
4 mm
medium to high
6 mm
8 – 10 mm
Orange peel 3 – 4 mm medium to high
Splatter coat 6 – 8 mm
6 – 10 mm
low to medium
Knockdown 8 – 12 mm low
Textured
Elastomerics
8 – 12 mm
high
Plastics 8 – 10 mm high
EIFS 8 – 12 mm high
Stucco 10 – 12 mm high
1
Control air volume with gun air flow valve (R).
2
For more material volume, try a larger orifice nozzle.
Adjusting the System
Sufficient fluid output (volume and pressure) and good
atomization require testing to balance the compressor
air to the gun and pump and proper nozzle selection.
Keep in mind these important points when adjusting
the gun:
D Read all of pages 12 and 13 before spraying.
D Start the sprayer with the gun air valve fully open. If
needed, slowly decrease the gun air flow until you
get a good spray pattern. Use the minimum amount
of air at the spray gun to achieve the proper spray
pattern and to minimize bounce back.
– Test the spray pattern on cardboard. Hold the
gun 18 to 30 in. (457 to 762 mm) from the
surface. Use this spraying distance for most
applications.
– Overlap each stroke 50% in a circular motion.
D Select the proper nozzle for your application. See
the Nozzle Selection at left. Consider the size of
aggregate in the material and the coarseness of the
spray pattern. Remember, the larger the nozzle, the
heavier the pattern.
D All spraying adjustments are made at the gun.
Material pressure and flow rate adjustments are
made at the regulator.
D The compressor provides air to the gun and the
pot; thus, the more air you supply to the gun, the
less that is available for the pot.
Note: It takes the sprayer 15 seconds to stabilize at
the pressure that is set at the regulator.