• Levelling the base frame
After the anchor filling mortar is completely cured
the frame should be levelled with a space
between block and lower frame flange of 3 - 5
mm. This space largely depends on the sort of
grout or mortar used. Determine this space as
given in the instructions of the grout or mortar
supplier. This space is necessary for levelling using
the base frame adjusting bolts with metal washers
(supplied separately). The base frame should be
levelled on each frame side. Adjust the frame on
each adjusting place until all frame sides are
horizontal.
• Finishing with a self-levelling grout (See figure A1.5)
After levelling is completed the adjusting bolt
ends must be greased to avoid bonding to the
self-levelling grout. The space between concrete
block and frame must be completely filled with
the self-levelling grout to ensure that the
complete bottom surface of the base frame will
be supported. Therefore, it is not allowed to use
shims between concrete base and base frame.
Grouting must be carried out in accordance with
the instructions provided by the grouting supplier.
After complete de-aeration of the grouted layer,
secure the base frame by tightening the anchor
bolt nuts and remove all adjusting bolts. At this
stage the drive system can be installed. These
(accessories) installation instructions can be found
in the order manual.
A1.5 Connecting to refrigerating system pipe-
work
After the compressor (package) has been levelled
and secured to the foundation, the system piping
may be connected. The suction line(s) and
discharge line(s) should be installed and supported
such that there is no load exerted on the
compressor. The size and location of the suction
and discharge connections, can be found in the
"Engineering Data" (bare compressor) and in case
of a package, the package lay out drawing.
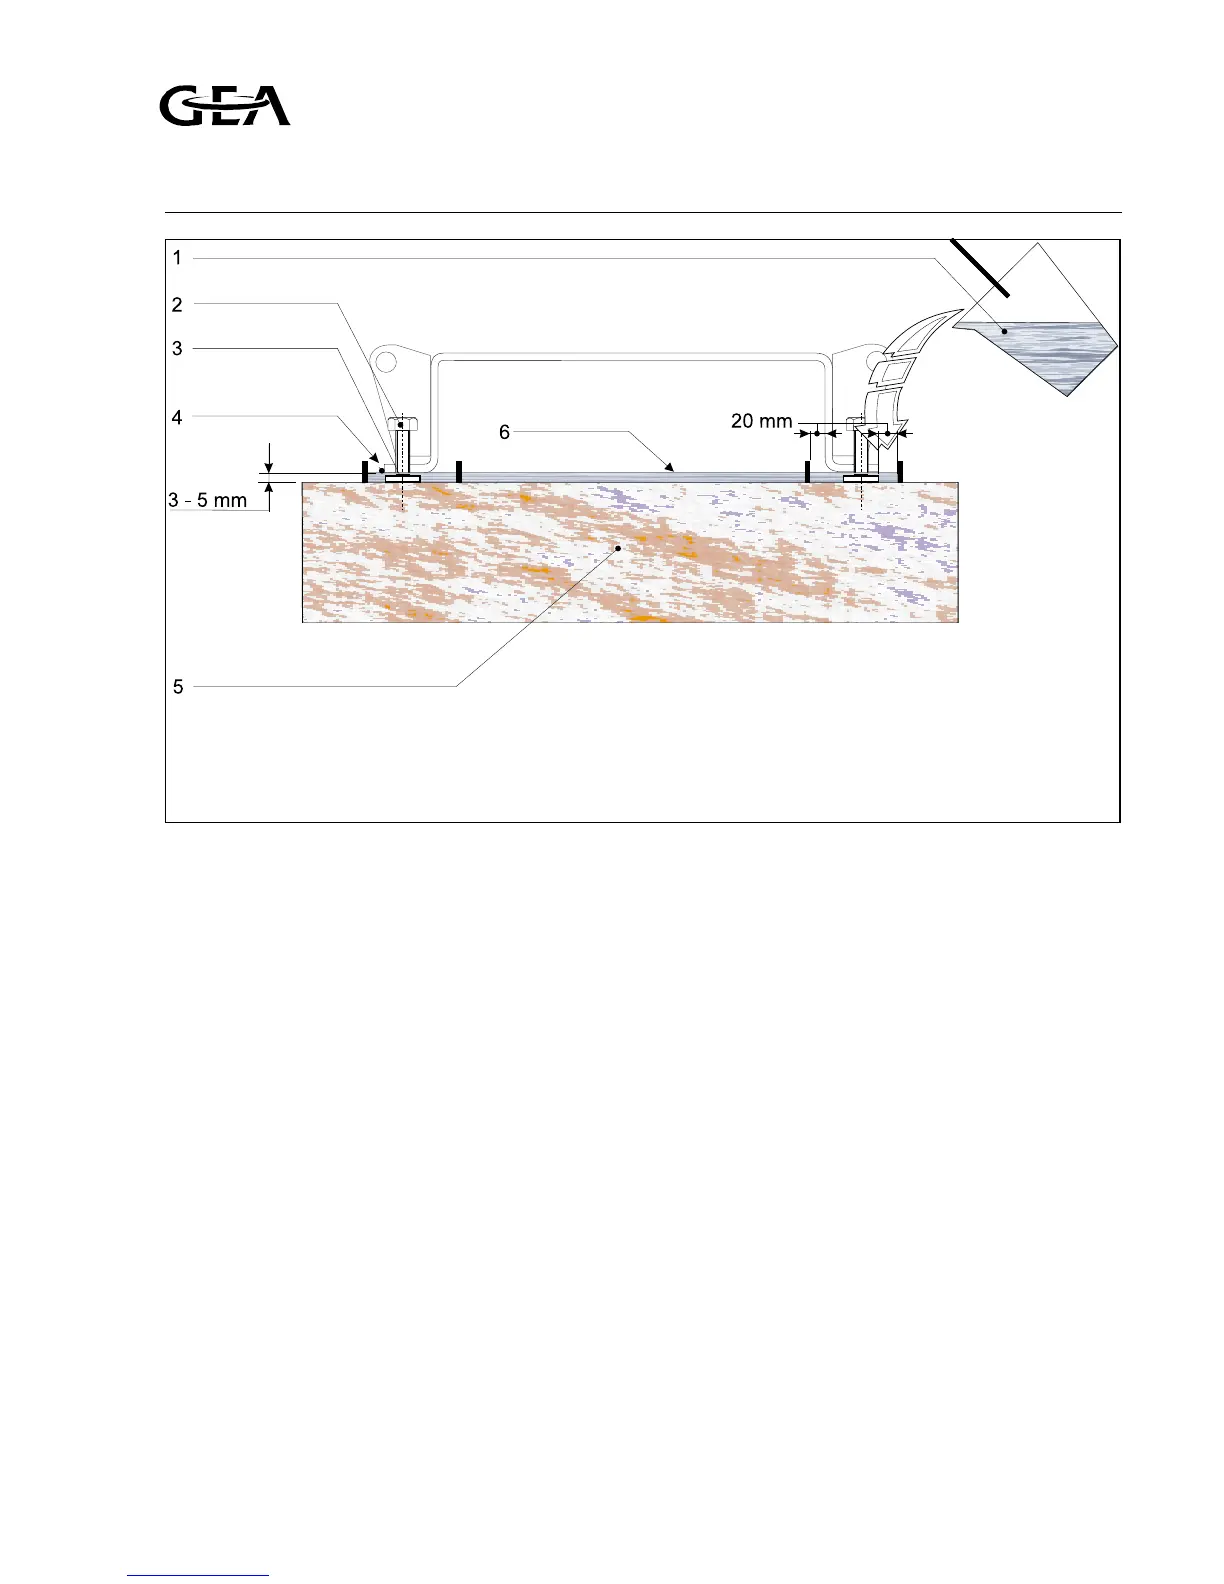
Fig. A1.5 Grouting details
1 Self-levelling grout
2 Adjusting bolt (4x)
3 Washer
4 Temporary barrier strip around and inside frame
5 Complete cured concrete block
6 Grout layer
Refrigeration Division
Grasso
A: INSTALLATION AND PREPARATION FOR USE
v001.99.01.en Installation and Maintenance Manual RC(U)6 A1.5