EN - 30
ELECTRICAL SERVICE
Replace Fuse
IMPORTANT: To avoid damaging the circuit,
replace fuses with fuses of the same
amperage rating.
1. Remove defective fuse.
2. Determine cause of fuse failure and
repair condition.
3. Install new fuse.
Replace Relay
NOTICE: Relays are interchangeable. Use
only quality replacement parts. See Service
Parts on page 24.
1. Remove defective relay.
2. Determine cause of relay failure and
repair condition.
3. Install new relay.
ADJUST TRANSAXLES
Check For Excessive Creep
1. Operate unit for a minimum of 5 minutes
to warm hydraulic system.
2. Stop engine and engage parking brake.
3. Chock front wheels and support unit so
both drive wheels are off the ground.
4. Remove drive wheels.
5. Start engine, move throttle lever to fast
position and release parking brake.
6. Move steering levers forward and
backward 5 or 6 times and then return
levers to neutral position.
7. Check hubs for rotation.
• If there is only slight rotation, stop
engine, reinstall wheels and lower unit
to ground.
• If there is excessive rotation, set neutral
position as directed below.
Set Neutral Position
If wheel hub has excessive rotation after
completing the procedure to Check For
Excessive Creep on page 30, adjust the
transaxles:
1. Stop engine, remove key and wait for
moving parts to stop and for hot parts to
cool.
2. Loosen jam nut above the tie rod on each
steering linkage end, and then disconnect
the steering linkages from the transaxle
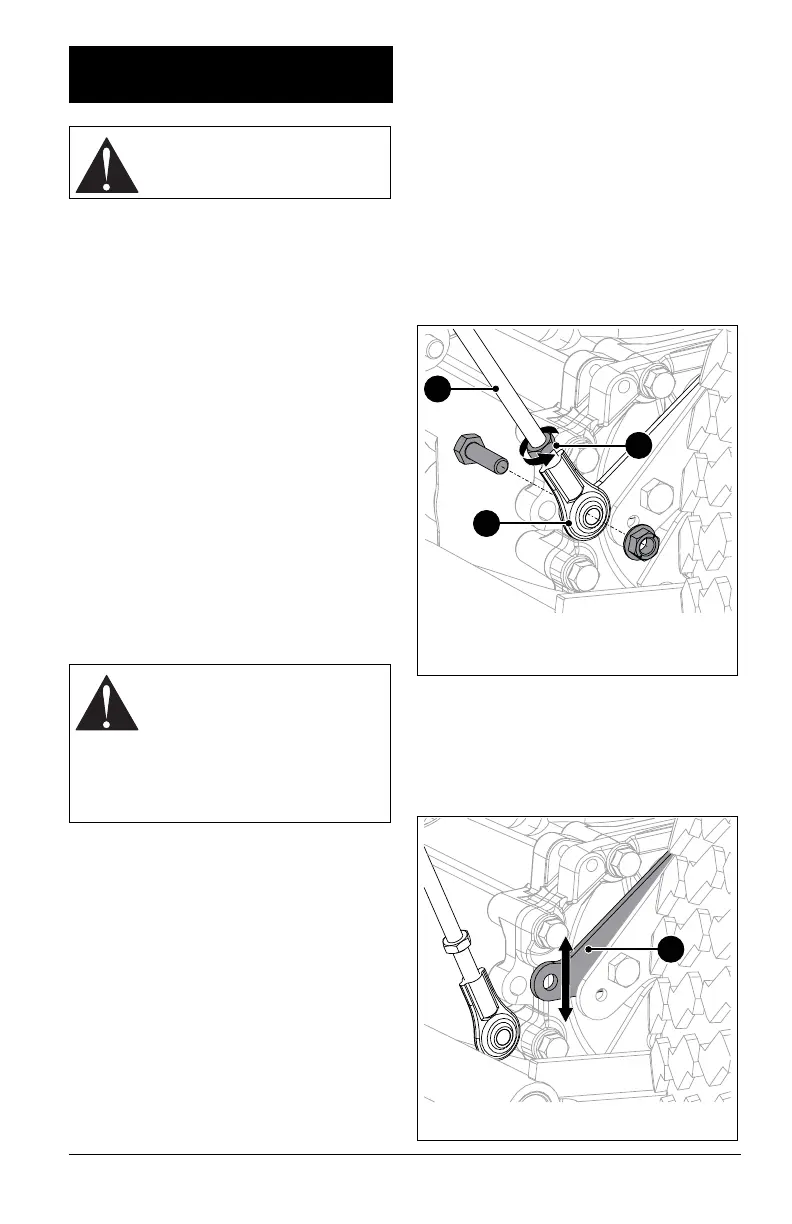
control levers. See Figure 33.
3. Engage parking brake to set steering
levers and linkages in neutral position.
4. Move the transaxle control lever up or
down to find the neutral stop. Hold
position when neutral stop is found. See
Figure 34.
SERVICE &
ADJUSTMENTS
WARNING: AVOID INJURY.
Read and understand the Safety
section before proceeding.
WARNING: AVOID INJURY.
This adjustment requires
operating the engine. Use
extreme care to avoid contact
with moving parts and hot
surfaces. Be sure rear of unit is
well supported and secure
before starting engine.
Figure 33
1. Jam Nut
2. Tie Rod
3. Steering Linkage
1
3
2
Figure 34
1. Transaxle Control Lever
1