DC INVERTER MULTI VRF INSTALLATION
130
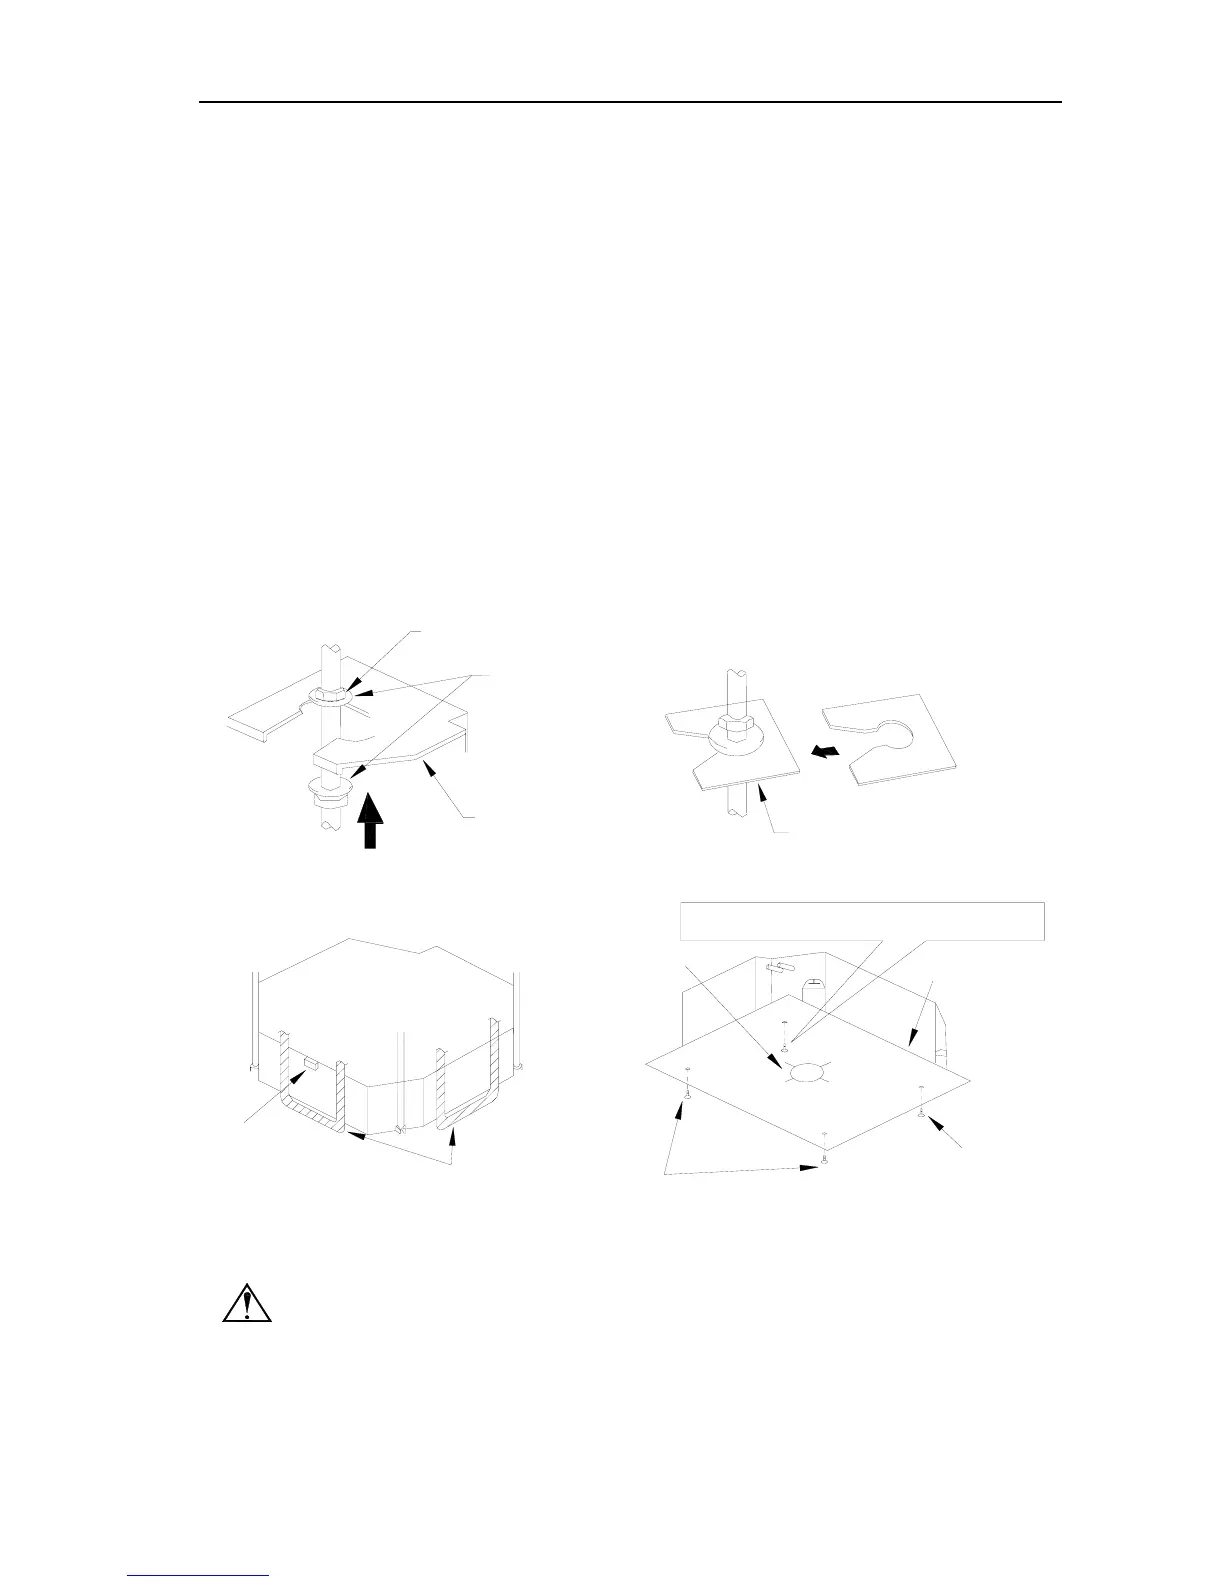
☆ When attach the hoisting stand on hoisting screw, do use nut and gasket individually at the upper and
lower of the hoisting stand to fix it. The use of gasket anchor board can prevent gasket break off.
2 Use install cardboard
☆ Please refer to the install cardboard about the dimension of ceiling opening.
☆ The central mark of the ceiling opening is marked on the install cardboard.
☆ Install the install cardboard on the unit by bolt (3 piece), and fix the angle of the drainage pipe at the
outlet vent by bolt.
3 Adjust the unit to the suitable install place. (Refer to the fig.2)
4 Check if the unit is horizontal.
☆ Inner drainage pump and bobber switch are included in the indoor unit, check if 4 angle of every unit are
horizontal by water lever. (If the unit is slant toward the opposite of the coagulate water flow, there may be
malfunction of the bobber switch and lead water drop.)
5 Backout the gasket anchor board used to prevent gasket break off and tighten the nut on it.
6 Backout the install cardboard.
[Fix the hoisting stand firmly]
Water lever
Tighten (double nuts)
Bolt of one of the angle of outlet pipe is fix
on the angle of the drainage slot
[Fix the install cardboard]
[
Fix the gasket firmly]
Polyethylene pipe
Bolt (attachment)
Center of the ceiling
opening
Bolt
(attachment)
Install cardboard
Gasket anchor board
(attachment)
Nut (supplied at scene)
Hoisting stand
Gasket (attachment)
Insert
Note!
● Please do tighten the nuts and bolts to prevent air conditioner break off.
● Connect the refrigerant pipe
☆ When connect the pipe to the unit or backout it from the unit, please do use both spanner and torque
 Loading...