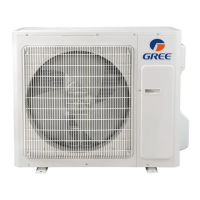
GREE DC INVERTER HEAT PUMP CONDENSING UNIT
64
(2) Prepare relevant tools
1) Prepare nitrogen. Please strictly follow the nitrogen welding standards during the welding process.
Make sure there is sufficient nitrogen. The nitrogen pressure should be above 2.0MPa;
2) Prepare welding rods. Prepare some welding rods of common specifications and some special
welding rods that contain more than 5% silver. They are used to weld the compressor. The suction
and exhaust openings of the compressor are all connected to copper-plated steel pipes, so we
need to use special welding rods and solder;
3) Prepare applicable welding tools. Please evaluate how much oxygen and acetylene should be used
according to the current welding condition. Try to avoid repeated welding.
4) Prepare a complete set of tools, including an internal hexagonal wrench, diagonal pliers, pincer
pliers, nipper pliers, a universal meter, a pressure gauge, cross screwdriver, straight screwdriver,
more than two wrenches, insulating tape and wire cables.
Step 2: Disconnect power
If the compressor needs to be replaced after judging as above, then switch off the outdoor unit and
disconnect the power cable of the outdoor unit. Use insulating tape to wrap the power cable and put a notice
board on the power switch to remind people to be cautious of electric shock.
Step 3: Neaten the electric components
When you detach the compressor wires, temperature sensors and electric heaters, mark them
correspondingly for the convenience of reconnecting them.
Step 4: Discharge refrigerant
Discharge refrigerant from the system. Discharge simultaneously from the high pressure side and low
pressure side. Do not discharge too fast (It should take more than 12h to completely discharge the refrigerant);
otherwise, large quantity of lubricant will escape from the system together with the refrigerant.
Step 5: Detach the compressor
Check the condition of the damaged compressor, including its position and model.
If the information of the compressor is confirmed, check the oil quality.
(a) If the oil is clear and impurities-free, we consider that the oil of the system is not polluted. Meanwhile, if
we confirm that the valves and pipes are also normal, then we can replace the compressor only. For the removal
of compressor, please refer to the section: Removal of Major Components.
How to check oil quality:
(1) After the compressor is detached, put it on a solid ground and shake it at an angle of 30~45° to ensure
that the contaminant at the bottom of the compressor can be poured out.
 Loading...
