Greenlee Textron / Subsidiary of Textron Inc.
17
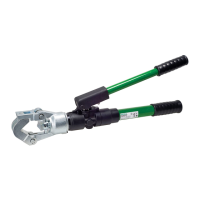
1990 Dieless Hydraulic Crimping Tool
Problem Probable Trouble Area Recommended Service
Ram advance:
1. no advance A. Air in hydraulic system {1, 2, 3, 4} A. See Air in the Hydraulic System at the end
2. slow advance of this troubleshooting table.
3. partial retract with each stroke B. Check valve/body {1, 2, 3} B. Reseat balls; tighten lock screw.
4. erratic advance C. Release mechanism {1, 2} C. Replace O-rings, check ball/pin clearance and
reseat (69–73).
D. Low pressure relief {1, 2} D. Reseat ball (77).
E. High pressure relief {1, 2} E. Reseat cone (81).
F. Plunger O-rings {4} F. Replace O-rings (62–68).
Slow pressure buildup:
1. Handle springs back A. Discharge check ball {1} A. Reseat ball.
2. No handle response B. Check balls/body {1, 2} B. Reseat balls.
C. High pressure relief {1} C. Reseat and reassemble.
D. Release mechanism {1, 2} D. Check clearance and seat body.
Tool does not achieve high pressure A. Check valves/body A. Replace O-ring, reseat check balls.
B. High pressure relief is not seated B. Reseat relief.
C. Pressure control mechanism is C. Check the assembly of roller, slides, stepped
improperly assembled rod and adjusting screw (80–86, 88, 89).
Ram does not retract A. Wedged connector A. Free and remove connector.
B. Die jammed due to misuse B. Free die. Inspect tool and replace any
damaged parts.
C. Release mechanism C. Make sure ball is not over-traveling.
D. Bent driving rod D. Replace rod (94).
Ram retracts partially A. Too much hydraulic fluid A. Bleed off excess oil.
B. Air in hydraulic system B. See Air in the Hydraulic System at the end
of this troubleshooting table.
C. Internal parts bind C. Check stepped rod and driving rod for a bind
point (84, 94).
D. Dies bind D. Replace dies.
Pressure setting:
1. does not change as ram advances A. Pressure adjusting screw is loose {1, 3} A. Adjust pressure and tighten screw (92, 93).
2. does not change when adjusting B. Improper assembly {1, 2} B. Check the assembly of stepped rod and
screw setting is changed roller slides (84, 89).
3. does not hold adjustment C. Stepped rod turned {1}. C. Turn to position. Adjust pressure.
D. Spring cap missing {1, 2} D. Replace cap (86) and adjust pressure.
E. Valve cap not tight {1, 2, 3} E. Tighten cap (87) and adjust pressure.
F. Driving rod disconnected {1, 3} F. Assemble. Fasten with threadlocking compound.
Internal leak at:
1. low pressure relief A. Ball/cone seat damage {1, 2} A. Reseat or replace.
2. high pressure relief B. Dirt or grit in the hydraulic system {1, 2} B. Drain oil; clean parts. Fill with fresh oil.
3. stepped rod seals C. Missing or damaged components C. Rebuild tool.
D. Damaged O-ring {3} D. Replace O-ring and backup ring.
External leak at:
1. base of reservoir handle A. Damaged reservoir {1, 2, 3} A. Replace reservoir (20).
2. grip B. Damaged or missing O-ring at reservoir {1, 2, 3} B. Replace O-ring (21).
3. inside reservoir handle C. Reservoir plug damaged or missing {1, 2, 3} C. Replace reservoir plug (19).
4. around release plunger D. O-ring on plunger damaged or missing {4} D. Replace O-ring and backup ring (64, 65).
5. between pump block and E. Loose cylinder cap {5} E. Tighten screws (59) to proper torque.
cylinder cap F. O-rings (WH) or copper washers (YM) damaged {5} F. Replace components (43, 44, 45) or (60).
6. around cylinder near cap G. Damaged cylinder seal in cap {6} G. Replace O-ring and backup ring (40, 41)
7. movable die H. Damaged O-rings and backup ring on ram {7} H. Replace O-ring and backup ring (36, 37).
I. Damaged ram {7} I. Replace ram. Check cylinder bore for damage.
Air in the Hydraulic System A. Improper fill and purge procedure A. Fill reservoir and purge air.
B. Loose or missing reservoir plug B. Replace plug, or install plug properly.
C. Damaged O-ring on low pressure plunger C. Replace O-ring and backup ring.
D. Damaged reservoir D. Replace reservoir.
E. Damaged or missing O-ring on reservoir E. Replace O-ring.
F. Reservoir is underfilled F. Fill reservoir and purge air.
Troubleshooting
This table lists some of the most common problems
(first column). The probable trouble areas (second
column) contain numbers in brackets { } relating to the
problems listed in the first column. Recommended
service procedures are provided (third column).