Greenlee Textron / Subsidiary of Textron Inc.
10
1990 Dieless Hydraulic Crimping Tool
1. Clamp the pump block in a vise with the handles
downward. Fully retract the ram.
2. Loosen the set screw (96) and unscrew the cylinder
(33) from the cylinder cap (42).
Note: Pull the cylinder straight off of the cap to
prevent damaging the driving rod.
Disassembly
Before performing any repair procedure:
1. Refer to the Service Tips and Troubleshooting
sections to determine the appropriate service
procedure.
2. Read through the entire procedure to be sure that
you have all of the necessary tools, repair parts and
supplies.
When performing any service procedure:
1. Check all disassembled parts for wear or damage.
2. Visually inspect the ball seats.
3. Carefully replace any O-rings, backup rings, and
other disposable items.
4. Check all items for dirt, grit or other contaminants.
The disassembly procedure is divided into five basic
sections, in this order:
1. Cylinder
2. Cylinder Cap
3. Reservoir
4. Pump Block, Relief Valves, and
Pressure Release Mechanism
5. Pump Pistons
Cylinder
The spring stores at least 310 Newtons (70 pounds)
of force. Follow this procedure exactly as instructed
to release the pressure on the spring carefully.
Failure to observe this precaution will release all of
the energy in the spring at once, resulting in injury
due to flying parts.
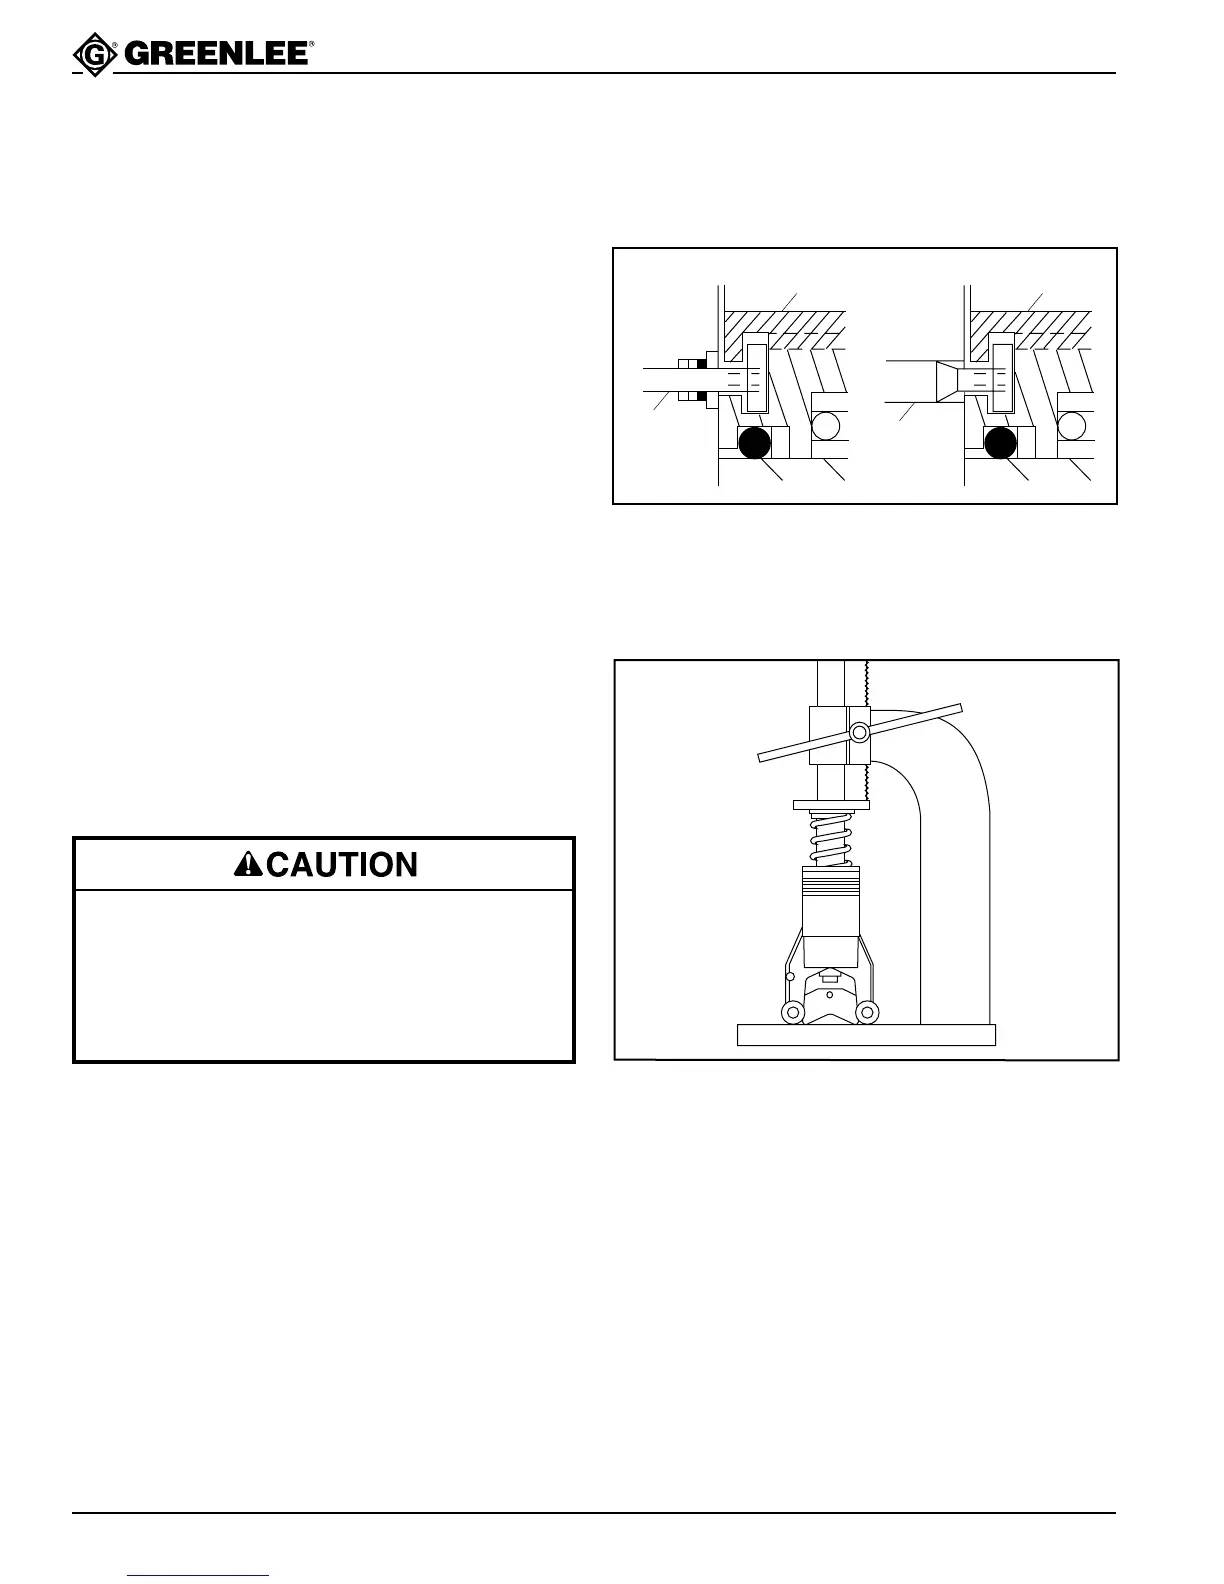
3. Pull the cylinder away from the cylinder cap 40 mm
(1-1/2") and remove the rod retaining screw (95).
Remove the driving rod (94).
YMWH
95
94
95
94
4. If the cylinder does not require service, proceed to
Cylinder Cap.
5. Clamp the cylinder assembly in a vise and support
the back of the ram with a C-clamp or arbor press, if
available.
6. Loosen the set screw (25) that secures the movable
die (26). Allow the ram to move far enough to
release the tension in the spring.
7. Disassemble the C-clamp or arbor press setup.
8. Remove the set screw (25), movable die (26), ram
(38), spring (39), guide (35) and wiper (34).
9. Replace all available packing (O-rings, backup
rings, springs, balls, wiper, etc.).