GRISWOLD PUMP COMPANY Repair Maintenance Page 33
Installation, Operation and Maintenance Manual
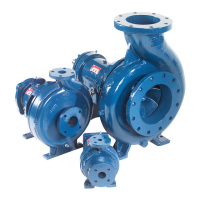
Griswold Model 811
Griswold Pump Company Repair Maintenance Page 35
When the pump is initially run, there will be a rela
tively high leakage rate from the stuffing
box and this is to be expected. As the packing runs in, the gland nuts may be tightened
gradually until the required leakage rate (40-60 drops per minute) is reached. It is
suggested that the gland nuts be tightened ¼ turn at a time every 2-3 hours during the run-
in period.
Use proper lifting methods and equipment to avoid physical injury and/or damage.
After the preliminary impeller adjustment is made (page 33):
1. Remove impeller leaving the shaft sleeve in place.
2. Re-install the impeller with its o-ring, being sure to tighten it firmly (tightens clockwise).
3. Install packing in the stuffing box. Stagger the packing ring joints at 90
O
intervals. Two
rings should be located at the bottom of the stuffing box, followed by the lantern ring,
then followed with three additional rings. Be sure the lantern ring is located under the
lantern ring flush connection. Otherwise, flushing liquid, if used, cannot enter between
the packing rings.
4. Install the packing gland halves (107) and tighten the gland nuts (353A) finger-tight only.
Installation of Back Pull-out Assembly
1. Inspect casing. Clean casing fit and install gasket (351) into case (100).
2. Loosen cap screws (390C) and jacking bolts (370D). Install back pull out assembly into
casing.
3. Apply anti - seize compound to casing bolts (370). Install casing bolts hand tight. Torque
casing bolts to values shown in Appendix V, Page 46.
4. Check lateral movement (travel) of impeller in casing. Interference indicates defective
parts, improper installation or presence of pipe strain. Determine cause and correct
before proceeding.
5. Set impeller clearance as described in the Appendix I, Page 40.
6. Check shaft rotation by hand. If binding or rubbing is present, determine the cause and
correct before proceeding.
7. Re-connect cooling and/or flushing lines.
8. Check lubrication. If flood oil (standard), fill with suitable oil. See lubrication chart
Appendix II, page 42.
9. Check rotation.
10. Re-install coupling/coupling spacer.
11. Check alignment.
12. Re-install coupling guard. Appendix IX, page 52.
Proceed with pump start-up as noted in the “Operation” Section, Page 20.