GRISWOLD PUMP COMPANY Repair Maintenance Page 32
Installation, Operation and Maintenance Manual
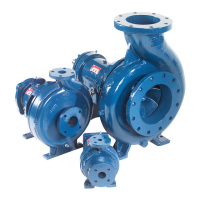
Griswold Model 811
Griswold Pump Company Repair Maintenance Page 34
The axial position of a cartridge seal is set after the back pull-out assembly has been
installed in the pump casing and the running impeller clearance has been established.
Refer to the seal manufacturer’s drawing and instructions for location of positioning
setscrews. Tighten seal positioning setscrews and then remove positioning clips or screws.
Check shaft for free rotation. If any binding or rubbing occurs, determine cause and c
before proceeding.
I. For Pumps with Component Mechanical Seals
1. Apply a bluing solution to the shaft sleeve and scribe a mark on the sleeve at the face of
the seal chamber/stuffing box cover. This locates the seal setting reference point for the
installation of the mechanical seal rotary unit. See mechanical seal manufacturer’s
dimension print for the seal to be used.
2. Remove the impeller and shaft sleeve. Remove stuffing box cover.
3. Install the mechanical seal stationary seat into the mechanical seal gland (250). Follow
the seal manufacturer’s instructions. Slide the seal gland with the stationary seat over the
shaft and locate back towards the bearing frame.
4. Install the seal rotary unit on the shaft sleeve following the seal manufacturer’s
instructions. Re-install the sleeve, with seal rotary, on the pump shaft.
5. Install stuffing box cover (184) with studs and nuts (370H and 423B).
6. Install impeller with o-ring, being sure to firmly tighten it clockwise.
7. Install mechanical seal gland (250) over studs with nuts (353A). Tighten nuts evenly.
Check shaft for free rotation. If any binding or rubbing occurs, determine cause and
correct before proceeding.
II. For Pumps with Cartridge-type Mechanical Seals
Cartridge seals unitized, i.e., the gland, sleeve, seal rotary and seal stationary are pre-assembled
and seal compression is pre-set at the factory. Seal faces are held in position for assembly into
the pump with positioning screws or clips. Since a cartridge seal includes its own shaft sleeve,
solid pump shafts (no sleeve) are often used to lower shaft deflection.
After the preliminary impeller adjustment is made (previous page):
1. Remove impeller and stuffing box cover.
2. Install cartridge seal assembly over the pump shaft (or pump shaft sleeve, if used) being
careful to not damage the o-ring located in the ID of the seal’s shaft sleeve. Locate the
seal assembly back towards the bearing frame.
3. Install stuffing box cover (184) with studs and nuts (370H and 423B).
4. Install impeller with o-ring, being sure to firmly tighten it clockwise.
5. Install the cartridge seal assembly over the studs with nuts (353A). Tighten nuts evenly.
III. For Pumps with Packed Stuffing Box
For proper operation, packing must leak to provide lubrication and cooling. Packing should be
gradually run in until a leakage rate of at least 40-60 drops per minute is achieved. Do not
attempt to eliminate leakage by over-tightening the gland nuts. If any solids are present in the
pumpage, it will be necessary to provide a clean liquid flush to the lantern ring connection in the
stuffing box cover (flushes between the rings of packing).