GRISWOLD PUMP COMPANY Appendix Page 52
Installation, Operation and Maintenance Manual
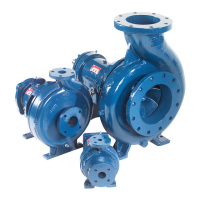
Griswold Model 811
Griswold Pump Company Appendix Page 54
Note:
Refer to the illustration for assembly beginning with Fig. A-5 and working in the reverse
order.
Before assembling or disassembling the coupling guard, de-energize the motor, lock out the
motor controller/start and place a c
aution tag at the starter indicating that it is disconnected.
Before resuming normal pump operation, replace the coupling guard. Griswold Pump
assumes no liability when this procedure is not followed.
DISASSEMBLY PROCEDURES
It is necessary to remove the coupling guard for certain pump maintenance and adjustments, such
as coupling alignment, impeller clearance adjustment and so forth. Replace the coupling guard
after completing maintenance.
DO NOT resume normal pump operation while the coupling guard is removed.
1. Remove the nut, bolt and washers from the center-slotted hole on the coupling guard.
Slide the motor end of the coupling guard half toward the pump. (See Figure A-5).
2. Remove the nut, bolt and washers from the driver end of the coupling guard half.
3. Slightly spread the bottom of the driver end coupling guard half and lift it off.
4. Remove the nut, bolt and washers from the pump end of the coupling guard half.
5. Slightly spread the bottom of the pump end coupling guard half and lift it off.
6. Remove the bolts from the bearing housing and remove the end plate. (See Figure A-
2).
WARNING