-26-
Model G0938 (Mfd. Since 03/21)
Removing/Installing
Pin-End Blade
Tool Needed Qty
Hex Wrench 4mm .............................................. 1
For faster cutting on workpieces more than
3
⁄4"
(19mm) thick, or when less precision is required
for an operation, pin-end blades are suggested.
This blade type is usually thicker than plain-end
blades and offers greater stability.
When using pin-end blades, the button head cap
screws on the upper and lower blade holders
should not be too tight or too loose. Proper blade
tension will keep the blade securely in place.
1.
DISCONNECT MACHINE FROM POWER!
2. Remove table insert (see Figure 22 on Page 24).
3
. Set work table to 45° left (see Figure 25 on
Page 25).
4
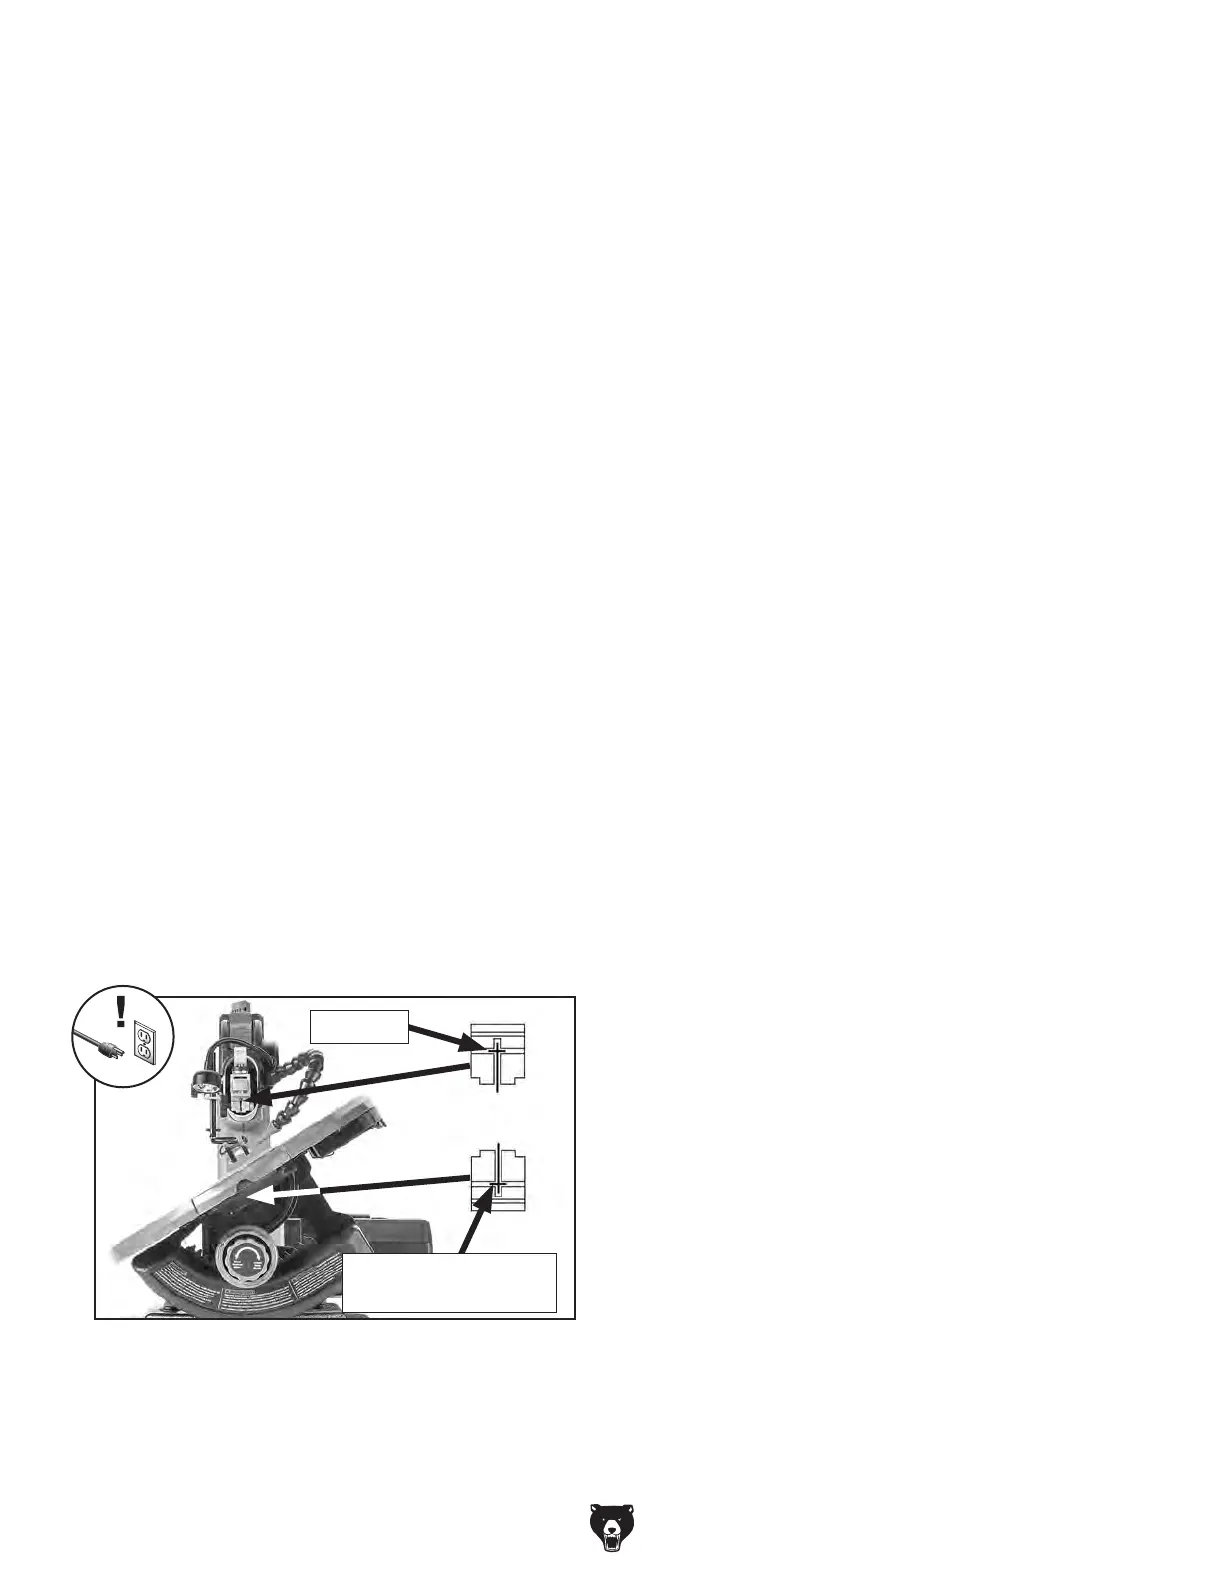
. Insert blade into upper slot in upper blade
holder. Make sure pin is properly located in
slot (see Figure 26).
Note: Wiggle blade end back and forth with
slight pressure to make sure pin is seated in
indents of mounting arm.
5.
Slide saw blade down through table hole so
that teeth face down and forward.
6
. Insert blade into lower slot in lower blade
holder. Make sure pin is properly located in
slot (see Figure 26).
Note: Wiggle blade end back and forth with
slight pressure to make sure pin is seated in
indents of mounting arm.
7.
Tighten upper and lower blade holder lock
knobs (see Figures 24–25 on Page 25).
Note: Do not over-tighten blade holder lock
knobs when using pin-end blades.
8.
Adjust blade tension (refer to Adjusting
Blade Tension on Page 21).
9.
If tension needs further adjustment rotate
blade tension lever clockwise to tighten,
and counterclockwise to loosen blade
(see Figure 23 on Page 25).
10.
Return table tilt to 0° and install table insert.
5.
Slide saw blade down through table hole to
clear machine.
6.
Return table tilt to 0° and install table insert.
1.
DISCONNECT MACHINE FROM POWER!
2. Perform Steps 2–6 of Removing Plain-End
Blade on Page 24.
3
. Remove blade from lower slot in lower blade
holder (see Figure 26).
Note: Wiggling blade end back and forth with
slight pressure may help to make sure pin is
removed.
4
. Remove blade from upper slot in upper blade
holder (see Figure 26).
Figure 26. Pin-end blade installation.
Pin Ends
Seat Pins in Indents
of Mounting Arm
Removing Pin-End Blade
Installing Pin-End Blade