3-1
3 Installing modules
Before connecting the device to a power source, install all modules.
To fasten a captive screw for a module, make sure the screwdriver bit matches the screw. Set
the fastening torque to 5.5 kgf•cm (0.54 Nm) ± 10%. Keep the screwdriver bit steady and
aligned with the screw and screw hole and press the screwdriver down into the screw.
The module installation procedure is similar for the M9000-X06 and M9000-X10 gateways. The
M9000-X06 gateway is used as an example in the following figures.
Installing MPUs
The device provides two MPU slots. You can install one MPU, or two MPUs for 1+1 redundancy.
The device supports active/standby MPU switchover when you install two MPUs for the device.
Make sure the active and standby MPUs are the same model.
If you install two MPUs for the device
, you can hot swap the standby MPU. If you install only one
MPU for the device, you cannot hot swap the MPU.
• If you are not to install an MPU in an MPU slot, keep the filler panel in the slot.
Installing an MPU for an M9000-X06/M9000-AI-X06 gateway
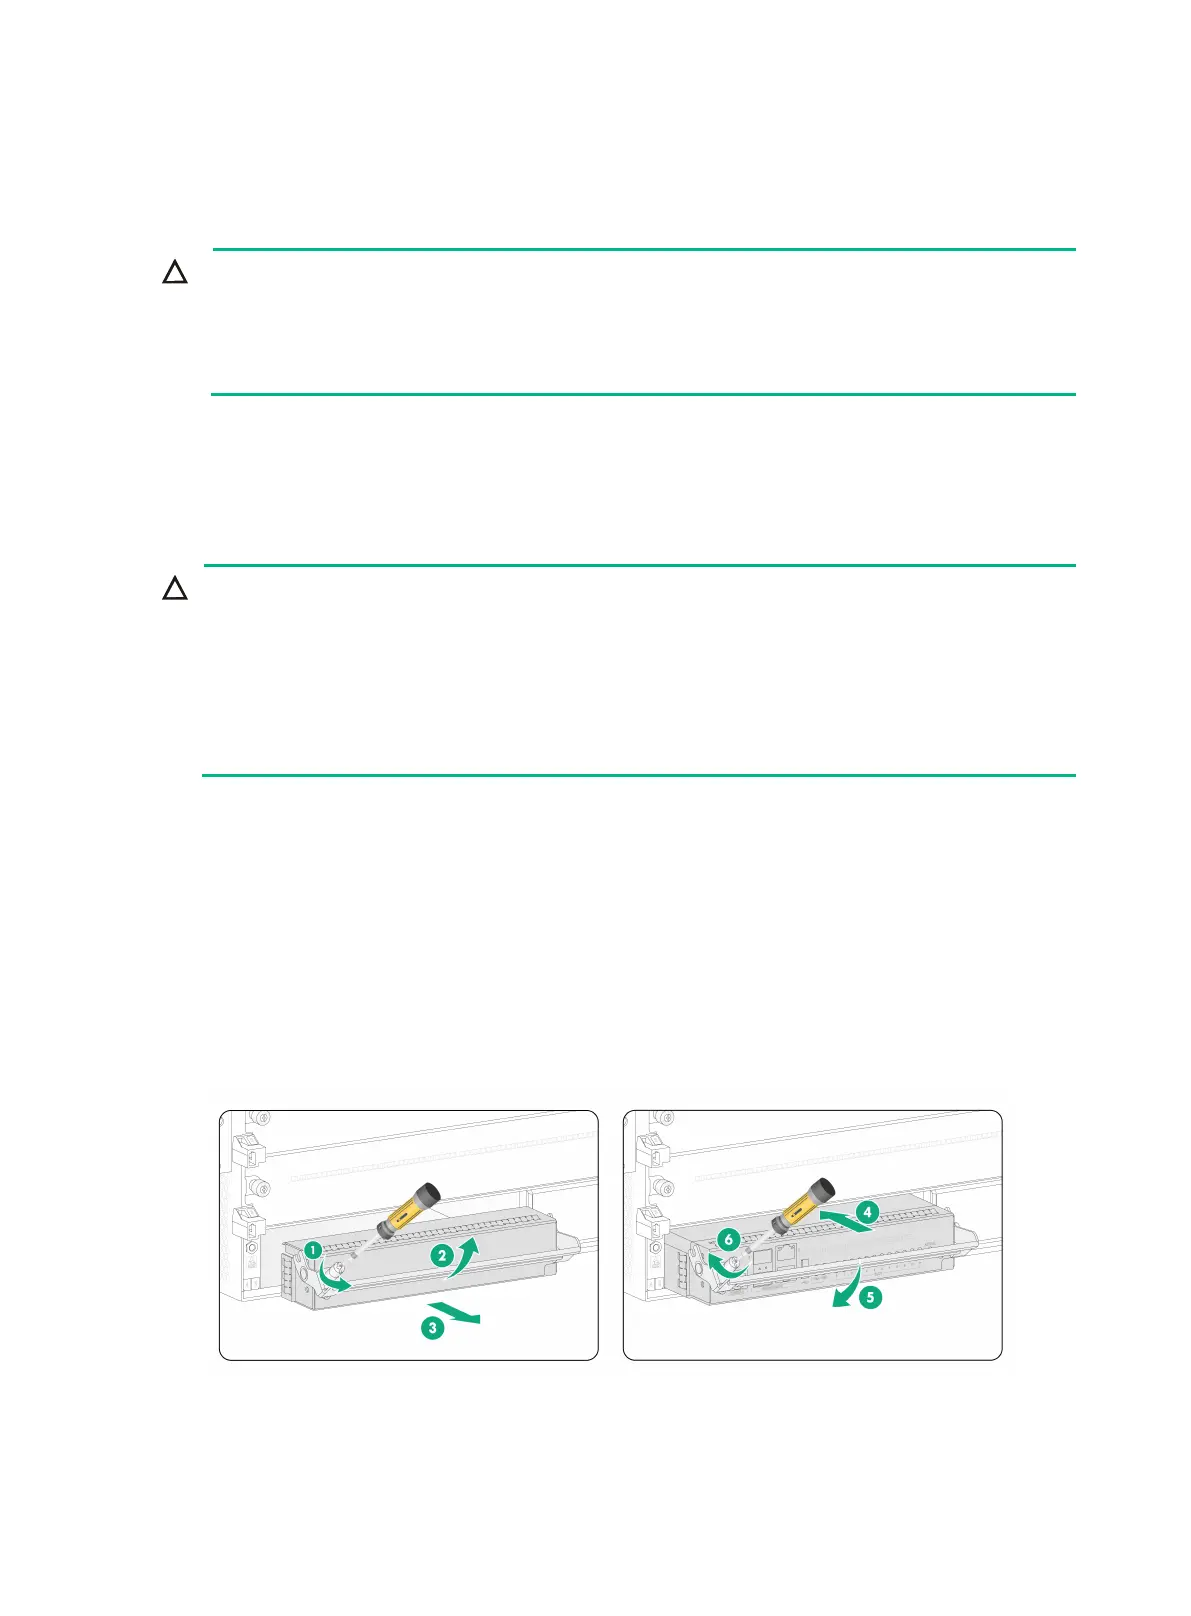
1. Use a Phillips screwdriver to loosen the captive screw on the filler panel in the target MPU slot.
Then remove the filler panel from the slot..
2. Correctly orient the MPU, rotate the handle upward, and then push the MPU steadily into the
slot along the guide rails.
3. Rotate the handle downward. Make sure the MPU makes close contact with the backplane.
4. Use a Phillips screwdriver to fasten the captive screw on the MPU.
Figure3-1 Installing an MPU for an M9000-X06/M9000-AI-X06 gateway