Atrazine
Atrazine
ATZ_None_Other_IMM_Eng_Ody.fm Page 5 of 8
Using the 1-cm MicroCuvette Rack
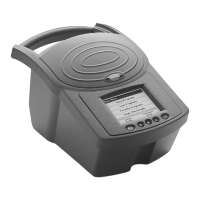
This rack (see Figure 2) has been designed specifically to aid in achieving precise
and accurate results when using the immunoassay technique to analyze several
samples at the same time.
Figure 2 The 1-cm MicroCuvette Rack
Loading the Rack — The cuvette rack is designed so that it may be inverted
with the cuvettes in place. Identify each cuvette with a sample or calibrator
number and place all the cuvettes in the rack before beginning the procedure. Fit
the cuvettes snugly into the rack, but do not force them or they may be difficult
to remove and their contents may spill. The cuvettes should remain in place
when the rack is inverted and tapped lightly.
Mixing — Set the rack on a hard, flat surface that is at least twice the length of
the rack. Hold the rack by one end and vigorously slide it back and forth along
its long axis for 30 seconds. The rack should move through a distance equal to its
own length in each direction.
Interpreting and Reporting Results
There is an inverse relationship between the concentration of Atrazine and the
reading. In other words, the higher the reading, the lower the concentration of
Atrazine.
Example
Readings:
0.5 ppb Atrazine Calibrator:
0.475 Abs
3.0 ppb Atrazine Calibrator: 0.245 Abs
Sample #1: 0.140 Abs
Sample #2: 0.300 Abs
Sample #3: 0.550 Abs
If the sample reading is… the sample Atrazine Concentration is…
…less than calibrator reading …greater than the calibrator concentration
…greater than calibrator reading …less than the calibrator concentration