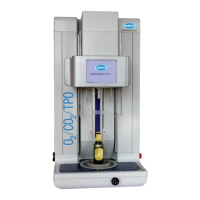
4.7.1 Sensor cable
An ORBISPHERE cable is needed to connect the sensor to the instrument. There is a cable gland for
cable passage, and the cable must be permanently connected to the measuring board connector. A
sensor cable is required with free wires on the instrument end. The free wires are connected to the
connector J8 on the measuring board, as detailed later in this chapter.
4.7.2 Electronic boards connectors
Connectors P8 on the main board (Figure 10 on page 13) and J7 and J8 on the measurement
board (Figure 12 on page 14 and Figure 13 on page 14) are made of two parts. Push down
carefully the black levers on either side of the connector and pull it out securely. Perform all
connections with these connectors unplugged. Once finished, attach the connectors to the boards by
pushing them firmly in place (levers up).
4.7.3 Main board
Figure 10 Main board Figure 11 Connector P8
Connector P8
The numbers listed below refer to the 13 available P8 connections (from left to right) in Figure 11.
1. RS-485 (signal A)
2. RS-485 (signal B)
3. PROFIBUS-DP (GND)
4. PROFIBUS-DP (+ 5 V)
5. PROFIBUS-DP (signal -)
6. PROFIBUS-DP (signal +)
7. PROFIBUS-DP (signal RTS)
8. Not used
9. Not used
10. Not used
11. System alarm relay (N.O.)
12. System alarm relay (N.C.)
13. System alarm relay (Common)
Connector P3
N O T I C E
Network and access point security is the responsibility of the customer that uses the wireless instrument. The
manufacturer will not be liable for any damages, inclusive however not limited to indirect, special, consequential
or incidental damages, that have been caused by a gap in, or breach of network security.
Ethernet RJ 45. Connect the instrument to the local network by passing an ethernet cable through
the ethernet cable gland (gland location illustrated in Figure 1 on page 7) and connecting to the
P3 connector illustrated in Figure 10.
English
13

 Loading...