40
Installing the Switch
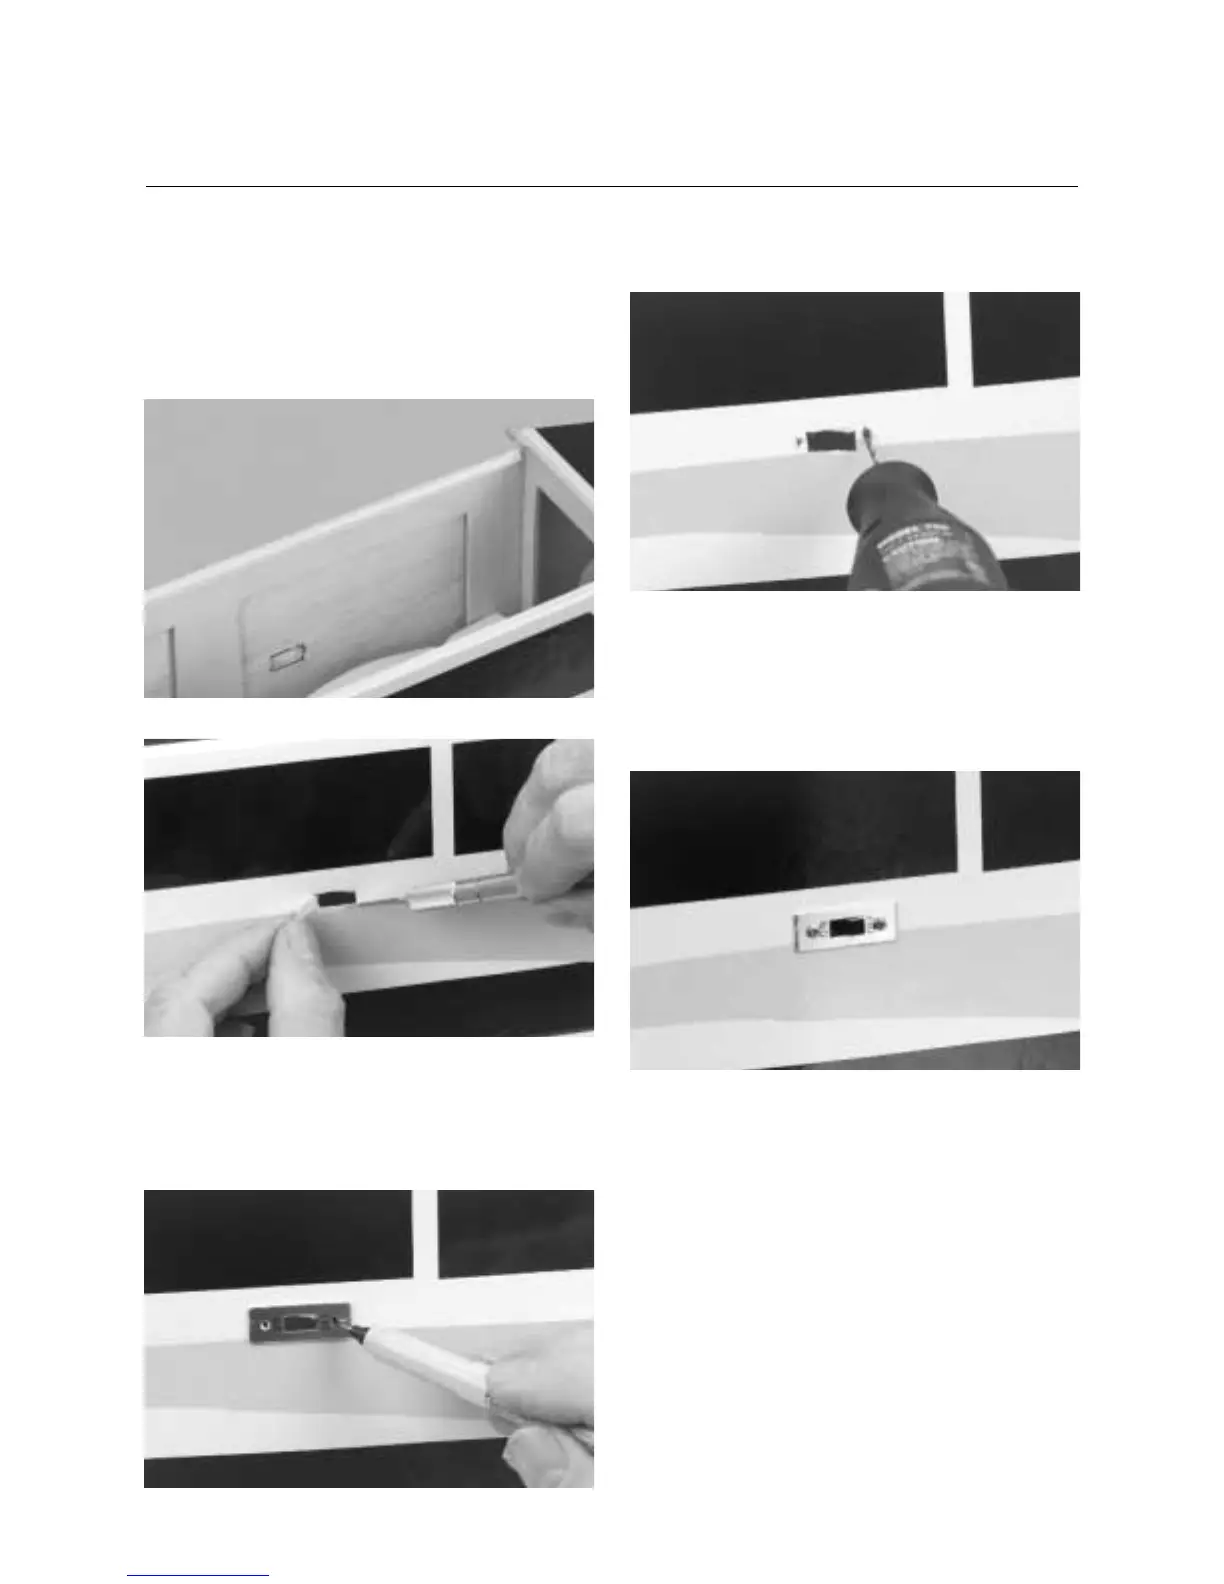
8. The switch should be mounted on the left side of the
fuselage, away from the potentially harmful exhaust gases.
Locate the pre-cut switch mounting hole on the inside of the
fuselage and, using a sharp hobby knife, carefully remove the
covering from this slot.
9. Detach the switch plate from the receiver switch harness.
Center the switch plate over the hole cut in the previous step.
Using a felt tipped pen, mark the screw holes on either end of
the switch plate.
10. Remove the switch plate from the fuselage. Drill the two
mounting holes as marked using a 1/16′′ drill bit.
11. Reposition the switch plate as shown and place the switch
on the inside of the fuselage. Using the two screws supplied with
the switch, attach the switch to the fuselage. The suggested
orientation of the switch is to have the “on” position forward and
the “off” position toward the back.
Section 14: Installing the Radio and Centering
the Servos
CONTINUED