10
Section 2: Joining the Wing Halves
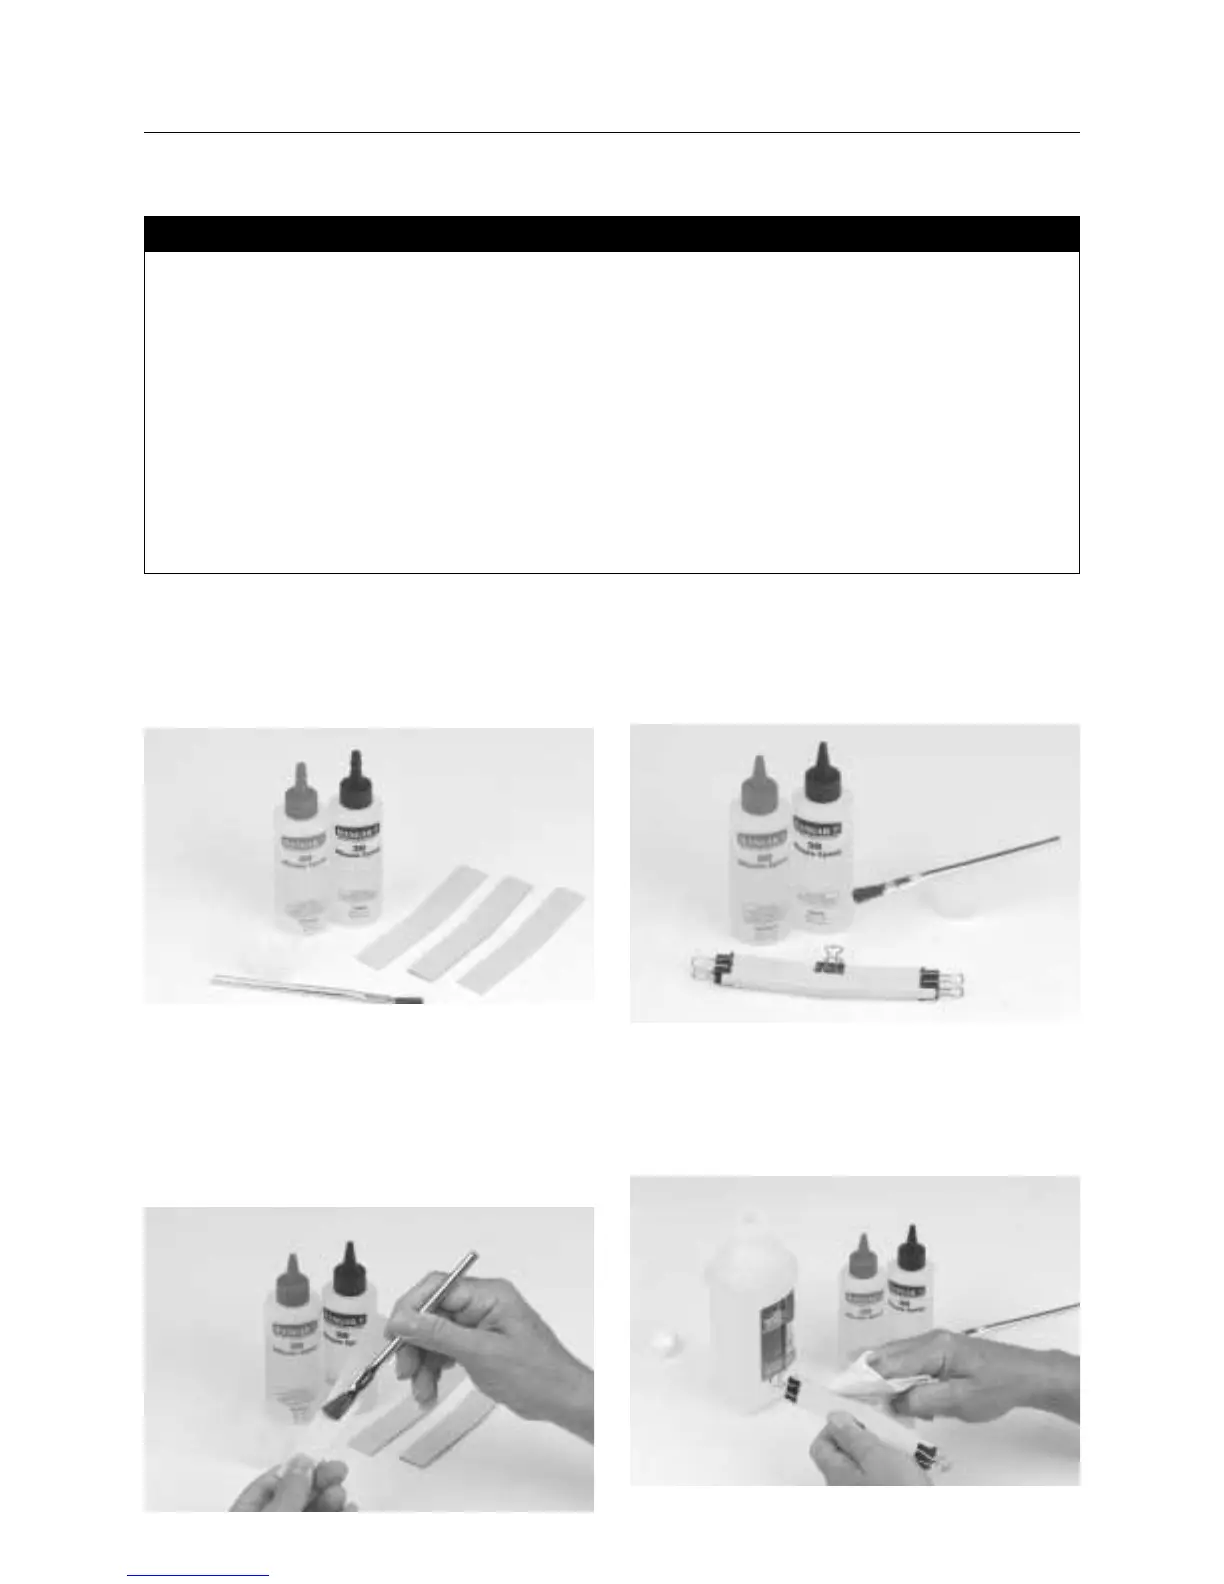
1. Carefully remove the three individual wing joiners from the
die-cut plywood sheet. If necessary, gently sand to remove any
rough spots. Once these are glued together, they will form what
is called the wing dihedral brace.
2. Mix up a small amount, approximately 1/4 oz., of 6-minute
epoxy. Using either a mixing stick or epoxy brush, apply the
epoxy to both sides of one of the wing joiners. Place the
epoxied wing joiner on top of one of the two remaining wing
joiners. Stack the remaining wing joiner on top of the epoxied
wing joiner. Align the upper and lower edges of all three joiners,
as well as the area which has the slight “V” shape.
3. Clamp the three joiners together using four clothespins or
clips. Make sure the joiners remain aligned and the clamps are
firmly attached.
4. Wipe away the excess epoxy using a paper towel and rubbing
alcohol, being careful not to disturb the alignment of the wing
joiners. Note: The excess epoxy should be removed before it
cures.
• Right wing panel from Section One
• Left wing panel from Section One
• Three plywood wing joiners
• 6-minute epoxy
• 30-minute epoxy
• Clips (e.g., clothespins, binder clips (4))
• Rubbing alcohol
• Paper towels
• Masking tape
• Wax paper
• Ruler
• Pencil
• Medium sandpaper
• Mixing stick/epoxy brush
• Felt tipped pen
Parts Needed Tools and Adhesives Needed