34
Section 11: Installing the Nose Gear
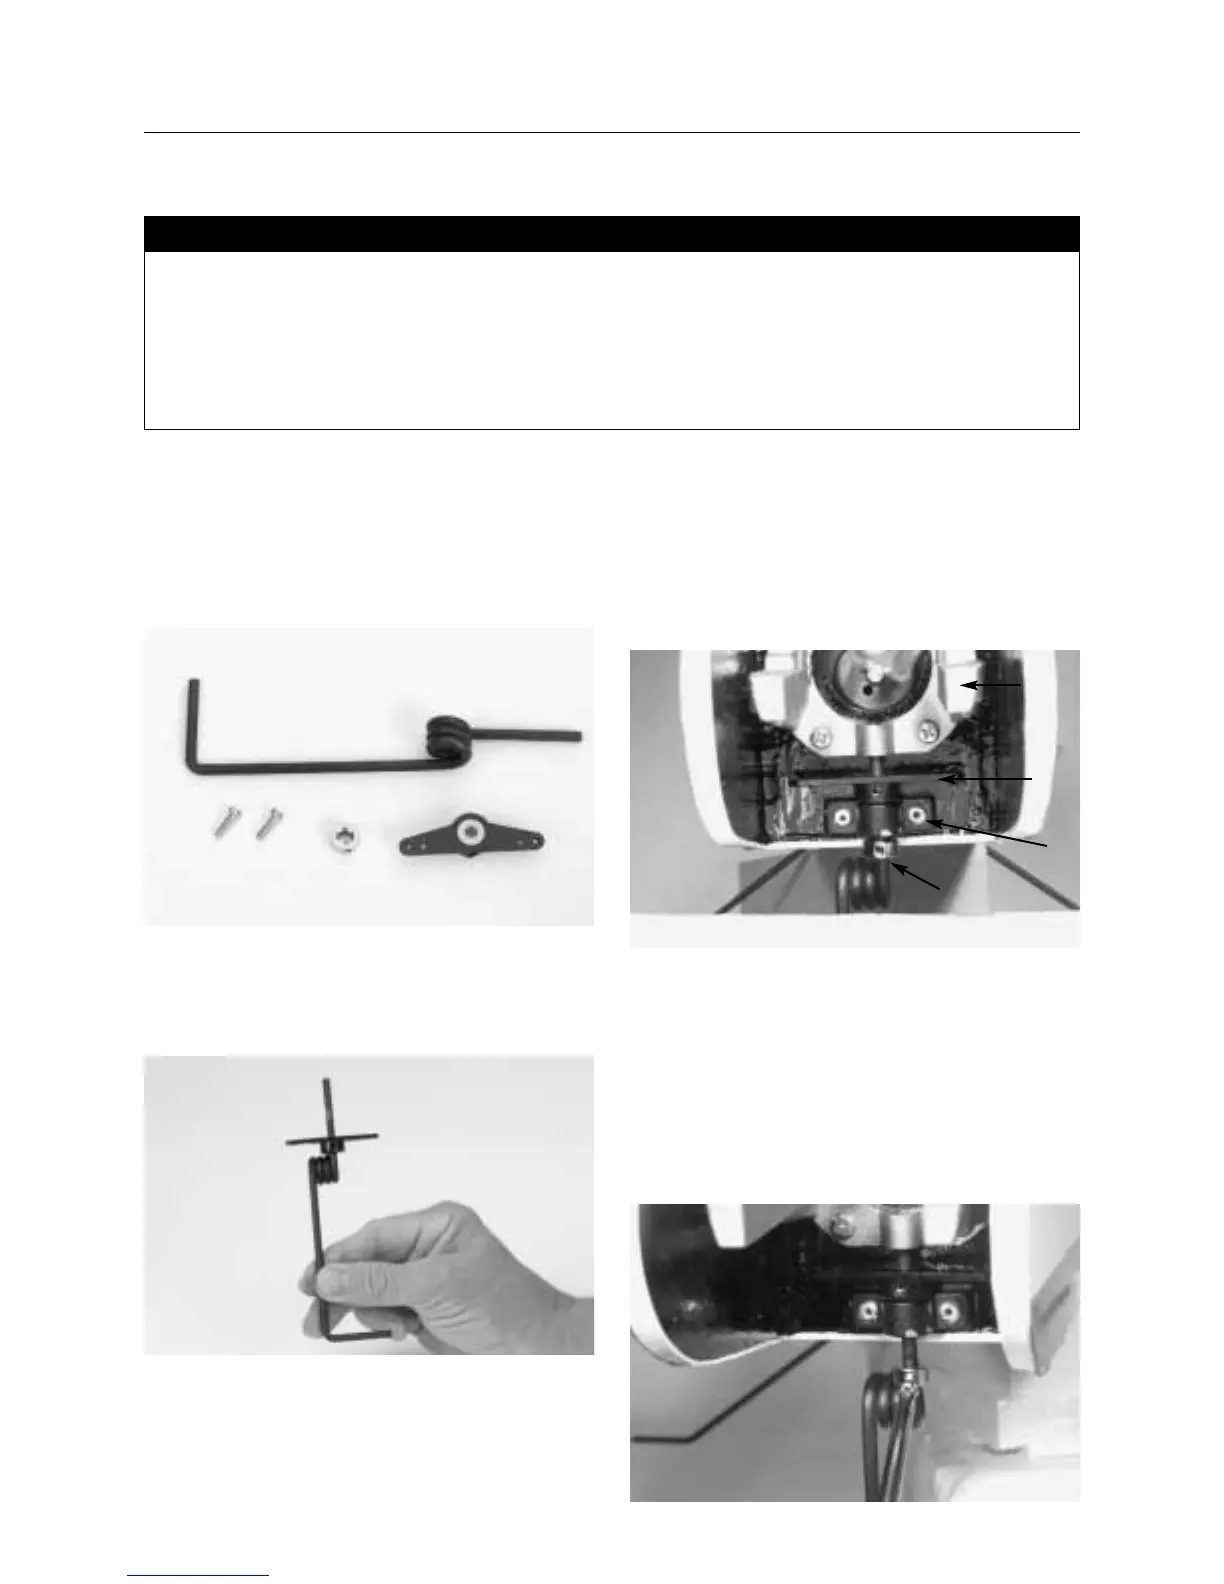
1. The nose gear mount is pre-assembled onto the front firewall
of the fuselage. Locate the nose gear, nose gear control horn,
two 5/32′′ wheel collars, and three 3mm screws. One of the
3mm screws will be used in the nose gear control horn.
2. With the screw hole facing forward, slide the nose gear
control horn onto the straight end of the nose gear. Note the
orientation as shown below.
3. Place a 5/32′′ wheel collar on the nose gear. Insert the nose
gear into the nylon nose gear mount. Insert the nose gear
steering arm onto the nose gear between the nylon motor mount
and metal motor mount as shown. Insert until the coil is just
below the bottom of the fuselage.
4. Adjust the nose gear control horn until the arm is parallel
with the firewall.
Note: The axle of the nose wheel should be parallel to the
firewall as well. Apply thread lock to a 3mm screw and
secure the steering arm in place.
CAUTION: Do not overtighten the 3mm screw as the threads
of the control horn can be easily stripped out.
• Nose gear
• Nose gear control horn with 3mm screw
• 5/32′′ wheel collar with 3mm screw (2)
• Nose wheel (1)
• Plastic spacer (from parts tree)
• Phillips screwdriver (medium)
• Thread lock
Parts Needed Tools and Adhesives Needed
metal motor
mount
nose gear
control horn
nylon nose
gear mount
wheel collar