Section 7: Installing the Tail
23
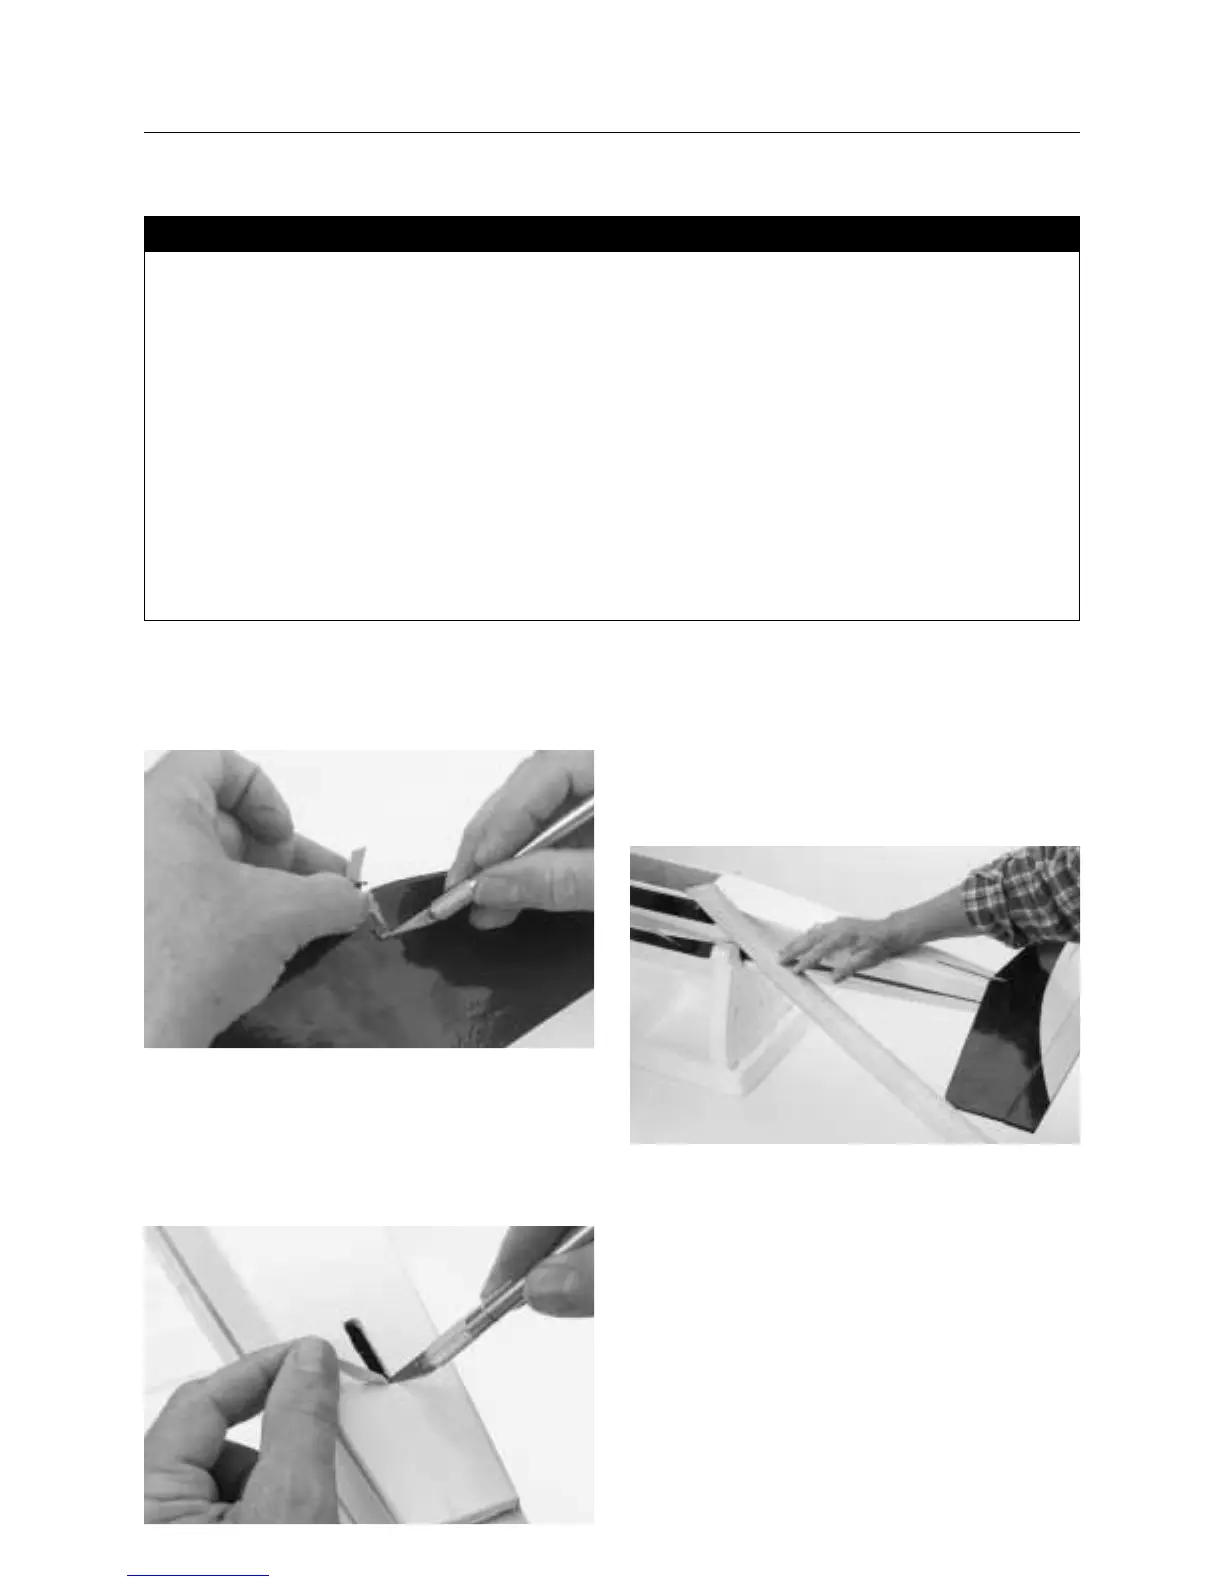
1. Using a hobby knife, carefully cut out the covering at the front
of the horizontal stabilizer slot as shown. The vertical stabilizer
will be inserted into this slot later.
2. On the rear of the fuselage, slots are pre-cut for the vertical
stabilizer and the rudder pushrod exit. Using a sharp hobby knife,
carefully cut out the opening for the vertical stabilizer. The
opening for the rudder pushrod will be cut out later in
Section15, Step 18.
3. Trial fit the horizontal stabilizer in place on the fuselage.
Check the alignment of the horizontal stabilizer by measuring
from a fixed point along the center line of the fuselage to the
leading edge on each side of the horizontal stabilizer. The
distance to the tip of the horizontal stabilizer must be equal on
both sides. If it’s not, adjust the stabilizer until the
measurements are the same.
• Fuselage
• Wing
• Horizontal stabilizer with elevator
• Vertical stabilizer with rudder
• 30-minute epoxy
• Hobby knife with #11 blade
• Straight edge
• Pencil
• Felt tipped pen
• Masking tape
• T-pins
• Rubbing alcohol
• Paper towels
• Epoxy brush
• Mixing stick
• 90 degree triangle
• Ruler
• Airplane stand (optional)
Parts Needed Tools and Adhesives Needed