24
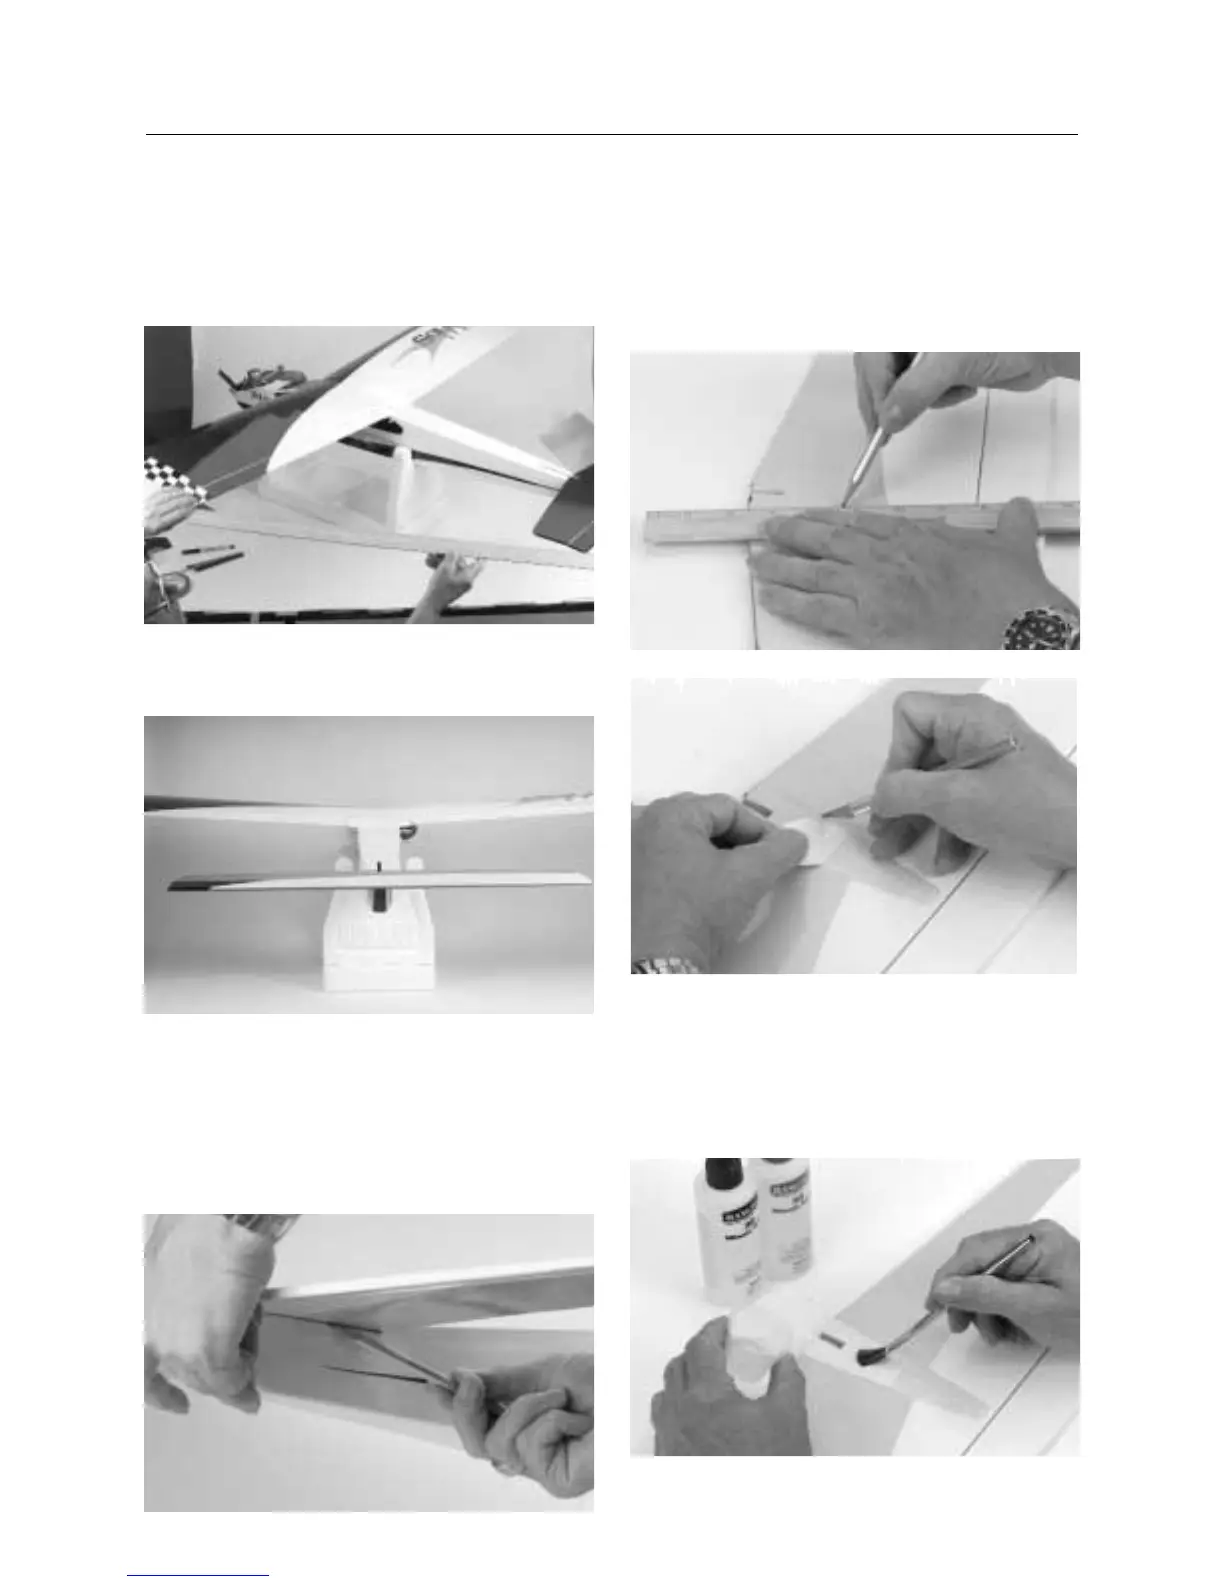
4. Install the wing, then check the alignment of the horizontal
stabilizer by measuring from a fixed point on the wing (tip of
wing) to the tip of the elevator. Both right and left dimensions
should be the same.
5. Sight the stabilizer alignment from the rear of the airplane,
making sure the stabilizer is exactly level with the wing.
6. When you’re satisfied with the alignment, use a pencil to
carefully trace around the bottom of the stabilizer where it meets
the fuselage.
Note: It’s important not to disturb the alignment of the
stabilizer. The pencil should leave a light indentation
in the covering.
7. Remove the horizontal stabilizer from the fuselage. Using a
straight edge make sure the lines drawn are straight. Using a
sharp hobby knife, carefully cut away the covering inside the
lines marked above. Be careful not to cut into the wood as doing
so will weaken the structure.
8. Mix approximately 1/8 ounce of 30-minute epoxy to install
the horizontal stabilizer. Using an epoxy brush or mixing stick,
spread epoxy onto the bottom of the horizontal stabilizer along
the area where the covering was removed in the previous step
and to the fuselage where the horizontal stabilizer mounts.
CONTINUED
Section 7: Installing the Tail
 Loading...