Page 14 of 26 CUS-013-0044-01
Loading and Unloading the Rotisserie
CROSS CONTAMINATION OF RAW ONTO COOKED PRODUCT IS VERY DANGEROUS.
DO NOT LOAD UNCOOKED PRODUCT INTO THE ROTISSERIE UNTIL COOKING CYCLE IS
COMPLETE AND ALL COOKED PRODUCT IS REMOVED FROM THE ROTISSERIE.
USE PROTECTIVE CLOTHING WHEN LOADING AND UNLOADING THE ROTISSERIE.
4.4.1. Loading the Skewers
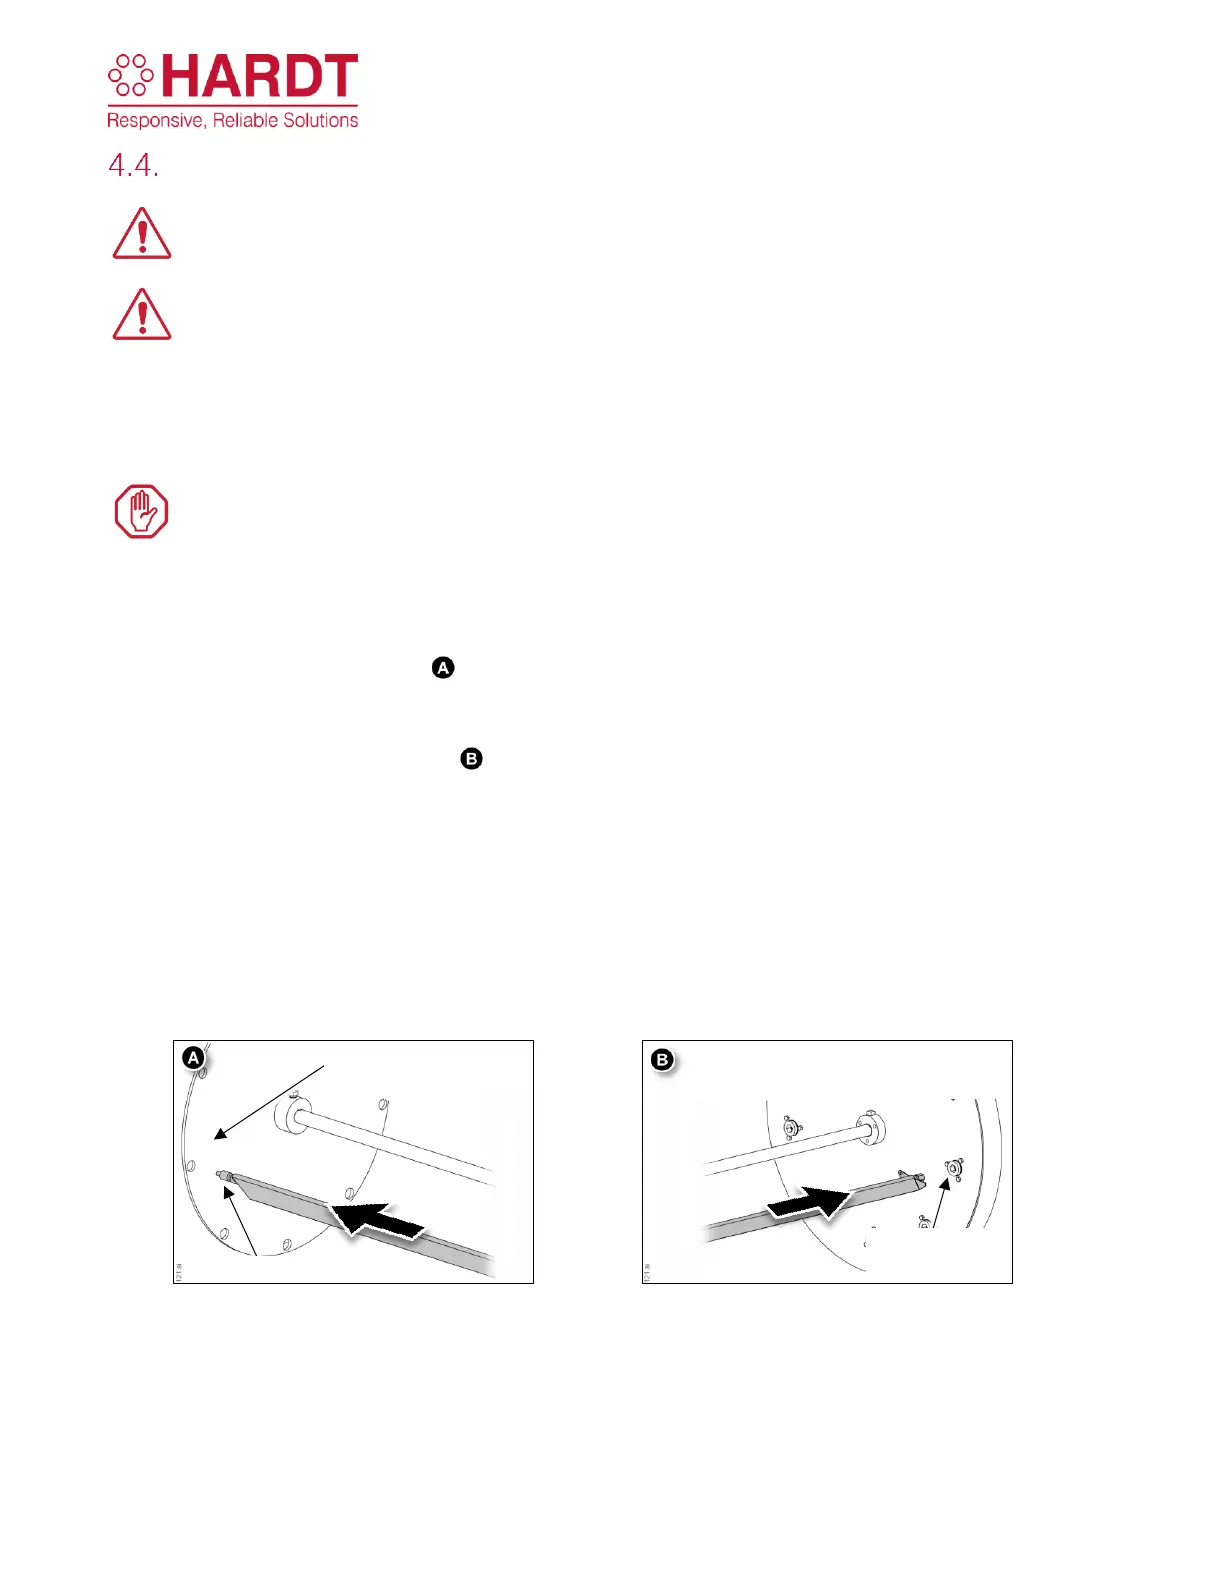
When the rotisserie reaches operating (preheat) temperature, skewers can be loaded.
Follow these steps to properly load skewers into the rotisserie.
The orientation of the skewer in the socket will vary depending on the model of your equipment.
Follow these steps to properly load skewers into the rotisserie.
1. Open the door to stop the drive rotation. Use the green manual advance switch to position the drive
assembly as required.
2. As indicated in diagram ‘ ’ below, insert the pointed end of the skewer into a hole in the plate on
the left side of rotisserie.
3. Align the other end of the skewer with the corresponding socket on the right plate and push it into
place as shown in diagram ‘ ’. Each skewer can only be inserted one way.
4. Slide the skewer back to the left until the shoulder at the left end of the skewer is snug against the
left side support plate.
5. Check that the skewer is secured in position (holds in place).
6. Advance the drive to another position using the green manual advance and try to ensure a balanced
load. Repeat steps 1-5 as required.
7. Close the door, select the proper cooking time and the rotisserie will begin to cook.
8. After loading, wipe the door handle, control panel, switches and anything that may have come in
contact with raw product.
Figure 4-3
PUSH SKEWER INTO HOLE IN THE RIGHT
DRIVE PLATE THEN RE-ADJUST FOR
SKEWER’S LEFT SHOULDER CLEARANCE
SLIDE SKEWER INTO THE
SUPPORT PLATE