Page 18 of 26 CUS-013-0044-01
5. Maintenance
ENSURE YOU ARE WEARING INSULATED GLOVES AND AN APRON AT ALL TIMES WHEN
WORKING WITH A HOT OVEN.
Allow a period of time for the rotisserie to reach a safe-to-touch temperature, but ensure that the
oven is still warm to facilitate easier cleaning.
5.1. Daily Cleaning
5.1.1. Beginning of the Day
Ensure that the entire rotisserie is clean by referring to the images in section 5.1.4 Cleanliness
Evaluation on page 19. If it is not clean, follow the on-site cleaning laminates or refer to the Cleaning
at the End of the Day instructions found below in section 5.1.3.
5.1.2. Cleaning Throughout the Day
It is recommended to clean the inner glass with a soft, damp cloth after every cooking cycle. This will
lead to optimal cleaning results without scratching the glass. Do not use scouring pads or abrasive
cleaners on glass. Refer to section 5.3.1 Guidelines for Cleaning Glass Surfaces for detailed
guidelines.
5.1.3. Cleaning at the End of the Day
It is recommended to clean the rotisserie at the end of the business day, after all cooking has been
completed.
ENSURE YOU ARE WEARING INSULATED GLOVES AND APRON AT ALL TIMES WHEN WORKING
WITH THE HOT ROTISSERIE.
1. Push in the main ON/OFF red switch and allow sufficient time for the rotisserie to cool until internal
surfaces are warm to the touch.
2. Open the door.
3. Remove any large pieces that are left on the bottom of the water pan.
Do not push solid debris into the drain.
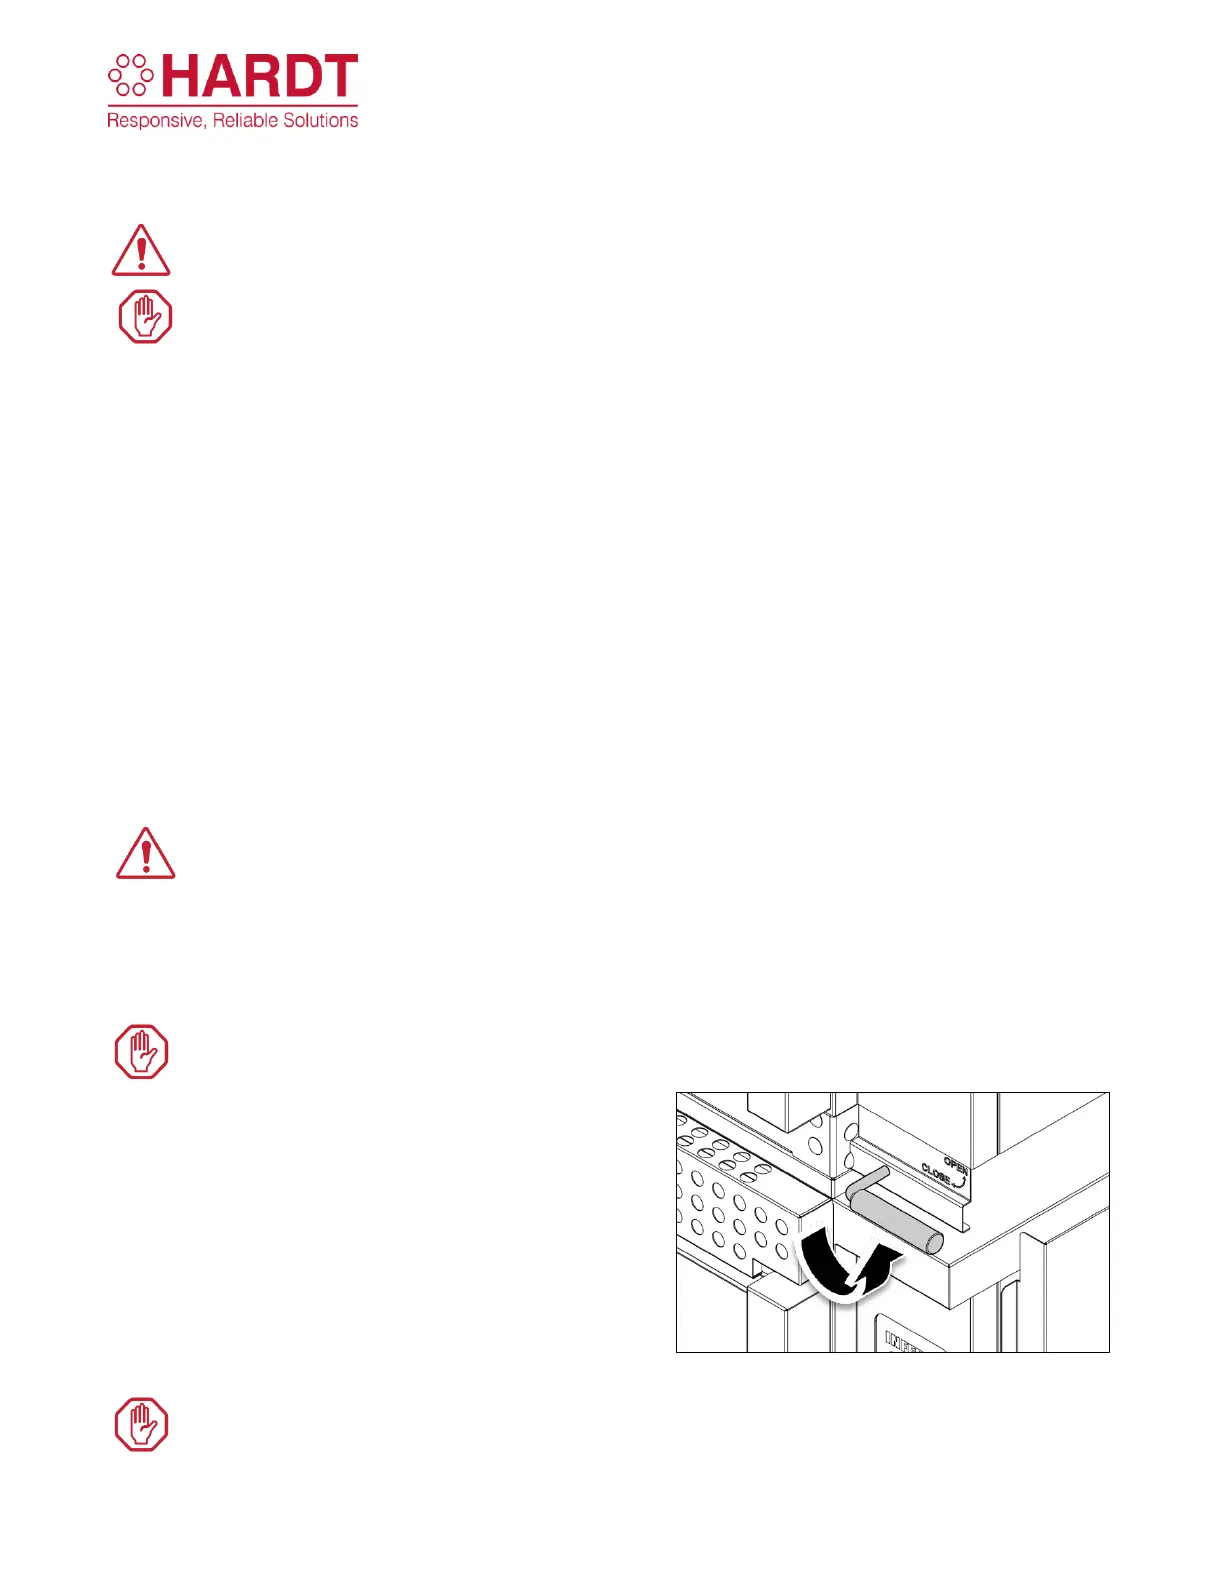
4. Ensure that an empty grease shuttle or a bucket is
positioned under each oven’s drain.
5. Drain the water pan by turning the drain handle to
“OPEN”.
6. Remove debris and add water to help float away
remaining residues in the water pan.
7. Spray a Hardt-approved oven cleaner on all major
surfaces (drive plate, spit support, shaft, water
pan, and side walls as shown in Figure 5-2); let it
settle for 15 minutes.
Do not spray directly onto the flame sensor or igniter!