22
P35i Fireplace Insert
Pellets or Corn/Pellet Mixture Only
Save These Instructions
3-90-775R15_04/13
L. Optional Log Kit
Ceramiclog#3-40-674099
LogBracketKit#1-00-774401
Removethetwoboltsfromtheairmanifoldbelowtheglass
opening. Install thelog bracketusing the sametwo bolts.
Placethelogontothebracketwiththesmallertwigspointing
backtowardtheburnpot.
J. Optional Trim Kit- #1-00-00775-*
The trim kit option includes a door frame and an ash lip
trim.Toinstalltheashliptrim,simplyslideitovertheash
lipfromthefront.Youcansecureitwithafewdabsofhigh
temperature silicone, if desired. To install the door trim,
followthesesteps.
• Removethedoorlatchbylooseningthesmallset-screw
andtappingouttherollpin.
• Remove the door
by lifting it off of
the hinges. Lay it,
face down on a at
surface.
• Locate and drill
the dimpled holes
in each corner of
the door, using the
provideddrillbit.
• Installthetrimframe
with the threaded
studs through the
holes in the door, and secure it with the four nuts
providedinthekit.
Set-screw
RollPin
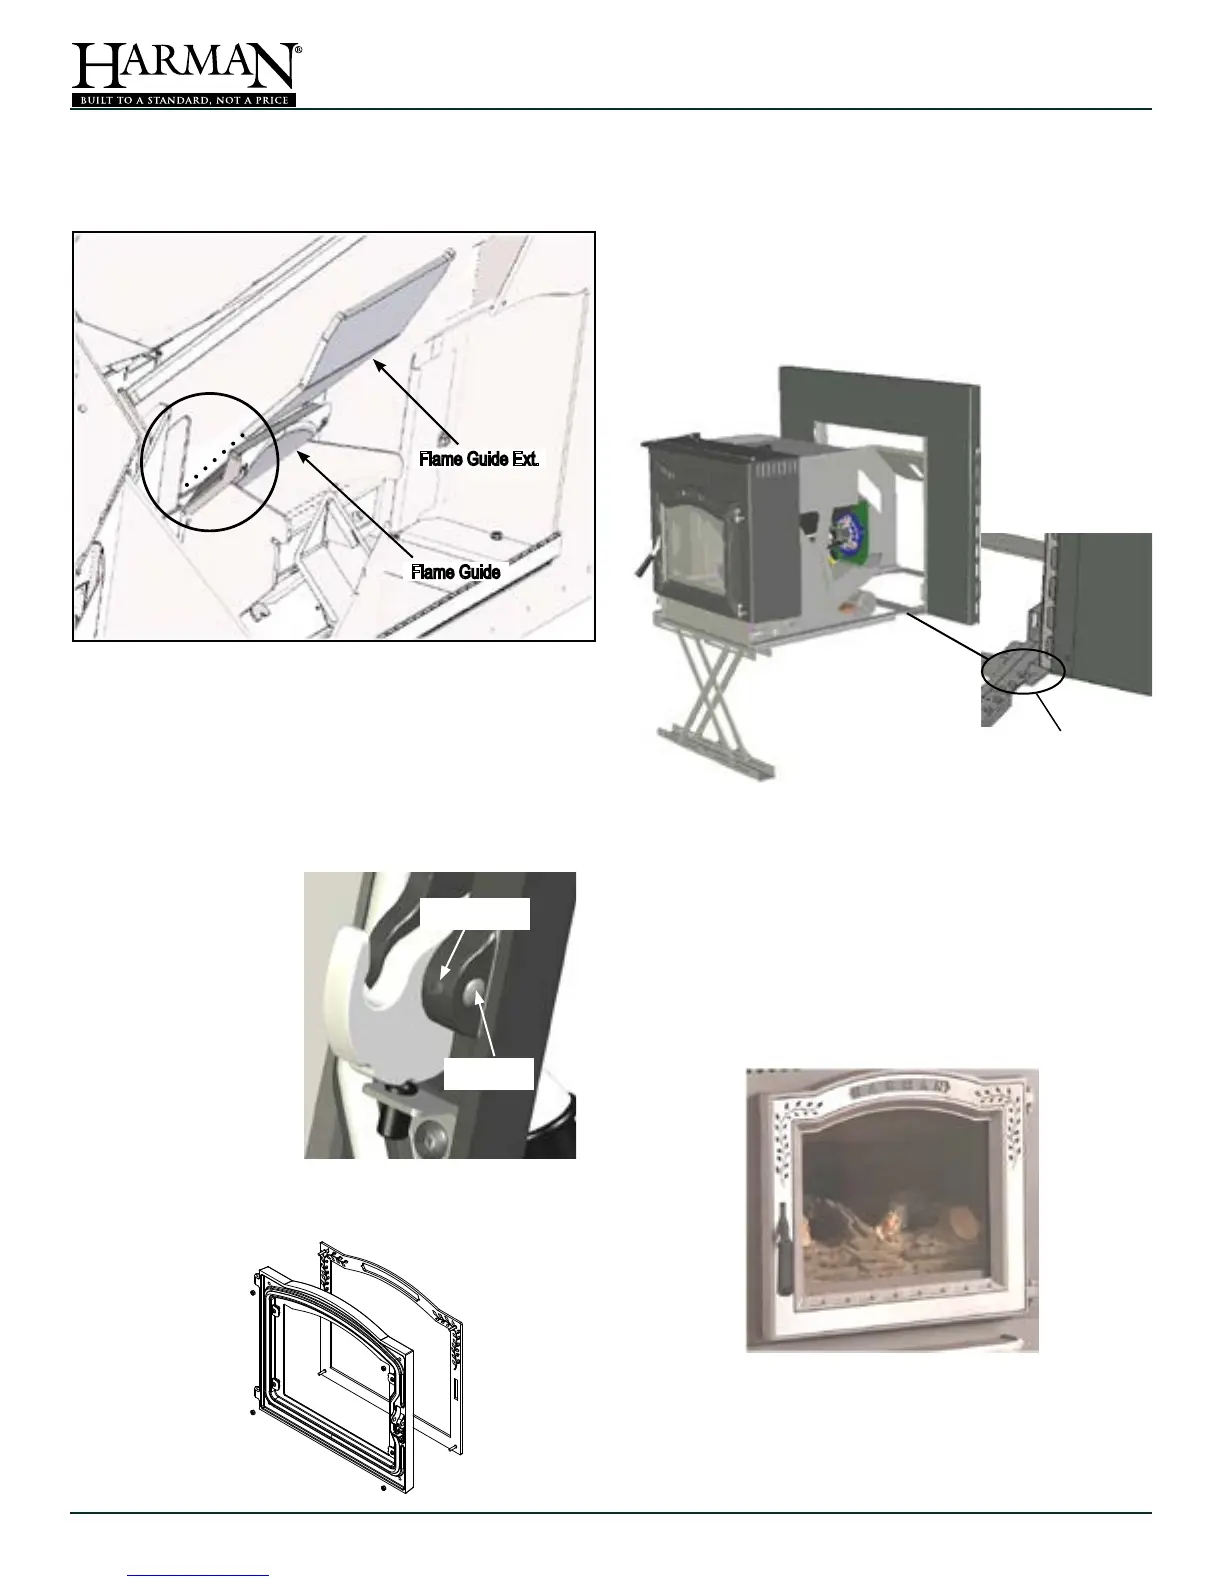
K. Service Rail Kit- #1-00-774125
The Service Rail Kit is used to support the insert body
whileitispulledoutofthemountingframeforcleaningor
service. Used only with a raised hearth installation, it is
easilyadjustabletoaheightrangeof4"to14".Assemble
the railkit using theprovided instructions.After removing
theAshPancover,therails attachtothemountingframe
with four bolts. There are even stop bolts on the rails to
preventaccidentalroll-off.
*Trimnishsufx;
4=Gold
7=BrushedStainless
8=BrightNickel
Two bolts on each side
secure the rail kit to the
mounting frame.
I. Flame Guide Extension
Once ame guide is installed the Flame Guide Extension
shouldbeinstalledbyslidingitinbehindtheameguideas
shownbelow.
Flame Guide Ext.
Flame Guide
Please Note; The decorative log is fragile and must be
handledwith care.The abrasive natureofpellet ash may
cause the log to deteriorate. Therefore, the log is not
coveredundertheappliancewarranty.

 Loading...