1.57
1.57
MAINTENANCE
CUTTERBLADES
Cutterblade Removal
WARNING: PREVENT ACCIDENTS - ALWAYS switch off the engine, apply the parking brake
and remove the ignition key before working on the cutterblades. The cutterblades have sharp
edges. Wear strong gloves to protect the hands when working on the cutterblades.
DO
NOT operate tools towards the cutting edges to avoid the risk of injury should the tool slip.
Always use genuine Hayter replacement parts.
The condition of the cutterblades and their mountings should be checked regularly for signs of wear or
damage. Ensure that the cutterblades are not bent or cracked.
IMPORTANT: PREVENT DAMAGE - Damaged or excessively worn cutterblades will cause the
cutting mechanisms to be out of balance. This will cause excessive vibration and may lead to
breakage. DO NOT use unbalanced cutterblades.
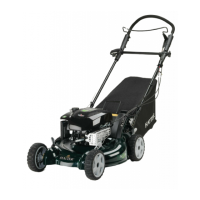
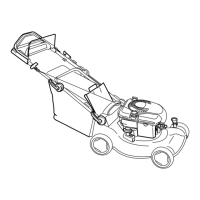
To remove and replace the cutterblades on Wing Decks & Front Deck.
1. Raise front deck and wing decks to the transport position and engage the latches and safety locks.
2. Switch off the engine, apply the parking brake and remove the ignition key.
3. Remove the cutterblade assembly by first bending the cutterbar lock tabs (6) and unscrewing bolts
(item 1) and withdrawing from the deck/motor. Note: The motor keys (items 5) are loose within
the mounting (items 4), refer to P1.58.
4. Remove the bolts (items 2) and lift away the Cutterblade mounting (items 4) and locating ring
(items 3) from the cutterblade and discard cutterblade.
5. Re-assemble the new cuterblade using new fasteners (items 1 and 2) and cutterblade
locking tab (item 6) by following the removal procedure in reverse order.
Ensure the correct fitment of components as illustrated on P1.58.
Torque fixing bolt (item 1) to 40Nm(30 Ibf.ft) - 55Nm(40 Ibf.ft). Then lock bolt (item 1) by
bending the cutter bar lock tabs around the bolt head .
6. Carry out steps 1 to 5 to all other Cutterblade assemblies as required.
 Loading...