34 USE ONLY GENUINE REPLACEMENT PARTS
WINTERIZATION:
In moderate climates, the heater can continue to operate during short-term cold spells. Do not use the heater to maintain the water
temperature just above freezing or for freeze protection. Care must be taken to avoid freeze-up in the heater. When it is used during
freezing weather, the pump must run continuously. The heater is not warranted against freeze-ups. In regions where freezing
temperatures are encountered, all water must be drained from the heater when it is out of service to prevent damage to the heater
and piping. Draining the heat exchanger is recommended as part of the season’s shutdown procedures.
NOTICE: A heater damaged by freezing is not covered under the manufacturer warranty.
DRAINING THE HEAT EXCHANGER: This procedure applies to installations where the heater is located higher than the pool water
level. If it is necessary to drain a pool heater located below the pool water level, you must either partially drain the pool, or isolate
the pool heater from the pool using valves, then follow these steps.
1. Set the heater to STANDBY mode using the keypad.
2. Turn the electricity to the heater OFF at the circuit breaker panel.
3. Turn the heater gas valve OFF using the knob or switch on the valve (see Figure26).
4. Turn the heater’s gas supply OFF at the main shut-off valve outside the heater cabinet.
5. Be sure the circulating pump is OFF.
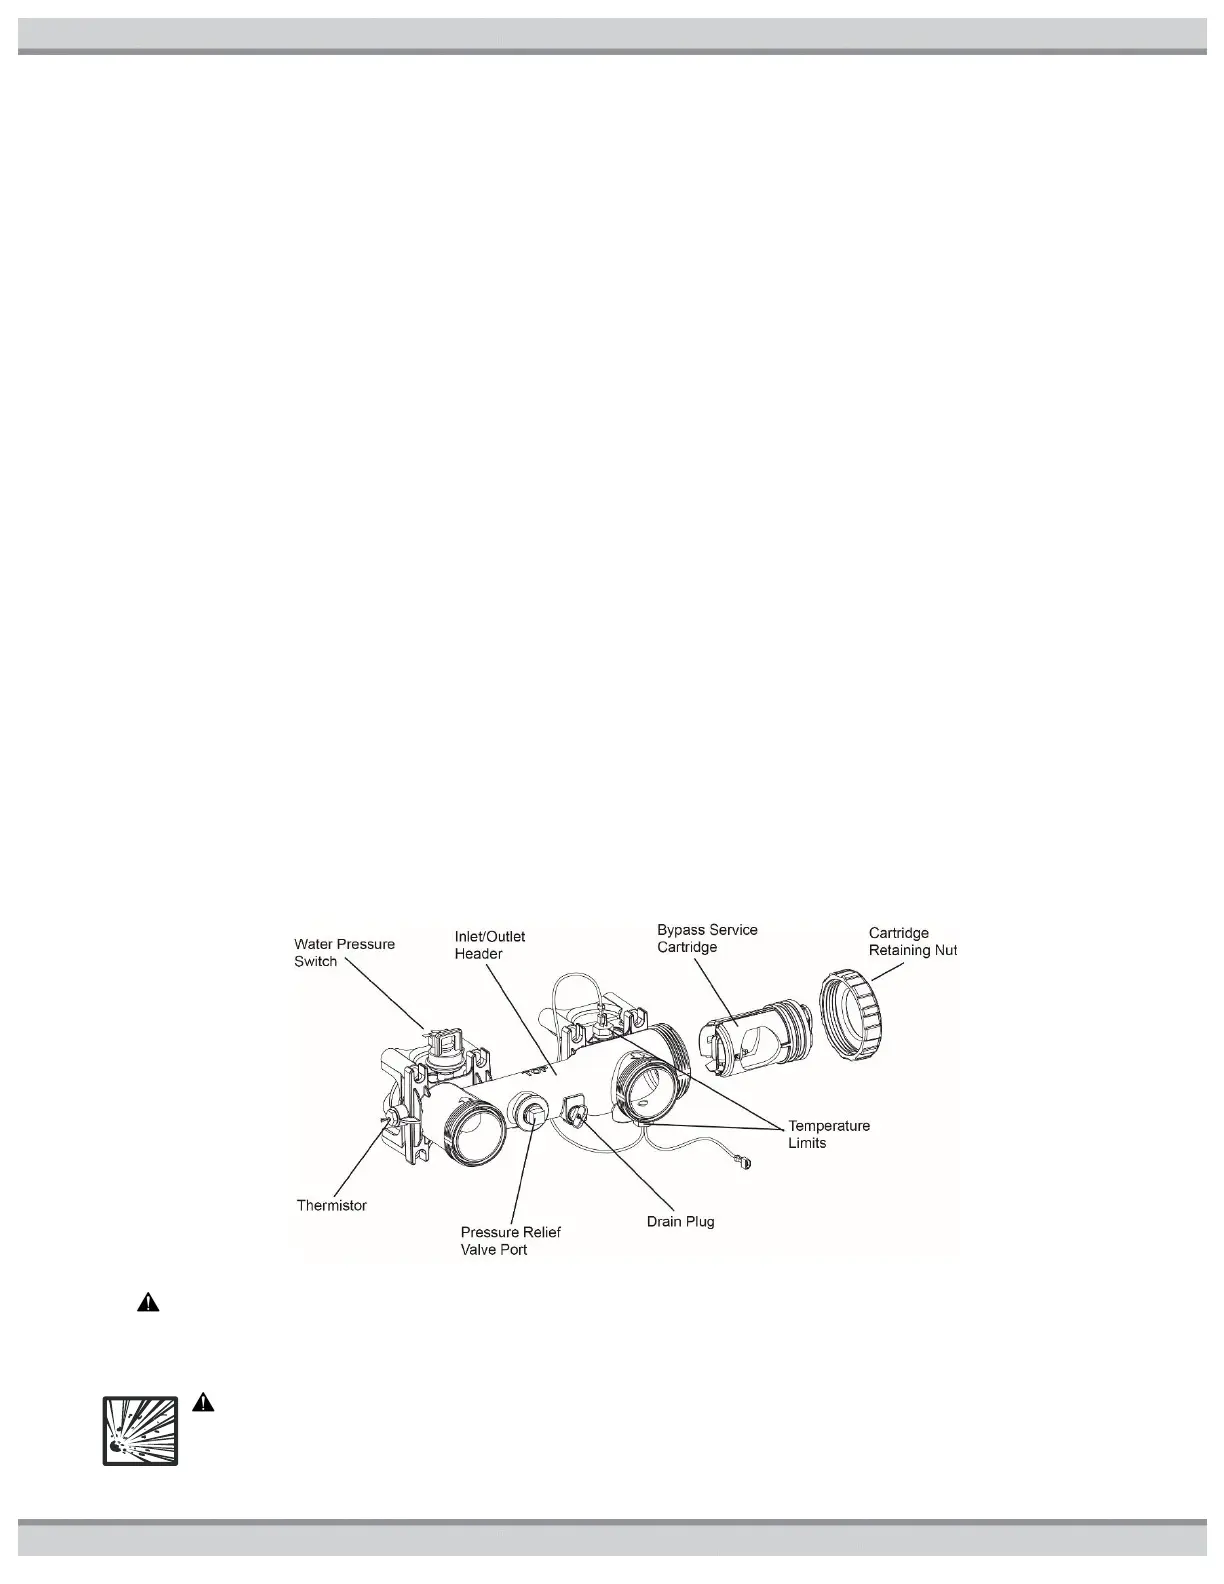
6. On models with plastic headers, remove the plastic drain plug (see Figure28). On models with bronze headers (ASME models),
open the brass drain valve located on the header (see Figure21).
7. Allow all water to drain from the heater.
8. On models with plastic headers, re-install the plastic drain plug. On models with bronze headers (ASME models), close the
brass drain valve located on the header.
SPRING START-UP: This procedure should be performed annually to ready your heater for the upcoming season. In addition to
the steps outlined below, it is recommended that a PERIODIC INSPECTION also be performed.
1. Inspect and clean the heater, being sure the heater is free of leaves and debris prior to startup.
2. Be sure inlet and outlet piping are properly attached to the heater and the drain valve is closed.
3. Turn the filtration system pump “ON” and allow the system to run long enough to purge all the air from the lines.
4. Turn the gas supply to the heater “ON”.
5. Set the temperature control using the keypad to “POOL” or “SPA” and adjust the set point to the desired temperature setting.
6. If operating difficulties are encountered, contact a qualified service company for assistance.
Figure28: Heat Exchanger Header
COMPONENT SERVICE
WARNING: Only qualified service technicians, with appropriate test equipment, should be allowed to service the heater.
All of the components that comprise the system have an effect on heater operation. Before proceeding with heater related
troubleshooting tips, be certain that the pump is operating correctly, the filters and strainers are not blocked, the valves in
the piping are properly positioned, and the time clocks are properly set.
WARNING: EXPLOSION HAZARD Do not attempt to repair broken or faulty components of this heater. Do not
modify the heater or its components in any manner. To do so may result in a malfunction that could result in death,
personal injury, or property damage. Check with the pool owner to see if any part of the heater has been under
water. Replace any electrically operated component that has been under water.
 Loading...