Page
15
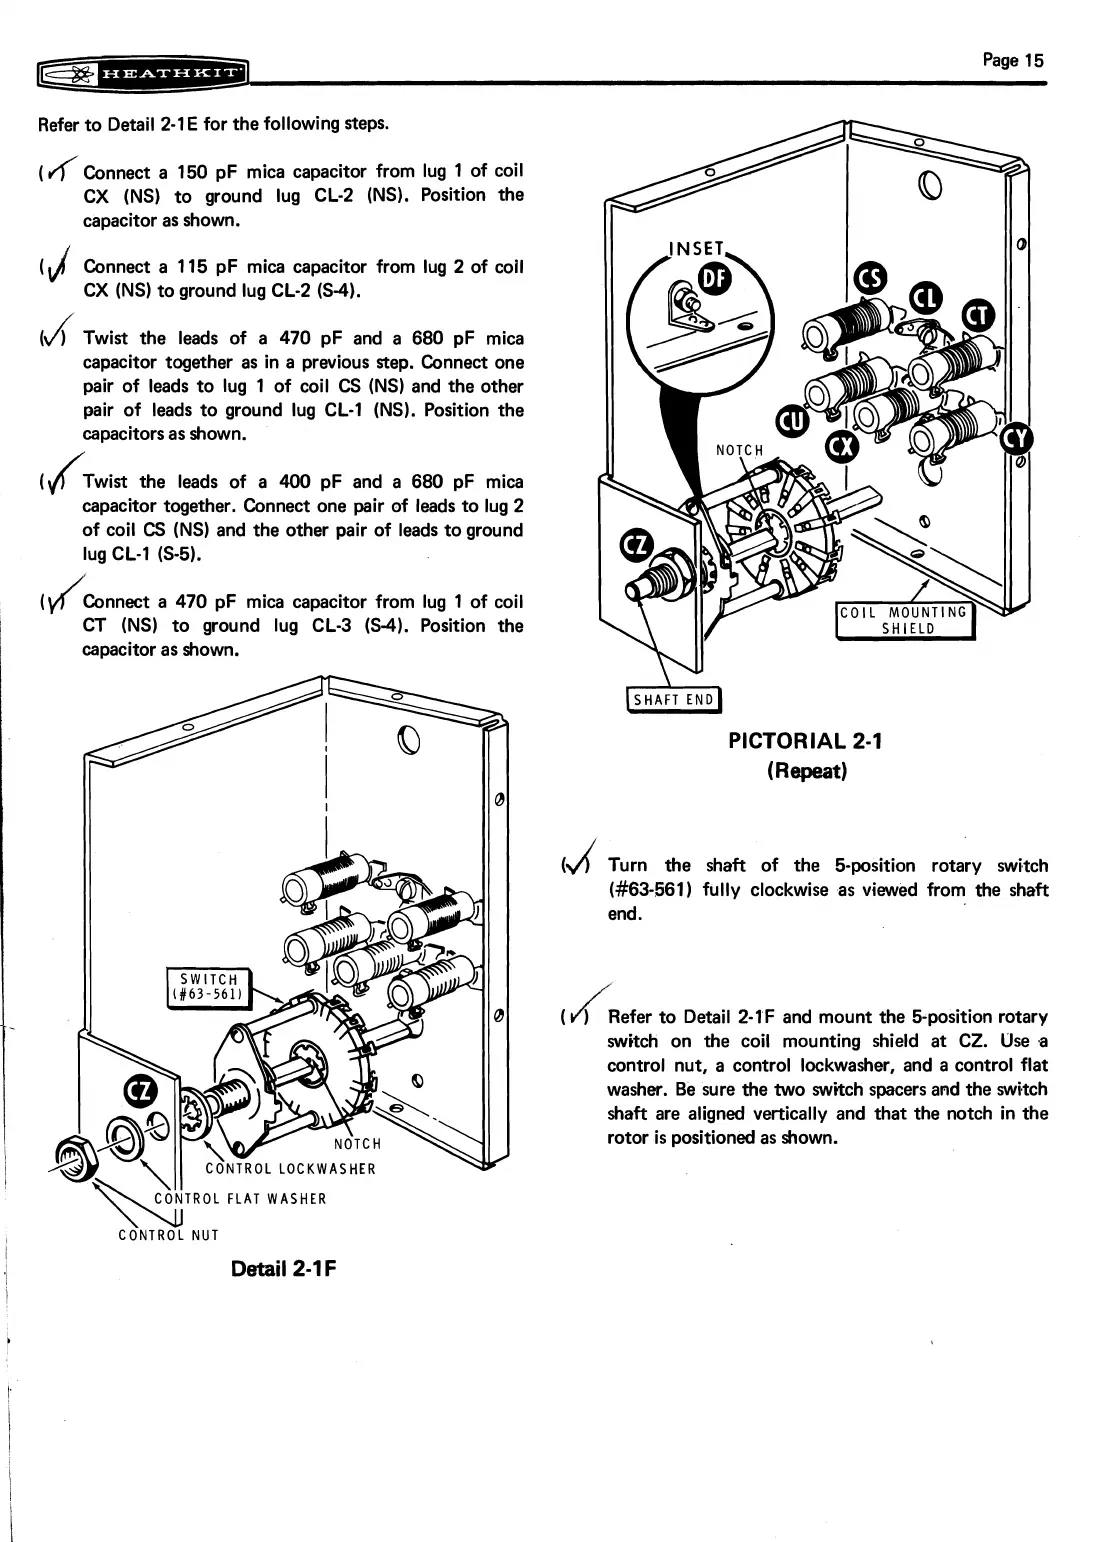
Refer to Detail 2-1
E
for the following steps.
(
Jf
Connect a
150
pF mica capacitor from lug
1
of coil
CX
(NS)
to ground lug CL-2
(NS).
Position the
capacitor as shown.
(4
Connect a 115 pF mica capacitor from lug
2
of coil
CX
(NS)
to ground lug CL-2
(S-4).
Id
Twist the leads of a
470
pF and a
680
pF mica
capacitor together as in a previous Rep. Connect one
pair of leads to lug
1
of coil
CS
(NS)
and the other
pair of leads to ground lug CL-1
(NS).
Position the
capacitors as shown.
(4Twist the leads of a
400
pF and a
680
pF mica
capacitor together. Connect one pair of leads to lug
2
of coil
CS
(NS)
and the other pair of leads to ground
lug CL-1
6-5).
(y/Connect
a
470
pF mica capacitor from lug
1
of coil
CT
(NS)
to ground lug CL-3
(S-4).
Position the
capacitor as shown.
PICTORIAL
2-1
(Repeat)
(d
Turn the shaft of the bposition rotary switch
(#63-561)
fully clockwise as viewed from the shaft
end.
J
(
)
Refer to Detail
2-IF
and mount the 5-position rotary
switch on the coil mounting shield at CZ. Use a
control nut, a control
lockwasher, and a control flat
washer. Be sure the two switch spacers
and the switch
shaft are aligned vertically and that the notch in the
rotor
is
positioned as shown.
CONTROL
FLAT
WASHER
\\
Detail
2-1
F