ENDE
Operating Instructions • Overhead Suspension AT2000 CPK • 03/2020 • 106-29021
Installation and initial operation
10
5.6 Installing the power supply unit with control
box
The following installation steps also apply for standard
power supply units without control box.
1
2
5
4
3
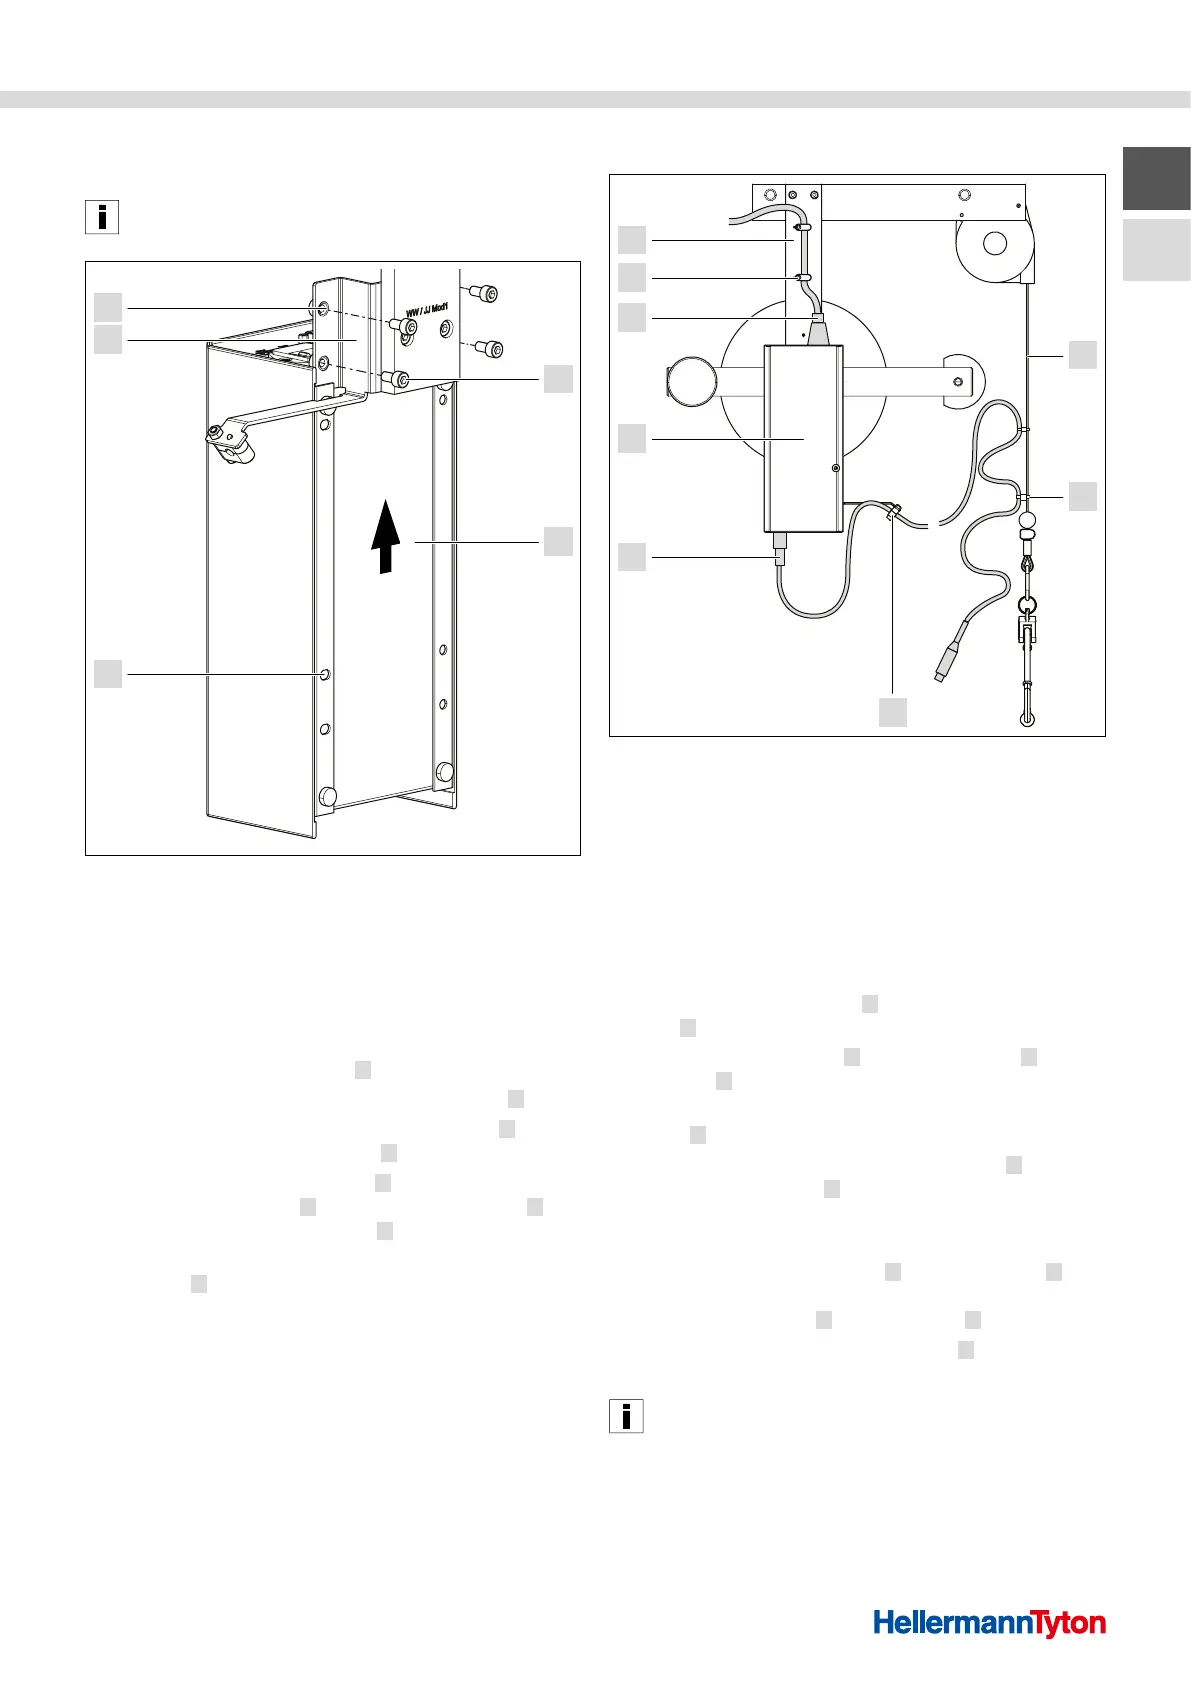
Installing the power supply unit with control box
1 Fixing screws (power supply unit bracket)
2 Power supply unit with control box
3 Holes for power supply unit
4 Power supply unit bracket
5 Holes for power supply unit bracket
1 Loosen and remove the four fixing screws
(power supply unit bracket) 1 .
2 Install the power supply unit with control box
2 .
f Push the power supply unit with control box
2 over
the power supply unit bracket 4 from below.
f Make sure that the four holes
3 on the power supply
unit with control box 2 are flush with the holes 5 on
the power supply unit bracket 4 .
f Insert the four fixing screws (power supply unit
bracket)
1 through the holes and tighten by hand.
; The power supply unit with control box is installed.
5.7 Connecting the CPK power supply unit
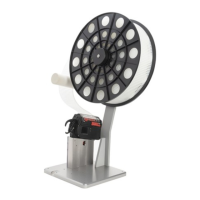
3
2
1
6
5
4
7
8
Connecting the CPK power supply unit
1 Balancer (cable pull)
2 Clips (balancer)
3 Spacer
4 Connection cable
5 Power supply unit
6 Power cable
7 Clips (column)
8 Column
1 Connect the power cable 6 to the power supply
unit 5 .
2 Fasten the power cable
6 along the column 8 using
the clips 7 .
f Make sure that the power cable is routed without
kinks
6 .
3 Connect the tool to the power supply unit
5 with
the connection cable
4 .
f Observe the operating instructions for the
Autotool2000CPK.
4 Clamp the connection cable
4 onto the spacer 3 of
the power supply unit bracket and fasten it along the
balancer (cable pull) 1 using the clips 2 .
f Make sure that the connection cable
4 is routed
without kinks.
The connection cable between the tool and the power
supply unit with control box must be fastened loosely on
the balancer to be able to compensate for possible
movements.
; The tool and the power supply unit are connected.