Commissioning
16
Commissioning
Handling of reagents
Adhere to the respective safety data sheet!
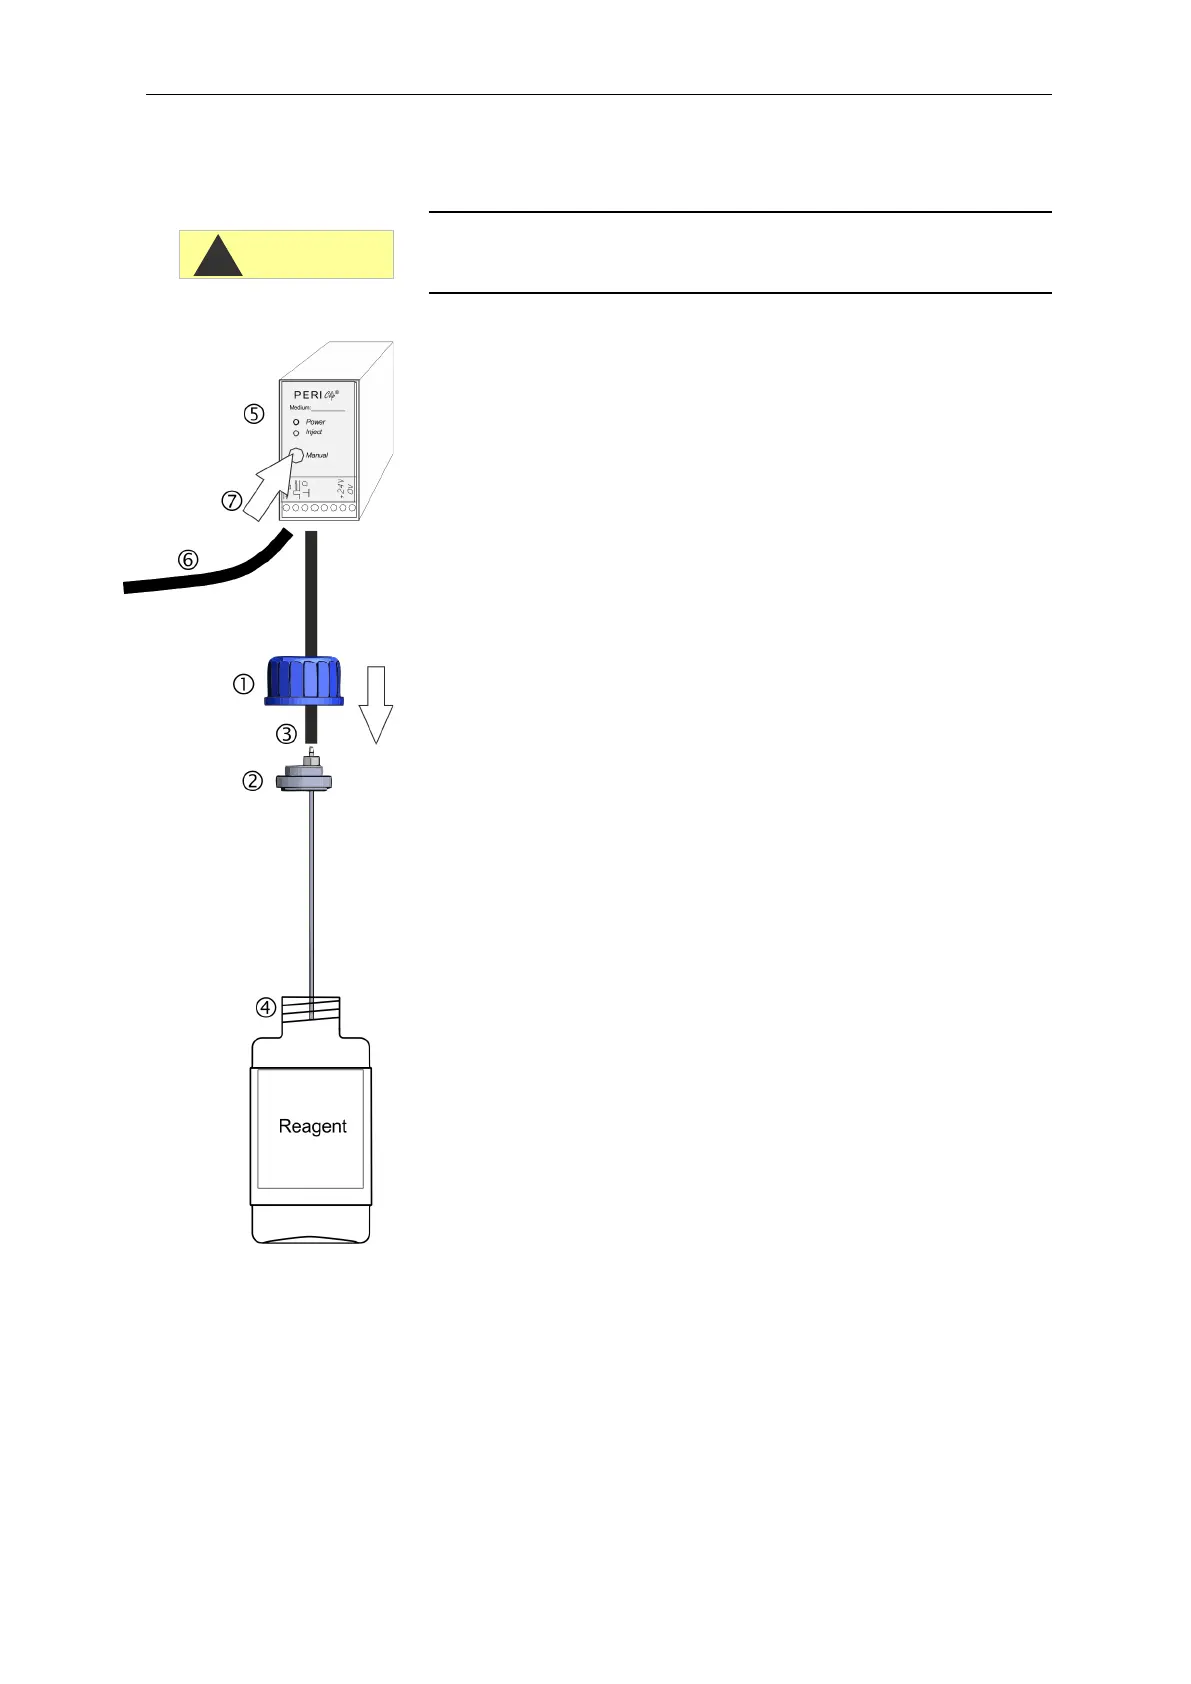
Inserting the reagent bottles
Open the lower housing door by pulling on the right-hand side.
Remove the cap from the indicator bottle.
Remove the plastic bag from inside the lower housing door. The
plastic bag contains the screw cap with hole and the insert
for the screw cap for each bottle.
Place the insert into the bottle .
Screw the screw cap with hole hand-tight onto the bottle .
Place the bottle underneath the dosing pump. Observe correct
allocation of the reagents A and B to the dosing pumps: A = left,
B = right.
Push the intake hose hand-tight onto the hose connector of the
insert .
Extracting the reagent
Switch the instrument on and press the "STANDBY" key.
During operation, the pump (PERIClip) automatically extracts
reagent.
To ensure that reagent is available for the initial analyses, the
intake hose and the transport hose must be filled with
indicator from the pump up to the measuring chamber.
Press the "manual" key several times until the intake hose
and the transport hose are filled up to the measuring chamber.
If necessary, manually tighten the hose connectors of the intake
and transport hose slightly in case of bubble formation.
Input reagent level
In the program menu M select
>Service I -> Input Reagents
Set the reagent levels to 100%.
Press ENTER to confirm the selection.
CAUTION