Maintenance
46
Service instructions
The surface of the instrument has not been treated. Therefore, soiling
caused by indicators, oil or grease should be avoided. However, if the
housing becomes soiled, please clean the surface with isopropanol
(never use other solvents).
Maintenance message pump head
During operation, the effective run time of the pump head is counted.
When a run time of 150 hours is reached, the maintenance message
for the pump head appears. During normal operation (analysis
interval, every 15 min), this run time is achieved after approximately
2.5 years or 81,000 analyses.
To confirm the information message, please select the following in
the program menu:
>Service I -> Confirm pump head
Now press ENTER.
The maintenance message of the pump head has now been reset.
Maintenance interval for the pump head
We recommend replacing the pump head after 2 years as the
performance of the pump head can decrease due to wear-and-tear.
Always replace the pump head if the maintenance message “Replace
pump head” is displayed.
Replacing the pump head
To replace the pump head, proceed as described below:
Remove the transparent cover.
Open the housing with a suitable screwdriver (push down the
snap-on fastening on both sides).
Carefully pull-out the pump head with a drive mounting bracket.
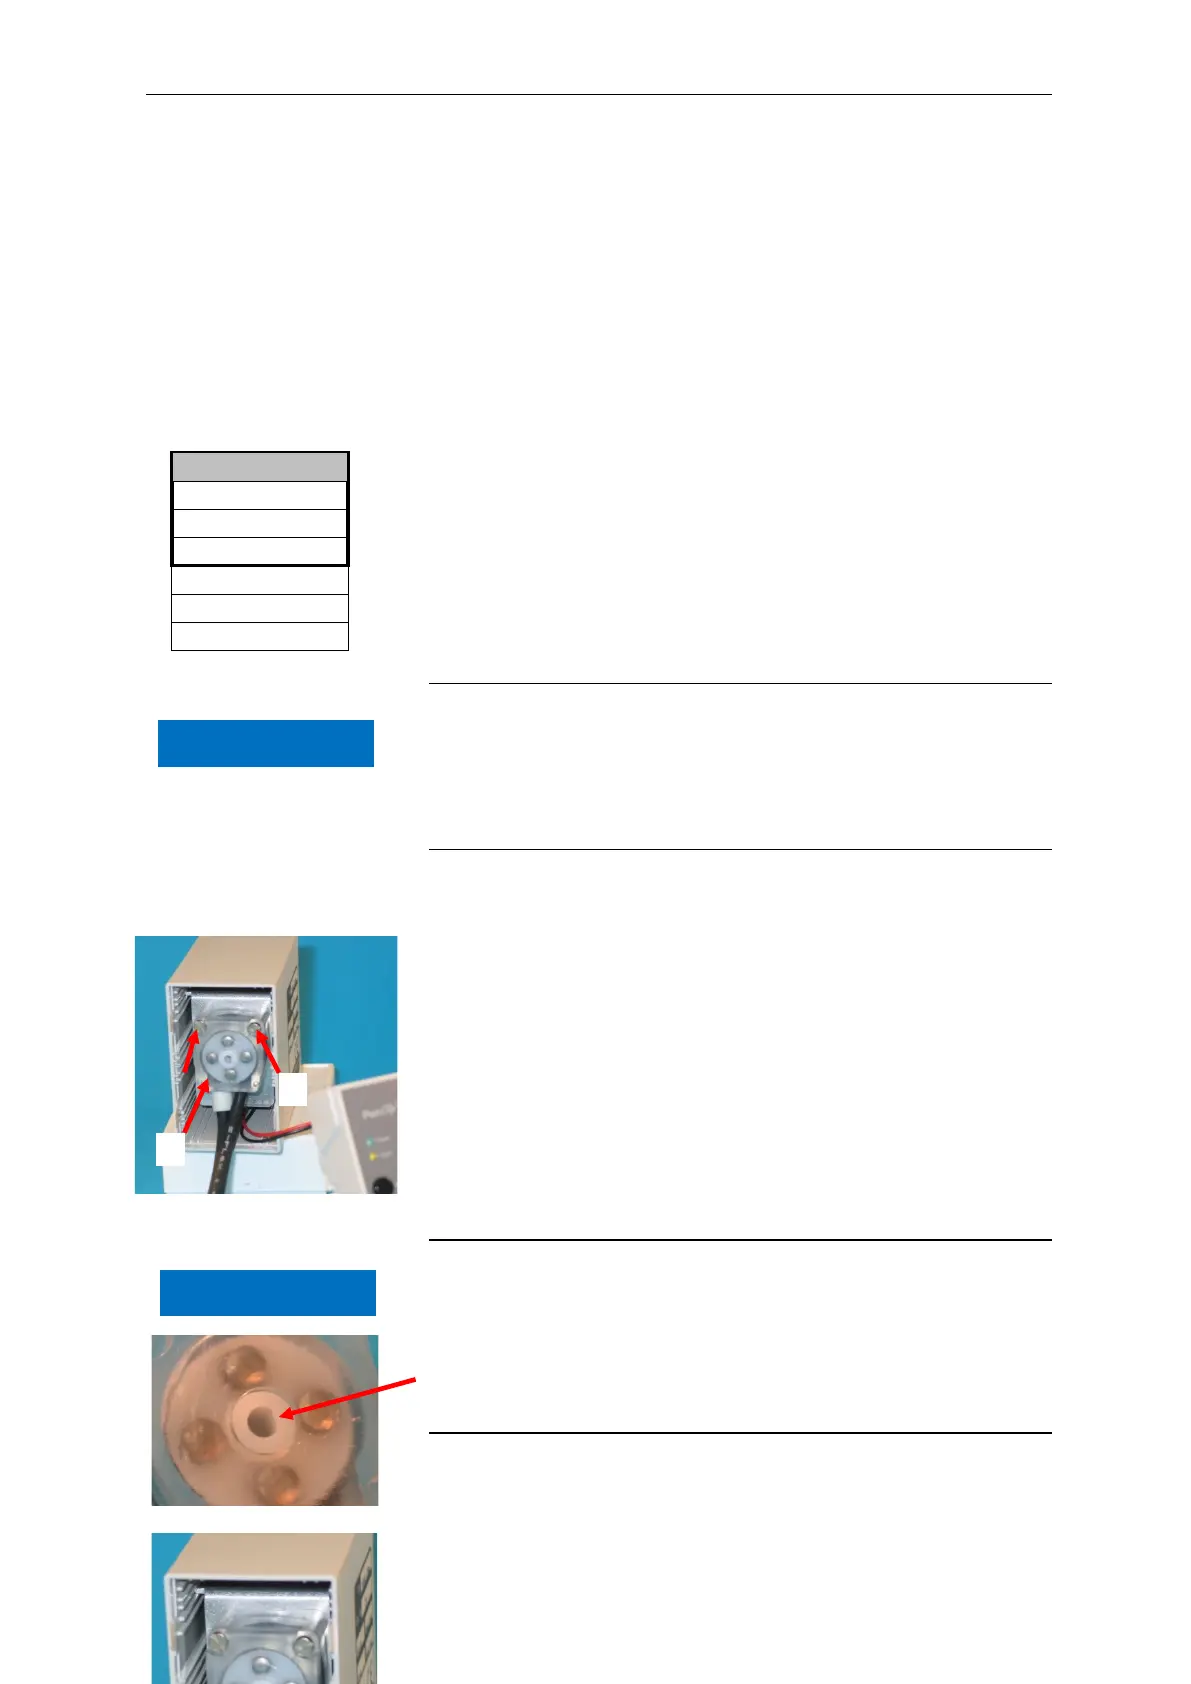
Loosen both screws at the pump head.
Pull the pump head from the motor shaft.
Place the new pump head on the shaft. The short hose with the
stopper must be on the left-hand side.
Anti-twist guard
Please observe the anti-twist guard on the motor shaft and the pump
head during installation! The drill hole and the shaft each have a flat
surface and only fit together in one position. Carefully turn the pump
head into the correct position until the snap-in noses snap into the
provided drill holes in the housing.
Re-assemble the pump in reverse order. Make sure that wires or
hoses are not trapped.
Do not place the drive mounting bracket on the top slide-in rail ,
Manual operation
Confirm maintenance
Confirm pump head 1
Confirm pump head 2
Input Reagents
>SERVICE I ▼▲
ME
Diagnosis
NOTE
NOTE