Installation
9
Installation
Risks resulting from incorrect installation!
Install Testomat 2000
®
Polymer
at a location where it is protected
against dripping or splash water, dust and aggressive substances
– e.g. in a switch cabinet or on a suitable wall.
Information for trouble-free operation
Install Testomat 2000
®
Polymer
vertically and without mechanical
stress.
Install Testomat 2000
®
Polymer
at a vibration-free site.
Operating Testomat 2000
®
Polymer
in the
pressure range of 0.3 to 1 bar
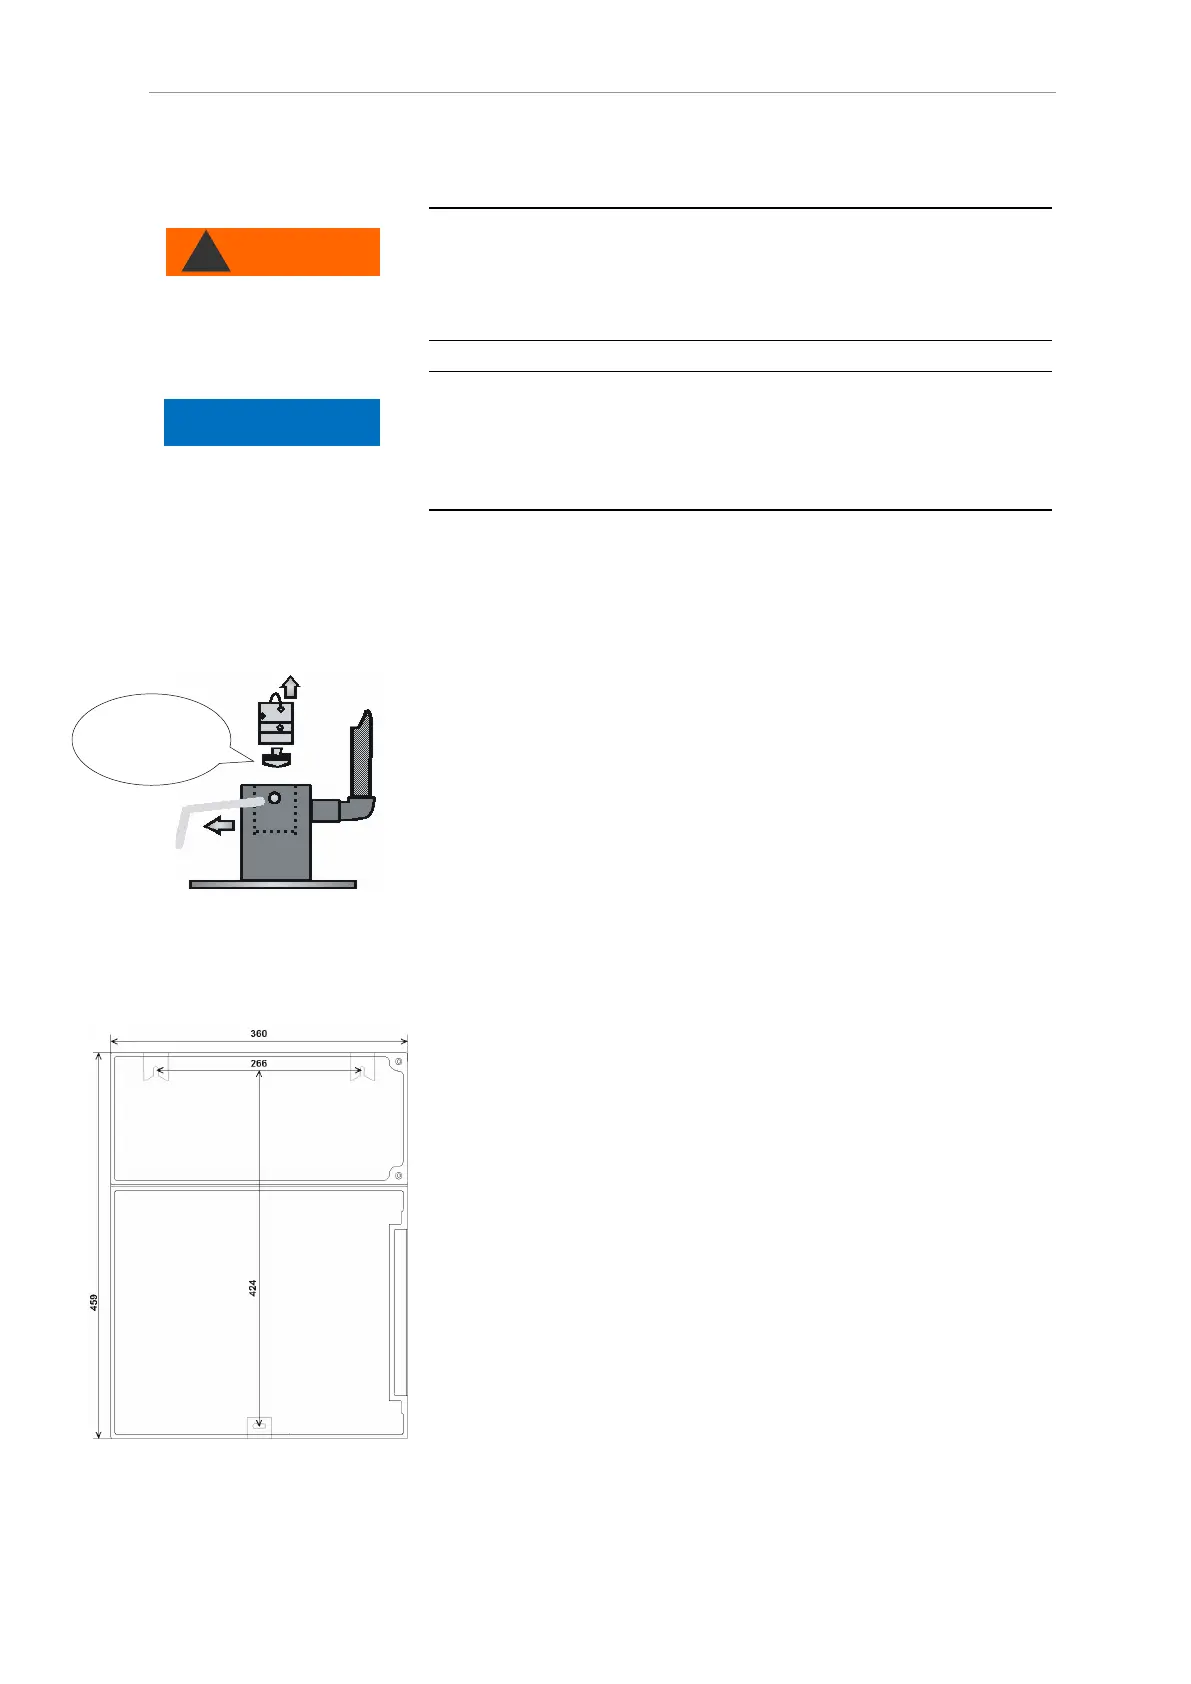
Prior to installation, please check whether lower operating pressure is
required. The instrument is factory set for the operating range of 1 to
8 bar. Remove the flow controller valve body to operate the
instrument in the operating range of 0.3 to 1 bar (e.g. when using an
aerator type R). This involves removing the retaining pin from the
controller/filter receiver . Subsequently use the metal bracket to
remove the controller plug from the borehole. Then remove the
flow controller valve body and reinsert the controller plug and the
retaining pin.
Installing Testomat 2000
®
Polymer
Select an installation site where the water inlet hose can be kept as
short as possible (max. 5 m).
Please leave sufficient space on the left-hand side of the
instrument to open the door.
Drill the mounting holes as shown in the drawing on the left.
Use three screws to attach the instrument at a suitable position in
the switch cabinet or on a wall.
WARNING
NOTE
Remove for
p
0.3 to 1 bar