10
automatically rebuild Redundant RAID arrays (RAID 1, 5, 10) in the case of disk failure. As with creating RAID arrays,
disks must be initialized before they can be used as spares. To set a hard disk to act as a Spare Disk, use the arrow
keys to select the target disk from the list of initialized disks, and press the Enter key. To remove the Spare Disk
setting from a hard disk, highlight the spare disk, and press the Enter key. Generally, single disks are designated to
act as spares (disks that are not configured into RAID arrays). However, in some instances, disks that are members
of RAID arrays may also be designated to act as a spare. If the disks in question are part of a RAID array that did not
utilize the full available capacity at the time of creation, these disks may be used as spares.
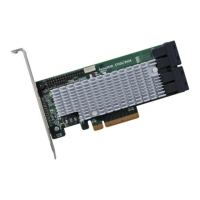
4.1.7 Settings
To access the Settings menu, highlight the Settings command from the toolbar, and press the Enter key. There are
Select Boot Device and Parameter Setting options in the menu.
Select Boot Device:
Select which disk or array will act as the boot disk, if the motherboard BIOS instructs the card to act as the boot
device.
▪ When booting up the system, press CTRL + H during the HighPoint RocketRAID splash screen to enter the
BIOS RAID creation utility.
▪ Navigate to Settings using arrow keys.
▪ Press Enter.
▪ Press Enter again.
▪ Select the desired RAID array.
▪ You will return to the main screen once the boot flag is set
Staggered Spin up:
The default value of this option is disabled. Enabling this setting will instruct the card to power up the hard disks,
sequentially (one disk approximately every 2 seconds). Not all disk support this setting – consult the disk
documentation for more information.
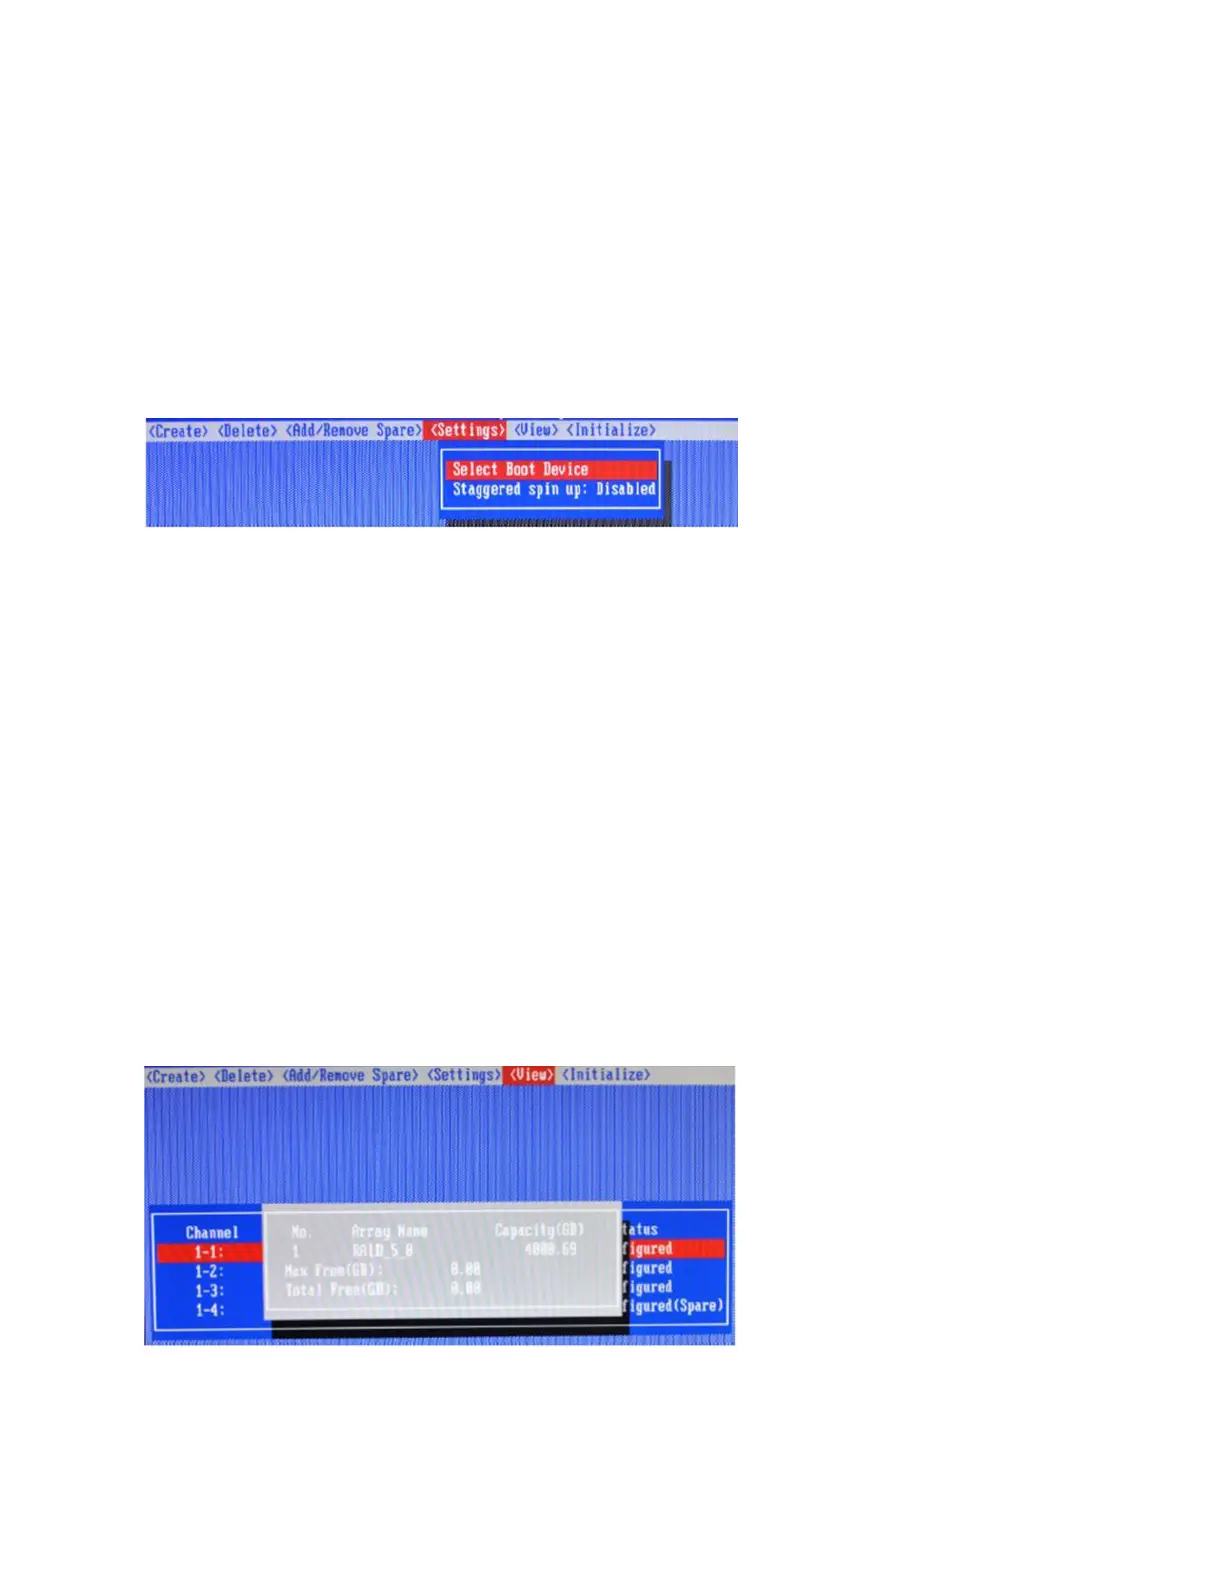
4.1.8 View
The View menu provides two options:
Devices – This option will display information for each disk hosted by the HBA.
RAID Array – This option will display information about each RAID array hosted by the HBA. Highlight the target
device and press the Enter key to view details about the configuration.