Note
Up to 31 characters are allowed, and it should be the same with the account ID congured on
ARC.
5.
Click OK.
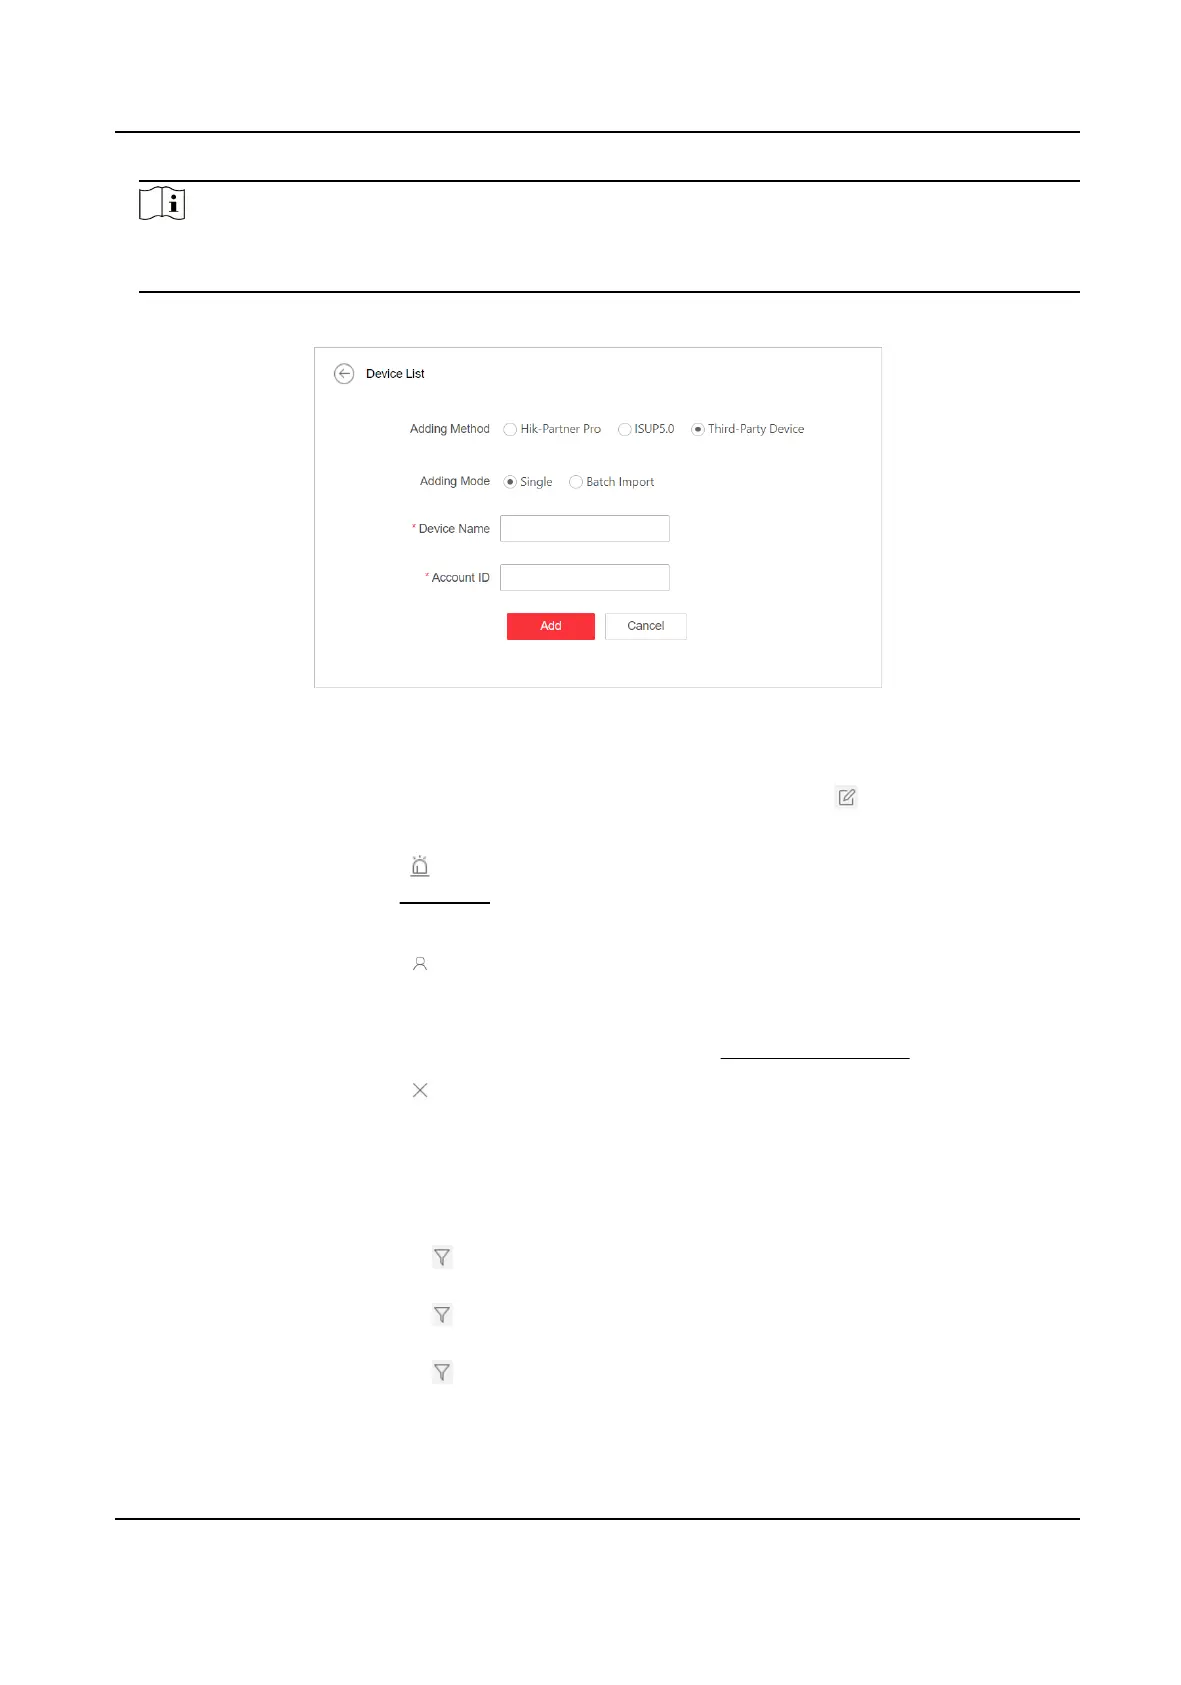
Figure 3-4 Add a Third-Party Device
6.
Oponal: Perform the following operaons as needed.
Edit Device
For Administrator and permied operators, click to edit device's
account ID and device name.
Enable Alarm
Service and Set
Zone
Click in the Operaon column to enable receiving alarms and set zones.
See Set Zone for details.
View Manager Click to view all users who can manage the device. If you are an
Administrator user, you can add and delete Operators. You can also
refresh the manager list and search for an operator who manages the
device. For detailed
informaon, see Manage Operators .
Delete Device Click to delete a device; or check mulple devices and click Delete to
delete the checked devices.
Synchronize
Device
Informaon
Select devices, and click Synchronize Device Informaon to Synchronize
device informaon excluding alarm-related informaon from Hik-Partner
Pro.
Filter Devices
●
Click in the Connecng Mode column, and check HPP, ISUP, and/or
Dual-Connecon to lter the devices.
●
Click in the Device Status column, and check Online and/or Oine to
lter the devices.
●
Click
in the Alarm Service column, and check Normal, Not Acvated,
and/or Not
Authencated to lter the devices.
Hik IP Receiver Pro User Manual
12
 Loading...