(APPENDIX III) DIMENSIONS, WIRING AND MECHANICAL PARTS | PAGE 100
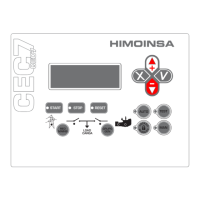
11.3 CEM7 MODULE
Fig.1
CEM7 module.
INSTALLATION AND WIRING
Fig.2
CEM7 module wiring.
To power the CEM7 device and make the other connections you should use a ca-
ble with a section of 1 mm
2
.
The CEM7 device is mounted on the front of an electrical panel. There are no
special ventilation requirements due to the low power consumed by the device.
The CEM7 device has a CAN terminator activation switch of 120 Ω active in ON
position.