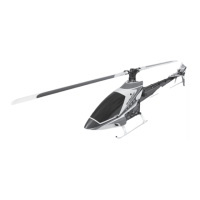
38
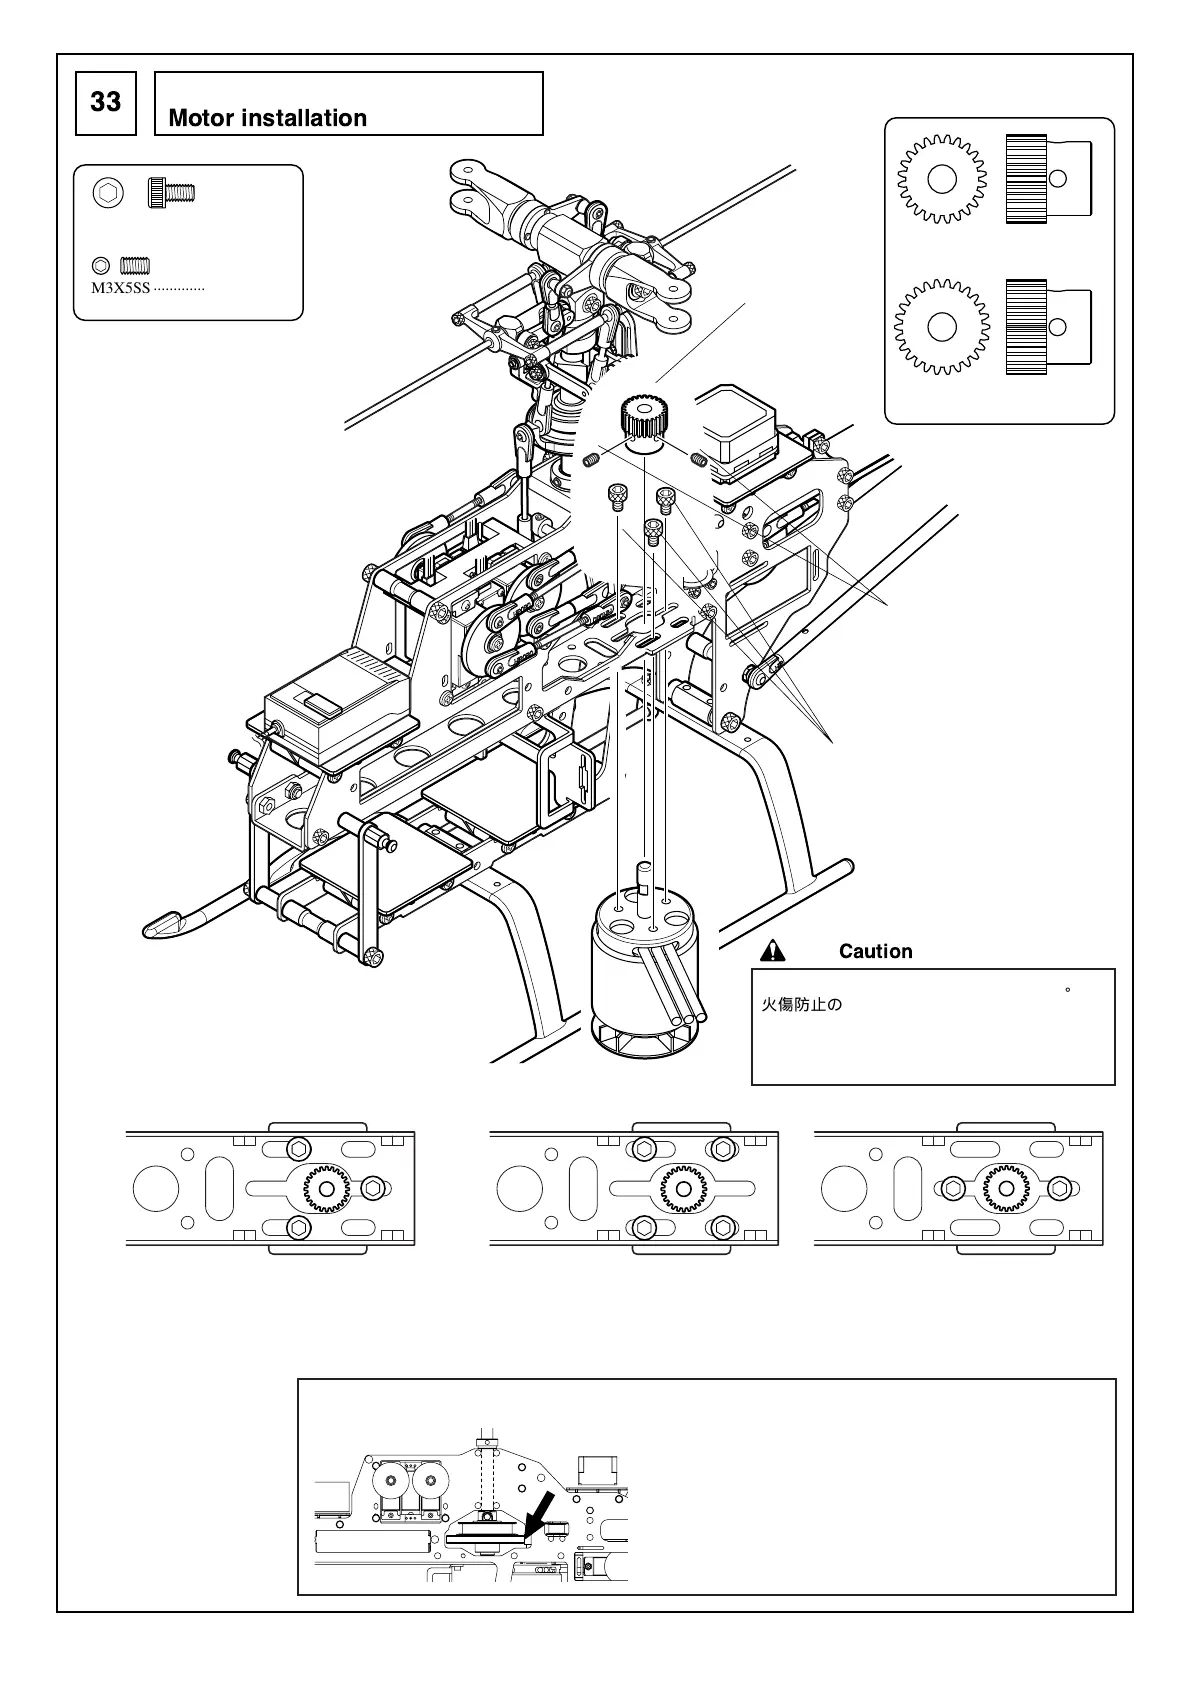
モーターの取付
M3X5SS
..............................
2
ピニオンギヤ
Pinion gear
M3X5CS
.............................
4
M3X5SS
M3X5CS
24T ―― 4セル用
For 4 cells
26T ―― 3セル用
For 3 cells
モーターのDカット部分に
M3X5SSがくるように
取付けてください。
Position the pinion gear so that
the M3X5SS (2 pcs) fit in the
D-shaped cut holes of the motor.
注意
飛行後のモーターは高温になっております。
火傷防止のためモーターに触れないようにして
ください。
Themotorbecomesextremelyhotafterflight.
Toavoidburns,donottouchthemotor.
メインギヤとピニオンギヤの間にはわずかな隙間が必要です。
メインギヤとピニオンギヤの間にビニール袋の切れ端を噛み合
わせた状態でモーターを固定してください。
A small gap is necessary between the main gear and pinion gear.
Fix the motor with a piece of plastic bag sandwiched between the
main gear and pinion gear.
ヒロボー純正モーターを使用するときは
上図の3箇所でネジ止めしてください。
When using a genuine Hirobo motor, fix it by
tightening the three screws as shown in the
figure above.
他社製モーターを使用するときは各モーターに合う穴を選んでネジ止めし
てください。
M3X5CSが締めにくい場合は、ボールポイントレンチを使用してください。
When using a motor other than Hirobo’s, use screw holes that match the motor.
If it is hard to tighten the M3X5CS, use a ballpoint wrench.
バックラッシュの調整
Backlashadjustment
前
Front
後
Rear
ピニオンギヤ24T
Pinion gear 24T
ピニオンギヤ26T
Pinion gear 26T