Chapter 4 Installation (hardware)
4 – 2
L1
(3.94)
14 (0.55)
L2
90 (3.74)
Figure 4.2 External dimensions
Dimensional table
Base L1
(External
dimensions)
L2
(Mounted
dimensions)
3 slots 222.5 (8.76) 207 (8.15)
5 slots 282.5 (11.2) 267 (10.51)
6 slots 312.5 (12.30) 297 (11.69)
8 slots 372.5 (14.67) 357 (14.06)
11 slots
462.5 (18.21) 447 (17.6)
Unit: mm (in.)
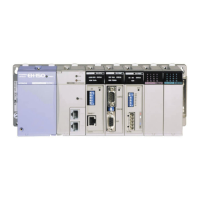
(b) Mounting to a DIN rail
Attaching to a DIN rail
2]
1]
1] Hook the claw fixed at the bottom of the base
unit, to the DIN rail.
2] Press the base unit into the DIN rail until it
clicks.
Note: Make sure the base unit is securely fixed
after installation.
Fixing the unit
SERIAL
SERIALS ERIAL
SERIAL
ETHER
ETHERETHER
ETHER
NET
NETNET
NET
HITACHI
HITACHIHITACHI
HITACHI
USB
USBUSB
USB
2.0
2.02.0
2.0
RS
RSRS
RS-
--
-
422/485
422/48542 2/485
422/485
10BASE
10BASE10BASE
10BASE -
--
-
100BASE
100BASE100BASE
100BASE-
--
-
Secure the unit by installing DIN rail fixing
brackets from both sides. (The product may go out
of place if not secured within the fixing brackets.)
Removing the unit from the DIN rail
1] While lowering the DIN rail fixing mounting lever
toward the bottom,
2] raise the base upward to remove.
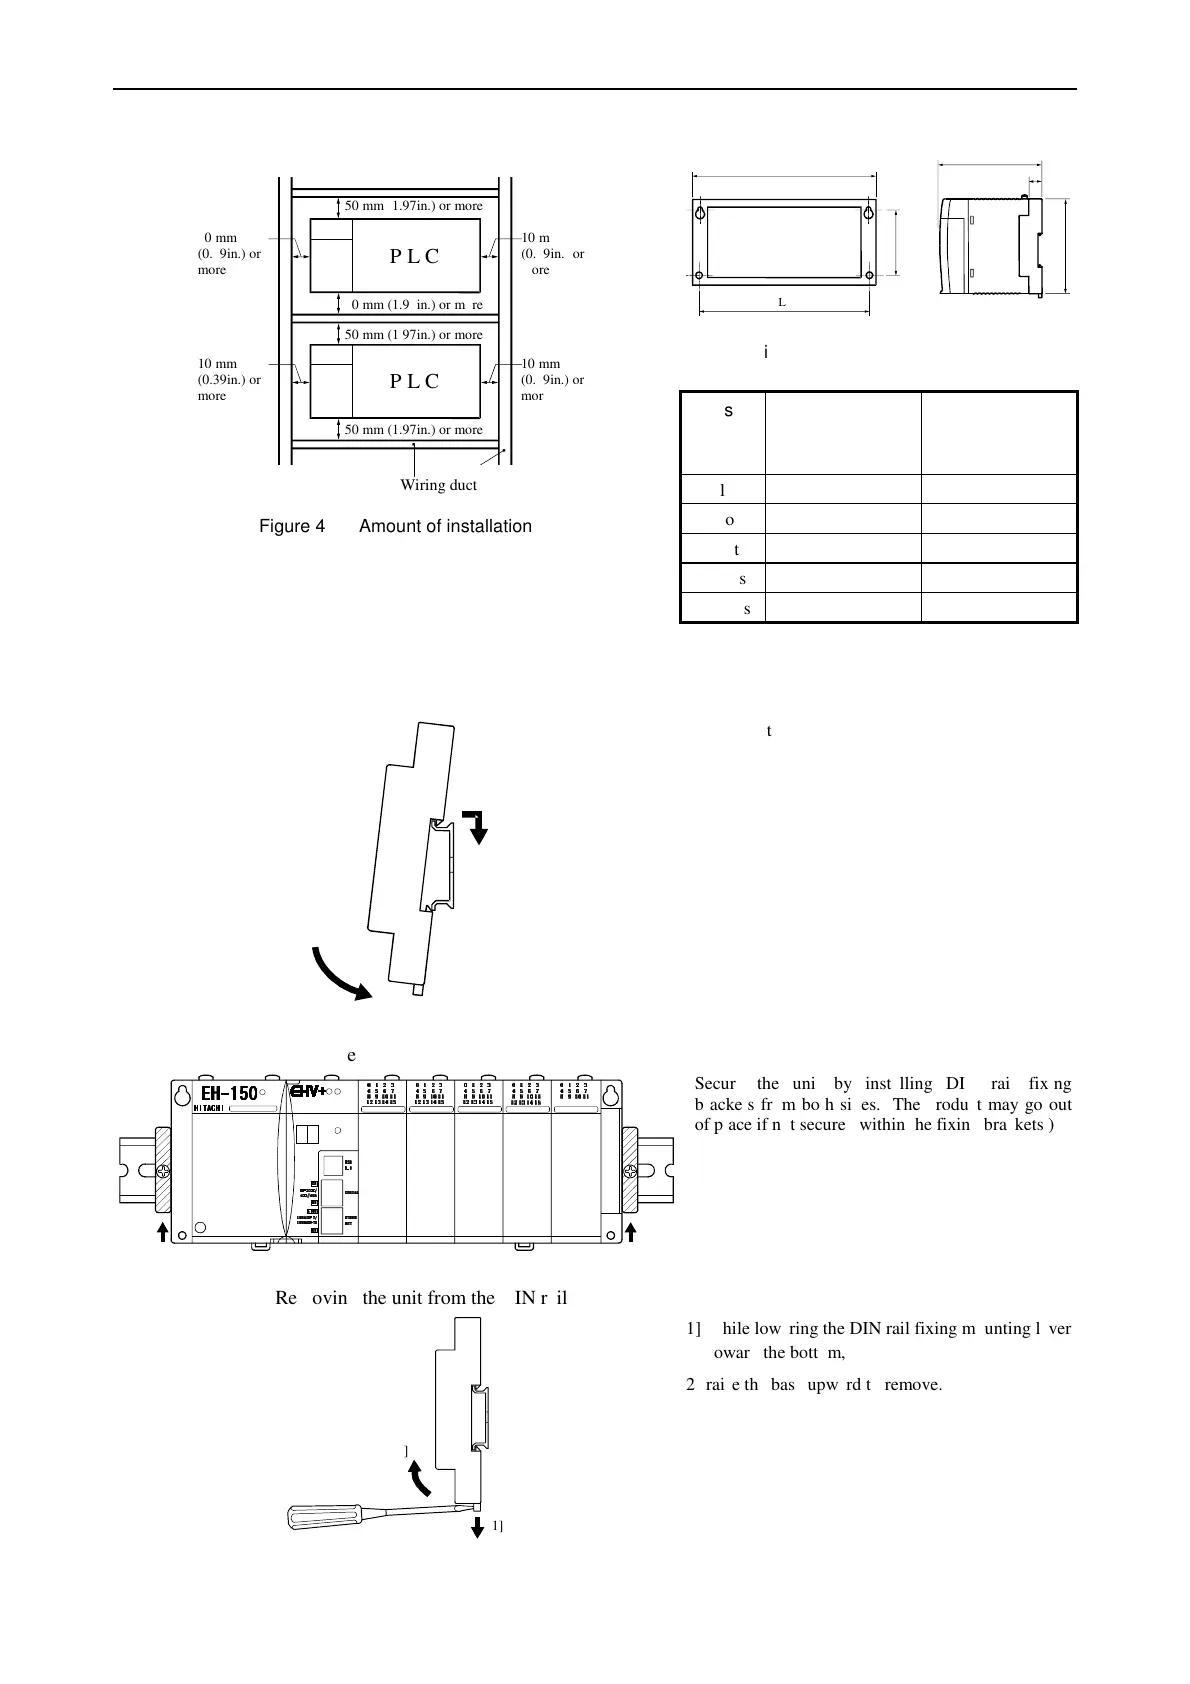
50 mm (1.97in.) or more
10 mm
(0.39in.) or
more
10 mm
(0.39in.) or
more
50 mm (1.97in.) or more
P L C
50 mm (1.97in.) or more
10 mm
(0.39in.) or
10 mm
(0.39in.) or
50 mm (1.97in.) or more
P L C
Figure 4.1 Amount of installation
 Loading...