3. Place the stabilizer plate as shown to mate with bracket at the bottom of
the frame. Using the washers, M8 screws, and tool in the kit, secure the
plate to the frame.
4. Reinstall the trim cover plate with the M4 flat head screws you removed
in step 1.
Installing blanking panels
Blanking panels should be installed to cover any empty space at the front of
the rack. This will ensure adequate airflow to the equipment in the rack if the
rack is not completely filled.
When installing blanking panels, follow these steps:
1. Place the blanking panel on the rack as a template to determine which
holes will require cage nuts.
2. Insert the cage nuts.
3. Secure the panels to the rack by screwing them onto the rack at the cage
nut locations.
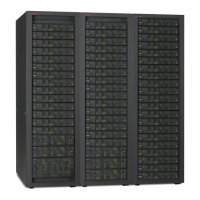
Post-installation considerations
The following sections provide guidelines to consider after you install
equipment in the Hitachi rack.
Casters
The casters facilitate movement of the rack across short distances in order to
position it for final installation. As soon as the rack is in its final position for
installation, make sure that the full weight of the rack is supported by the
leveling feet.
The casters can only support the weight of the rack with installed components
for short periods of time and not designed to support the full weight of the
rack on a long-term basis. If this occurs, the casters may be damaged.
Inspection and cleaning
Observe the following precautions when inspecting and cleaning the rack.
• If the equipment must be powered off, perform the power-off sequence
described in
Chapter 5, Power On/Off procedures on page 5-1, before
proceeding with maintenance.
• Do not work on the equipment or rack in a damp or flooded environment.
• Do not obstruct access to the rack with parts or tools.
• If the rack has a door, before performing the work with the door open,
take off metal watches or jewelry to prevent electric shock. If you wear
metal-frame glasses, do not touch the equipment.
C-36
Rack information
Hitachi Unified Storage VM Block Module Hardware User Guide
 Loading...