– 4 –
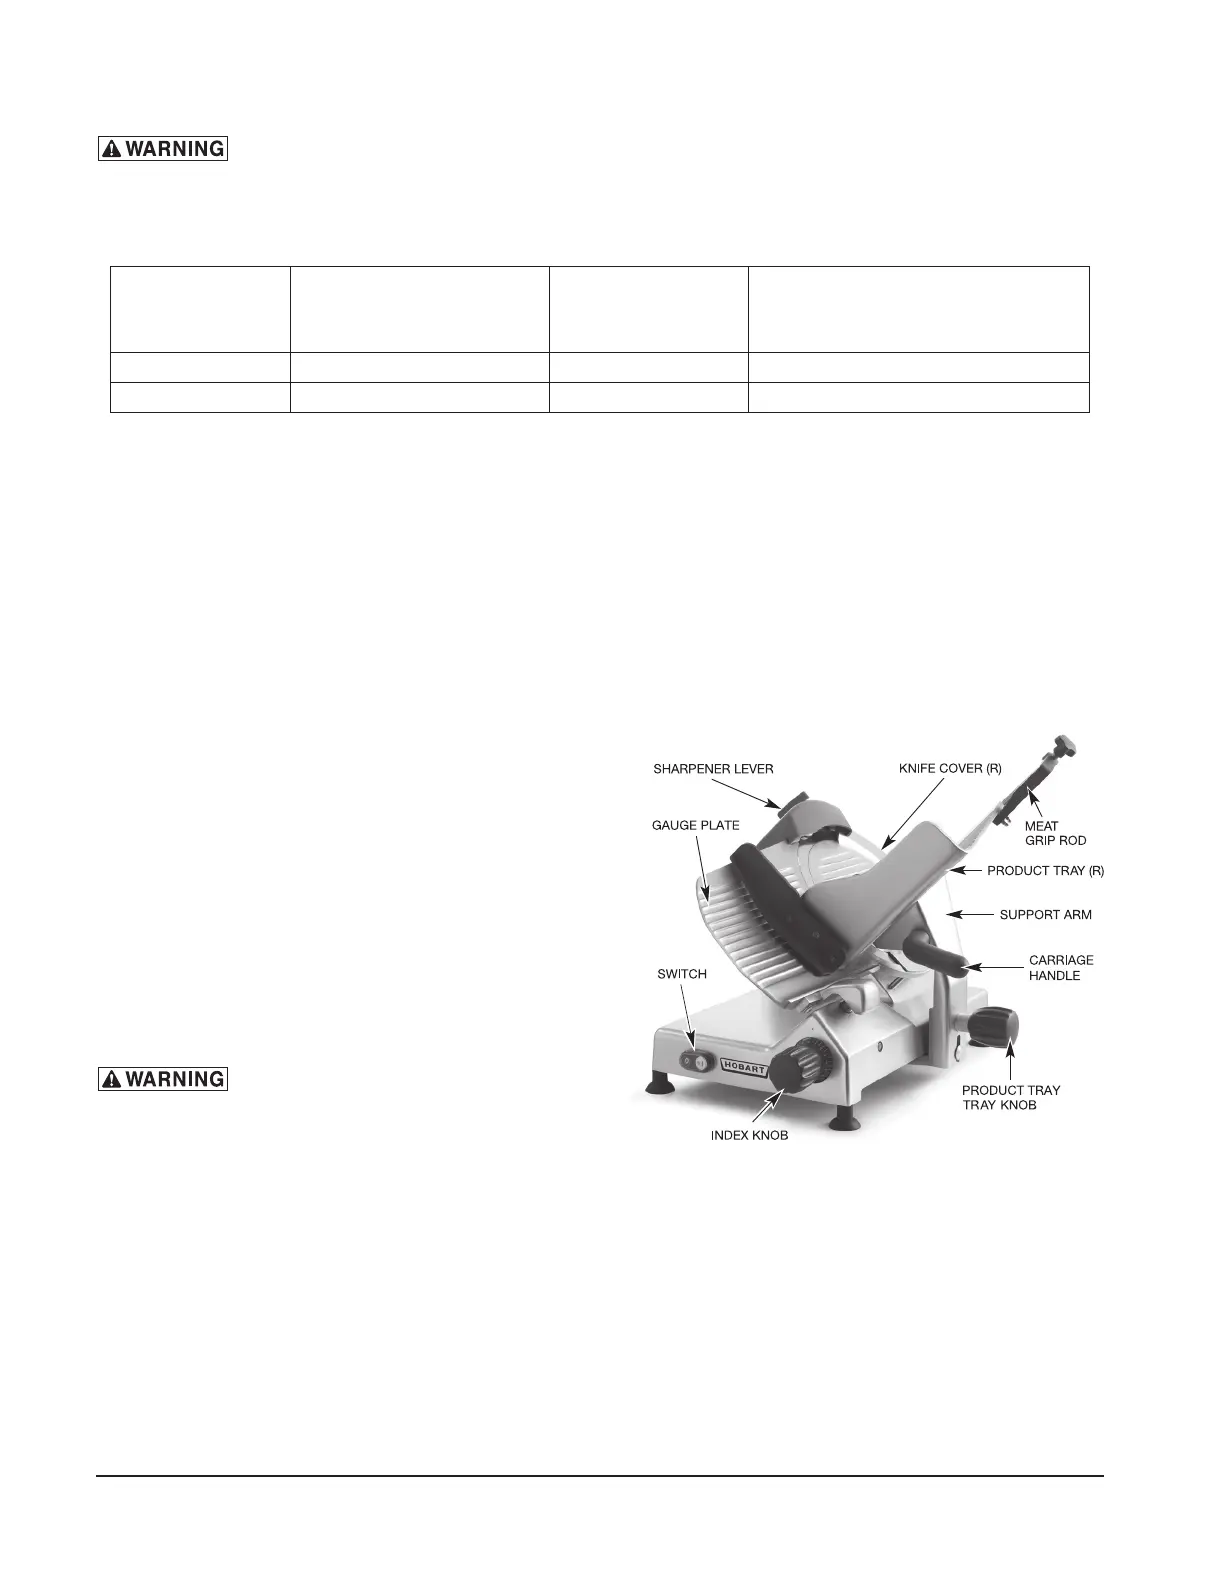
Fig. 2
(R) refers to removable part.
ELECTRICAL
This machine comes with a three-prong grounding plug. The outlet to which this
plug is connected must be properly grounded. If the receptacle is not the proper grounding type,
contact an electrician.
ELECTRICAL DATA
Model Volts / Hertz / Phase Machine Amps
Minimum Circuit Ampacity
Maximum Protective Device
AMPS
EDGE12 120 / 60 / 1 4.0 15
EDGE13 120 / 60 / 1 4.0 15
Compiled in accordance with the National Electrical Code, NFPA 70, latest edition.
OPERATION
SAFETY
SAFETY DEVICES INCORPORATED IN THIS SLICER MUST BE IN THEIR CORRECT OPERATING
POSITION ANY TIME THE SLICER IS IN USE.
The Knife Cover should already be secured in place
with the Knife Cover Knob on the left side tightened
clockwise (Fig. 1). The Ring Guard is not removable.
The Meat Grip (Fig. 4) helps secure product in position
and must be used when slicing short ends to keep your
hand(s) away from the knife.
When the slicer is not running, the Index Knob (Fig.
2) must be turned fully clockwise so the Gauge Plate
covers the Knife edge.
Always UNPLUG the Power Cord before cleaning or
moving the Slicer.
Rotating knife. Unplug machine
power cord before cleaning, servicing or removing
parts. Replace parts before use.
SLICING
With the Gauge Plate fully closed, pull the Product Tray forward until it stops. With the Meat Grip out of
the way, place the product to be sliced on the Product Tray. Set the Meat Grip against the product. Turn
the slicer on by pressing the Switch ON (Fig. 2).
If the Meat Grip is not needed, store it out of the way by lifting it to the top of the Meat Grip Rod and
rotating it 270° behind the Product Tray. Allow it to rest on the small notch of the upper Product Tray slot.
Adjust the Gauge Plate to obtain the desired slice thickness by turning the Index Knob (Fig. 2) to vary the
slice thickness from paper thin to
9
/16" thick. Use the Carriage Handle (Fig. 2) to move the carriage back
and forth to slice.
 Loading...