OM-316 Page 14
Return To Table Of Contents
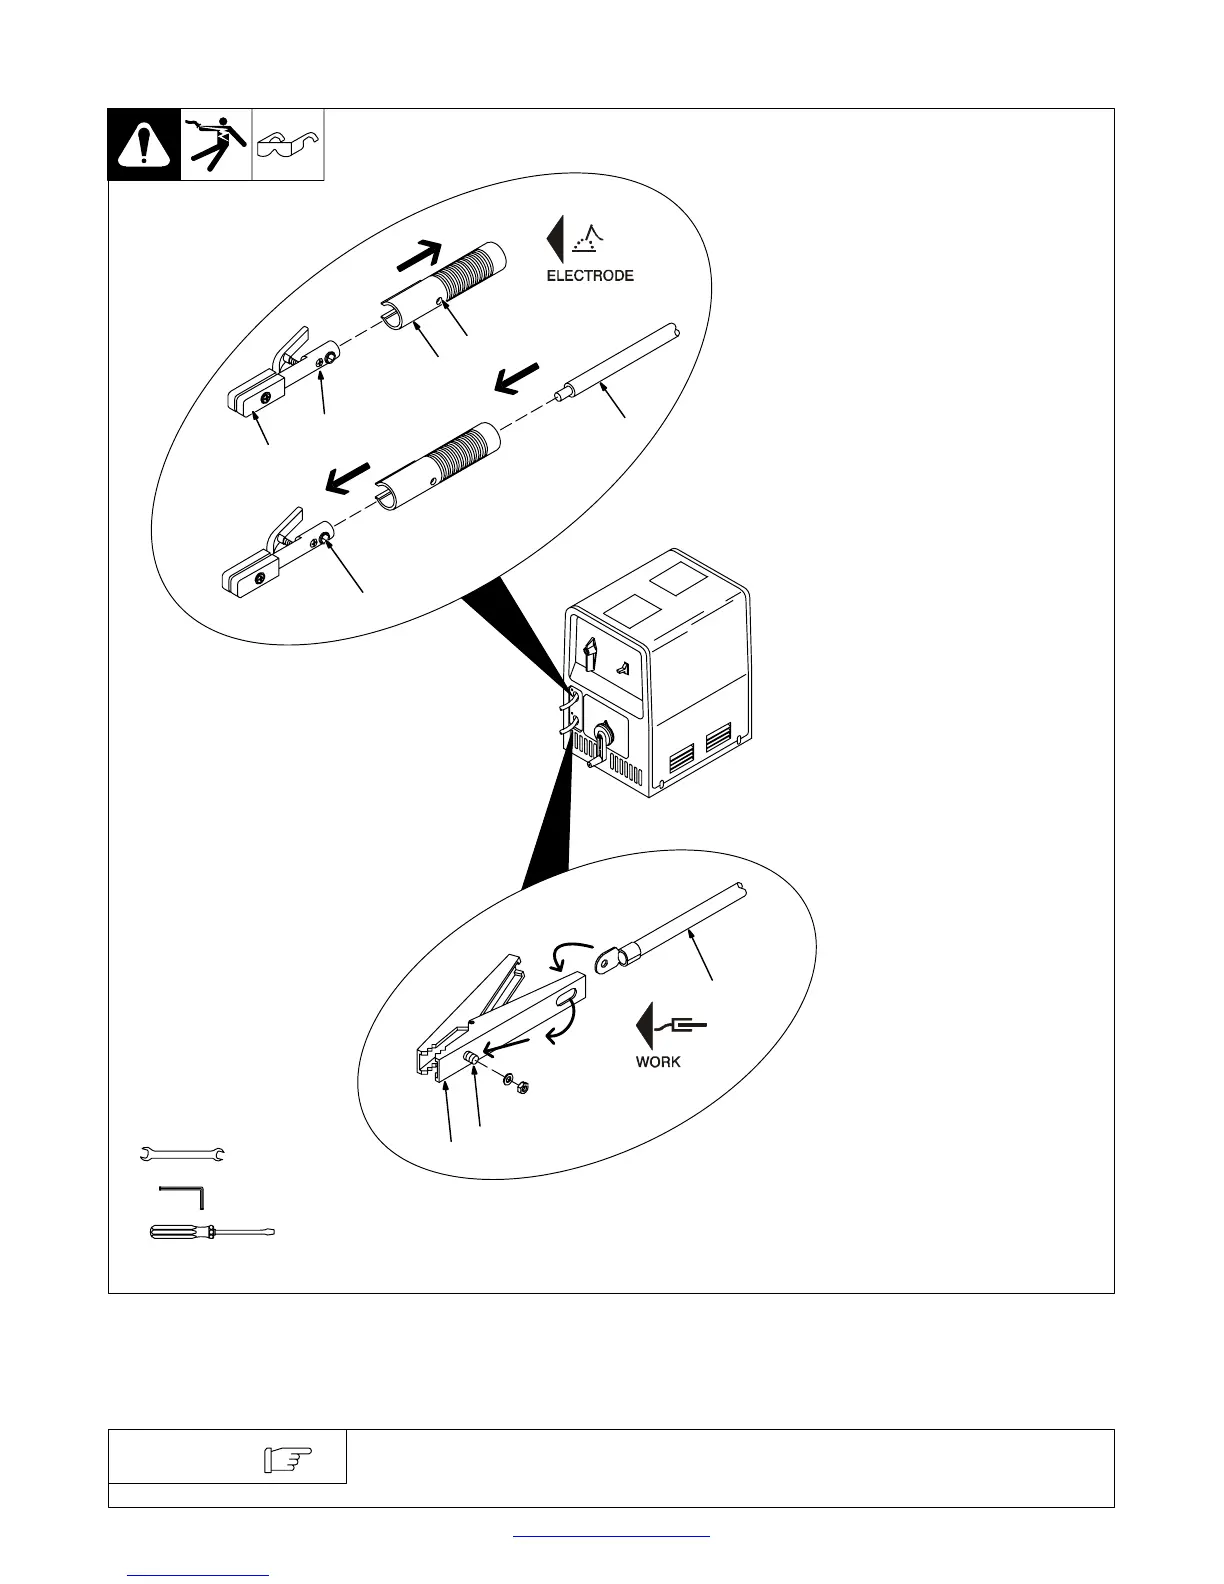
3-5. Installing Electrode Holder And Work Clamp
ST-802 251 / ST802 105-C
Y Turn Off unit and disconnect
input power before installing
electrode holder or work
clamp.
Removing Barrel From Elec-
trode Holder
1 Electrode Holder
2 Barrel
3 Access Hole
4 Set Screw
Loosen set screw through access
hole and slide barrel away from
electrode holder.
Installing Electrode Cable and
Barrel onto Electrode Holder
5 Electrode Cable From Unit
(Has Bare Conductors on
End)
6 Terminal Screw
Back out terminal screw from elec-
trode holder. Insert electrode cable
through barrel into end of electrode
holder and tighten terminal screw
securely.
Move barrel toward electrode hold-
er and tighten set screw to secure
barrel in place.
Installing Work Cable onto Work
Clamp
7 Work Clamp
8 Work Cable From Unit (Has
Ring Terminal on End)
9 Mounting Bolt
Route work cable through work
clamp as shown and install onto
mounting bolt using supplied hard-
ware.
1
4
2
3
8
9
7
6
5
1/4 in
Tools Needed:
1/2 in
3-6. Weld Output Cables
For weld output cable replacements or extensions, contact your Factory
Authorized Service Agent.
NOTE

 Loading...