CYLINDER/PISTON
9-11
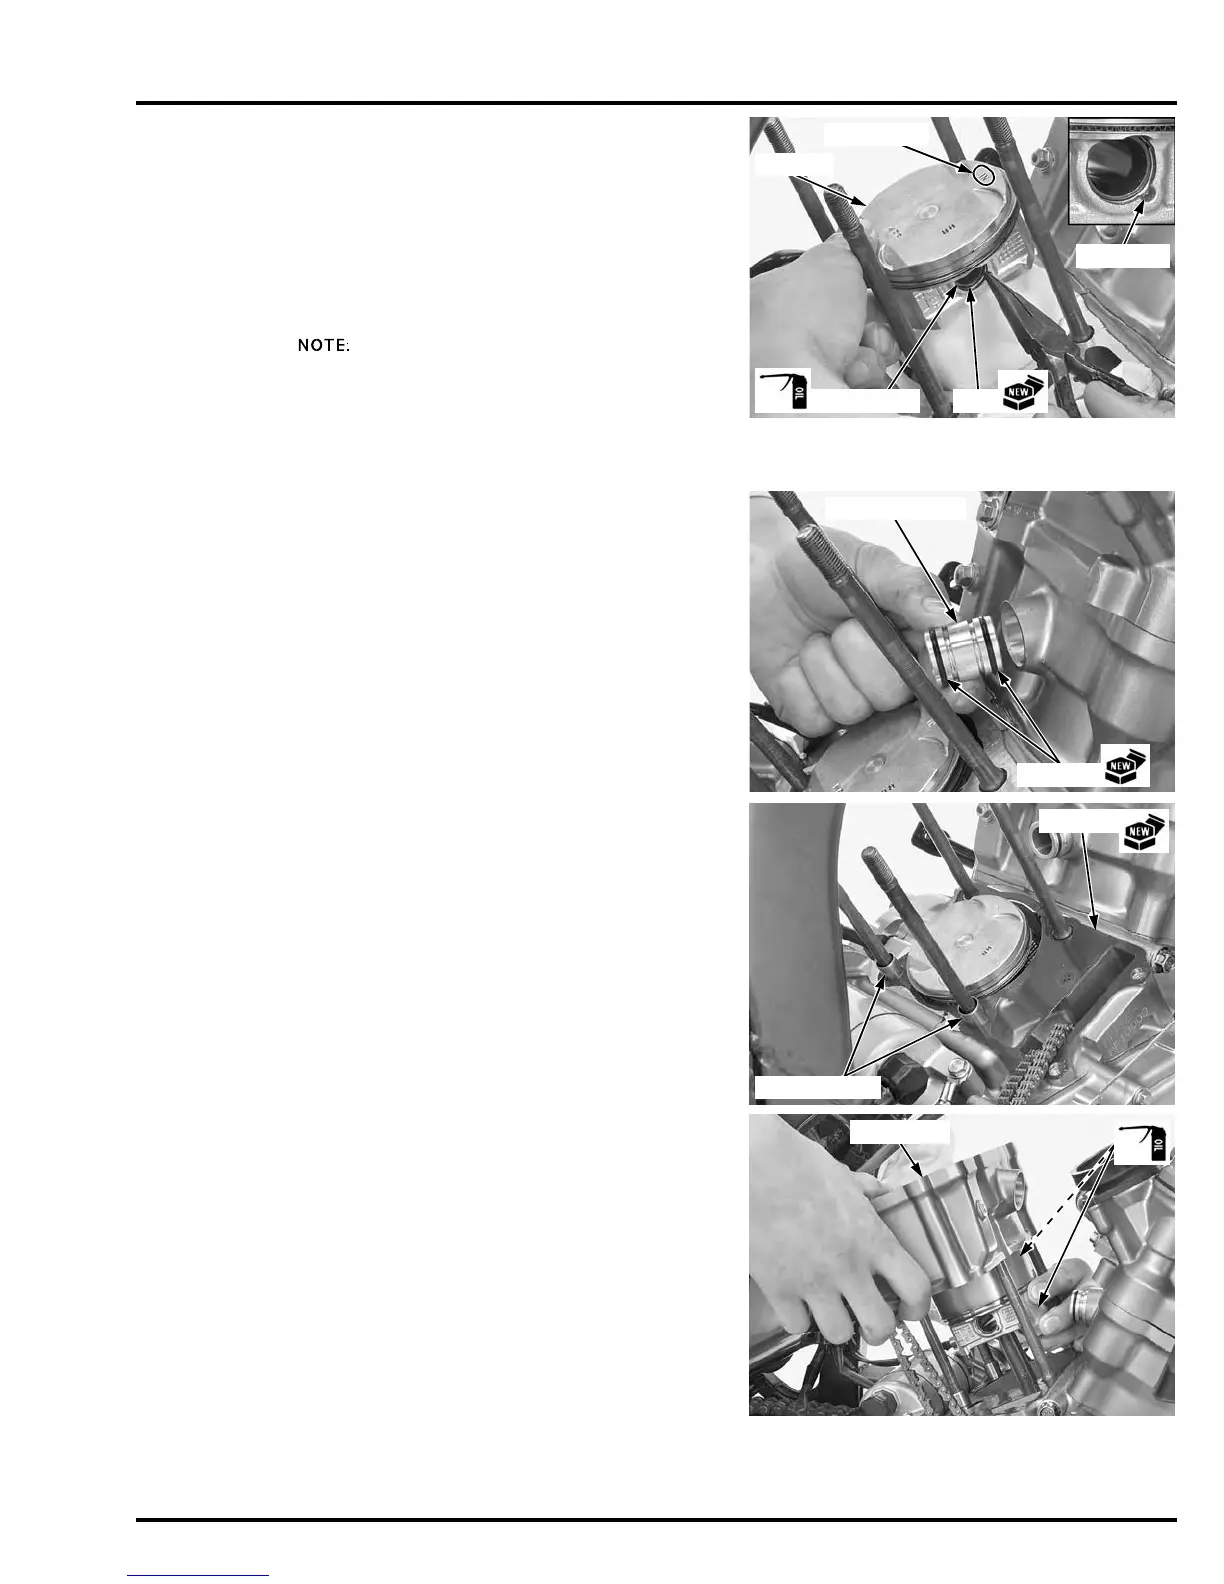
Place a clean shop towel over the crankcase to pre-
vent the clip from falling into the crankcase.
Apply engine oil to the piston pin outer surface.
Install the piston with the "IN" mark facing intake
side.
Install the piston pin through the piston and con-
necting rod.
Install new piston pin clips into the grooves in the
piston pin hole.
• Make sure the piston pin clip is seated securely.
• Do not align the clip end gap with the piston cut-
out.
CYLINDER INSTALLATION
The front cylinder
uses the same
service procedure
as the rear cylinder.
Clean the gasket surfaces of the cylinder and crank-
case thoroughly, being careful not to damage them.
Install new O-rings to the joint collar.
Install the joint collar to the cylinder.
Install the dowel pins and a new gasket.
Be careful not to
damage the piston
rings and cylinder
wall.
Apply engine oil to the cylinder wall, piston outer
surface and piston rings.
Route the cam chain through the cylinder and install
the cylinder over the piston while compressing the
piston rings with your fingers.
CLIPPISTON PIN
CUT-OUT
"IN" MARK
PISTON
 Loading...