Reassembly
8500C/8500C+ System Maintenance Manual 5-69
5.9 Reassembly
NOTE: Harness dressing and routing are important to ensure proper operation and fit.
Follow original factory routing.
5.9.1 Signal Selector 8520C Reassembly (Figure 5-13)
5.9.1.1 Power Supply Board A2
a. Install power supply board A2 on chassis (11) and secure with four 4-40 nylon lock std.
hex nuts (6) and two #4 clear rnd. 1/4” o.d. standoffs (9).
b. Connect three connectors (J1, J2, J3) to power supply board A2.
5.9.1.2 Controller Board A1
a. Install controller board A1 on chassis (11) and secure with six 4-40 x 1-3/8” hex standoffs
(8) and 4-40 x 1/4” pan php. cad. screws (19).
b. Connect seven connectors (J1, J2, J3, J4, J5, J6, J8) to controller board A1 (J7 is unused).
5.9.1.3 Quad Peak Detector A3
a. Install four 4-40 x .5” spacers (22) on controller board A1.
b. Align pins on quad peak detector board A3 with socket on controller board A1 below, and
carefully connect the two.
c. Secure quad peak detector board A3 with four 4-40 x 1/4” php. cad. screws (19)
d. Install bottom cover (12), secure with eighteen 4-40 x 3/8” pan php. blk. screws (5) and #4
std. intl. lck. .260” washers (7).
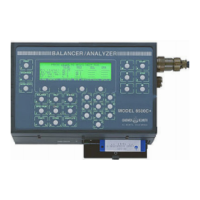
5.9.2 8500C/C+ Reassembly
5.9.2.1 Reassembly of Printer/Disk Drive Assembly
(Figure 5-18 and Figure 5-19)
5.9.2.1.1 Printer Assembly
a. Install printer assembly (13) (with printer board attached) on chassis (2) and secure with
two 3/16” pan php. cad. screws (29), two 1/4” pan php. cad. screws (43), and four #4 std.
flt. .315” washers (42).
b. Place spring (53) in paper holder bracket.
c. Connect harness assembly connector (Figure 5-19, printer P3) to printer board connector
13(A1J3).
d. Trim any ragged edges on paper roll and tightly rewind roll.
e. Place paper roll and paper bar 13(13) in paper holder bracket so that paper feeds up
(Figure 2-3).
 Loading...