Disassembly
8500C/8500C+ System Maintenance Manual 5-51
5.8 Disassembly
5.8.1 8500C/C+ Disassembly
NOTE: Harness dressing and routing are important to ensure proper operation and fit.
Note original factory routing for reassembly. In most cases, the connectors are not marked.
Before disconnecting any connectors, tag the connectors to ensure proper installation
during assembly.
NOTE: It is important that proper length screws be returned to their original location.
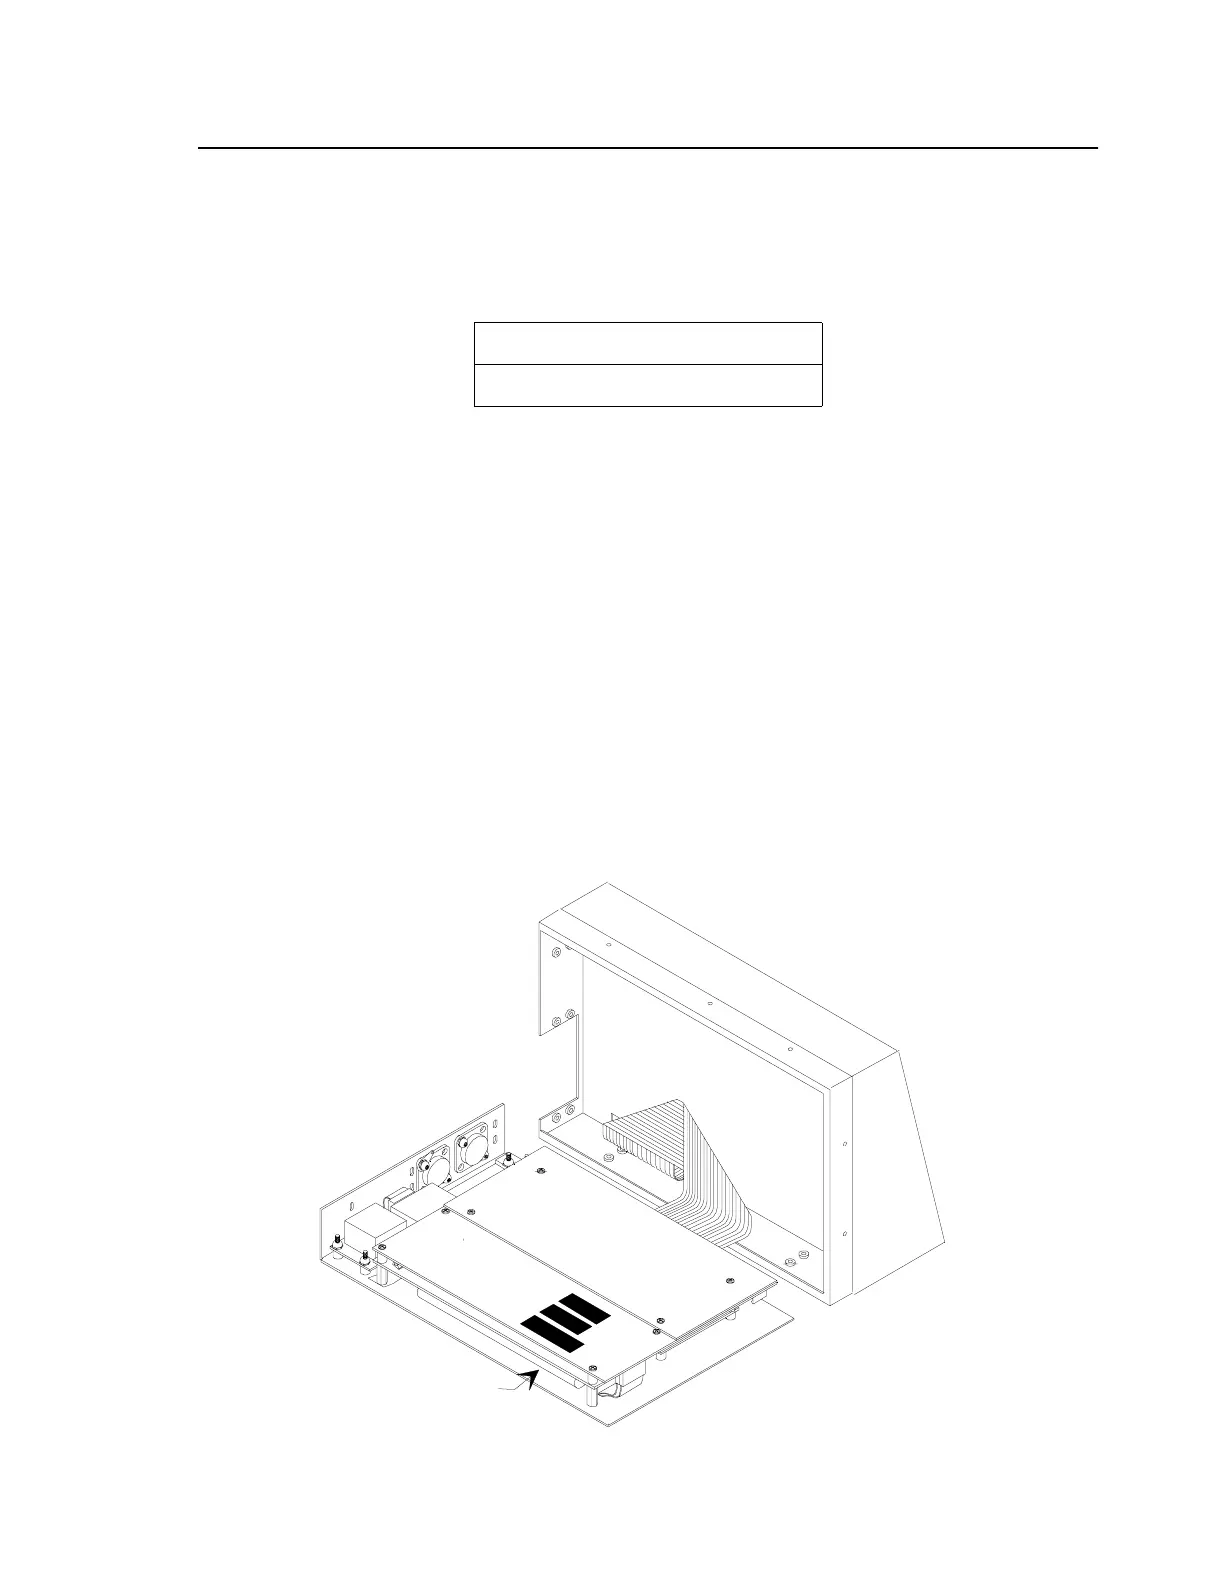
5.8.1.1 Disassembly of Balancer/Analyzer Assembly (Figure 5-17)
5.8.1.1.1 Digital Board A1
a. Remove ten screws (32) and four screws (33) and remove bezel (4).
b. Fold back printer/disk drive assembly so that it stands straight up on its side with keypad
panel (1) lying flat on table, as shown in Figure 5-16. NOTE: Further disassembly is not
necessary when changing EPROM’s (see Section 5.7.3, “EPROM Change Procedure”).
Figure 5-16. Opening 8500C/C+ Unit to Access Balancer/Analyzer Assembly
Table 5-14. Tools for Disassembly/Reassembly
#1 Phillips Head Screwdrive
1/4” Hex Driver
FILE: 85C_OPNB.DRW
NiCad Battery Pack
 Loading...