
H
haynesjoshuaSep 4, 2025
What to do if Honeywell Controller is in the READY mode?
- KkstoutSep 4, 2025
Press RUN/HOLD to set the Honeywell Controller to the RUN mode.
What to do if Honeywell Controller is in the READY mode?
Press RUN/HOLD to set the Honeywell Controller to the RUN mode.
What to do if Honeywell DCP301 Controller does not enter the setting entry state?
This cannot be displayed nor set on Honeywell Controller.
What to do if Key lock is enabled during AT on Honeywell DCP301 Controller?
Set variable parameter L O C setting to 0 to 2 on your Honeywell Controller.
Why AT cannot be executed by 3D and 5K outputs on Honeywell DCP301?
If this is a heat/cool model of Honeywell Controller, set variable parameter A T setting to other than 0.
What to do if Honeywell DCP301 is in the END mode?
Reset the Honeywell Controller to READY mode.
What to do if the currently selected program in READY mode has not been set up on Honeywell DCP301 Controller?
Select an already set up program on your Honeywell Controller.
What to do if Key lock is enabled on Honeywell DCP301?
Set variable parameter L O C setting to 0 to 2 on your Honeywell Controller.
What to do if Honeywell DCP301 Controller is in the constant-value operation mode?
Set constant-value operation data M .O D E setting to 0 on your Honeywell Controller.
What to do if program selection by external switch input is not 0 on Honeywell DCP301?
Set all external switch inputs RSW8 to 12 OFF on your Honeywell Controller.
What to do if there is MFB disconnection on Honeywell Controller?
If the MFB (Y, T, G) line(s) is disconnected, you should check the MFB wiring on your Honeywell Controller.
Details the one-year manufacturer's warranty for the Honeywell device.
Provides contact information and troubleshooting advice for technical assistance.
Explains safety precautions and the meaning of various warning and caution icons.
Instructions for checking and handling the product after removing it from its package.
Describes how the manual is structured into chapters for user guidance.
Explains the symbols, notes, and conventions used throughout the manual.
Details the DCP301's capabilities, including high accuracy, wide control output types, PLC compatibility, and easy operation.
Illustrates the controller's basic function blocks, inputs, outputs, and operational parameters.
Explains the structure of data, comprising parameters for setting functions and programs for operation.
Describes system configuration, particularly for models supporting RS-485 communications via a network.
Provides a guide for selecting model numbers based on output, function, power, options, and additions.
Details the controller's main components: body, console, case, standard terminal base, and add-on terminal base.
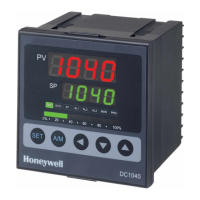
Describes the console, including basic display state, display elements, and indicator LEDs.
Explains the various keys on the console and their functions for operating the controller.
Details key combinations for performing specific functions like reset, advance, fast operation, and program setup.
Lists available input types, range numbers, and their corresponding temperature ranges in °C and °F.
Provides detailed external dimensions and mounting bracket information in millimeters.
Specifies panel cutout dimensions for single and multiple unit mounting, including recommendations.
Covers mounting locations, noise countermeasures, dust-proof covers, and essential warnings.
Details how to securely mount the controller using brackets, including securing steps and angle considerations.
Outlines essential safety warnings and precautions to follow before and during wiring.
Explains the use and types of compensating leads required for thermocouple inputs and other I/O.
Describes the type of crimped terminals and recommended tightening torque for M3.5 screws.
Shows the layout of terminals on the standard and add-on bases with recommended lead draw-out directions.
Details how to properly connect the ground and power supply, including anti-noise measures.
Provides detailed wiring layouts for both standard and add-on terminal bases.
Explains how to connect analog inputs, including thermocouple, RTD, DC voltage, and DC current.
Details wiring for various control output types like relay, current, and position-proportional outputs.
Explains how to connect optional auxiliary outputs for different model types.
Details wiring for event outputs EV1, EV2 (1a contact), and EV3 (1a1b).
Explains how to connect optional time event outputs T1 to T5.
Details how to wire external switch inputs, both standard and optional.
Illustrates the internal circuitry for connecting external switch inputs on terminal bases.
Explains how to connect for communications, specifically the RS-485 interface.
Shows isolation between inputs and outputs for different control output types.
Outlines the various data types supported by the DCP301, including parameters and program data.
Explains program patterns, segments, SP setting, and how segments are categorized (ramp, soak).
Details event configuration data, including PV type, controller status, and time events.
Explains how to set time events, including ON/OFF times and segment No. events.
Describes PID set selection methods, including segment designation and auto-switching.
Explains the G.Soak function for ensuring segment execution time with PV close to SP.
Details the PV start function, which initiates operation from a point where PV matches SP in the program pattern.
Explains the cycle function for repeating program operation a preset number of times.
Describes the pattern link function for connecting patterns together sequentially.
Details the available modes: Program operation, Constant-value operation, READY, RUN, HOLD, FAST, END, AUTO, MANUAL.
Explains how to transition between different operational modes like RUN, HOLD, RESET, ADV, FAST, AUTO, MANUAL.
Explains the roles of the DCP301 as either a controller or a programmer, depending on model and setup.
Describes the sequence of input processing, including range type, compensation, scaling, and filtering.
Details how control output, SP output, and auxiliary output are processed based on model type.
Guides the user on powering on the DCP301 and the startup sequence of operations.
Explains how to switch between different display states on the controller's console using the DISP key.
Details the various display modes available when the controller is operating in program mode, shown via DISP key.
Details the various display modes available when the controller is operating in constant-value mode.
Explains how to select program numbers for operation using console keys or external switch inputs.
Details the functions of external switch inputs (RSW1-RSW12) and their assignment types.
Specifies the read timing for external switch inputs and program selection operations.
Explains manual operation of outputs/SP and the process of auto-tuning (AT) for PID parameter optimization.
Guides on entering parameter setup, selecting setting groups (major items), and individual items (minor items).
Explains how to use the PARA key for registering and calling up frequently used parameters.
A comprehensive list of all parameters, their codes, factory/user settings, and descriptions.
Provides detailed explanations for key parameters like L O C (key lock) and P R T C (program protect).
Details the settings for event type, standby, hysteresis, and ON delay time for events 1, 2, and 3.
Lists PID parameters for sets 1 through 8, including proportional band, reset time, and rate time.
Details setup data settings for control action, input units, range types, and limits.
Provides detailed explanations for setup data settings such as square root extraction and SP limits.
Explains settings for input linearization table approximation (A-axis and B-axis).
Details settings for constant-value operation mode, SP, events, and PID parameters.
Guides on entering program setup, selecting program numbers, and understanding display start items.
Illustrates the mode transitions within the program setup state using a diagram and descriptions.
Shows the programming map matrix, detailing setup items and segments for program creation.
Explains how to set up pattern items, including SP and time settings for No.1 and No.2 setups.
Details setting up events (PV type, time, controller status) for segments in the programming map.
Explains how to set up time events, including ON/OFF times and their display.
Describes how to set the PID set number for each segment in the programming map.
Explains how to set G.Soak width and G.Soak time-out items for segments.
Details how to set PV start items, enabling or disabling PV start for programs.
Explains how to set cycle items to repeat program operation a specified number of times.
Details how to set pattern link items to link one program to another.
Guides on how to delete entire programs from the controller.
Explains the process of inserting or deleting segments within a program.
Details the procedure for copying programs between the controller and other sources.
Explains how to perform a general reset to clear programs and return parameters to factory settings.
Explains self-diagnostics functions, alarm codes, and categories for identifying issues.
Addresses common problems related to key entry and mode changes, providing causes and remedies.
Discusses issues with motor adjustment, wiring, and alarm displays related to motor control.
Provides instructions and precautions for replacing the controller's internal lithium battery.
Lists detailed specifications for programs, inputs, outputs, conditions, standards, and installation.
Provides detailed drawings and dimensions of the controller and its external parts.
Lists standard accessories and optional parts available for the DCP301.
Advises on warming up the controller and ensuring stabilized test equipment before calibration.
Lists the necessary equipment and their required accuracy for performing calibration.
Provides a table summarizing calibration items for different controller models and options.
Details the procedures for entering calibration mode and selecting calibration items using keys.
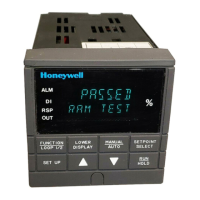
Explains how to perform a function test, including key tests and display checks.
Guides on performing PV zero and span adjustments using calibration devices and gain number selection.
Details the procedure for calibrating the cold junction sensor, including input and temperature data.
Explains how to calibrate the current outputs (CH1, CH2, CH3) by adjusting to specific mA values.
Provides diagrams showing how to connect calibration devices for various gain numbers and PV inputs.
| Type | Digital Controller |
|---|---|
| Operating Temperature | 0 to 50°C (32 to 122°F) |
| Enclosure Rating | IP65 (front panel) |
| Control Modes | PID, On/Off |
| Display | Dual 4-digit LED |
| Communication | RS-485 Modbus RTU |
| Power Supply | 100-240 VAC |